
How to Rip a Seam
Estimated reading time: 5 minutes
In quilting classes I am often asked how to rip a seam. Usually this comes up after I rip out a seam for someone, and someone in the class will be curious as to how I did it so fast without damaging the fabric. To be honest, when I first started quilting, I dreaded having to rip out a seam, but I eventually accepted this truth: “As ye sew, sew shall ye rip!”
When I tell classes that, I usually hear a few groans. My friend Emma states it more elegantly. She says, “Un-sewing is just part of the process.”
So true.
I’ve come to embrace the seam ripper as a fact of life, and proudly proclaim to all to “let her rip!”
I have ripped out many more seams than I care to admit. But I’d rather rip out a seam than than have a whole row of blocks sewn on backwards! Over time, I’ve learned to embrace my seam ripper as a part of life. And using it so much has made it easier. But I do think there is a bit of a trick that not all sewists see at first glance.
Know your seam ripper!
There are several versions out there, but most of them look like this:
These two pointy ends do the work. One point is very sharp, and I call that part the “awl.” The other end has a rounded ball, and I call that the “Ball.” So, there’s the awl and the ball. Got it? In between the awl and the ball is what I call the “Scoop.” Now the scoop is actually a razor/knife edge. How sharp my scoop is greatly determined how much I like my seam ripper.
I should also add that my favorite seam ripper is the Clover Seam Ripper, and you can find a link to it on my product recommendation page.
How to rip a seam (Method 1):
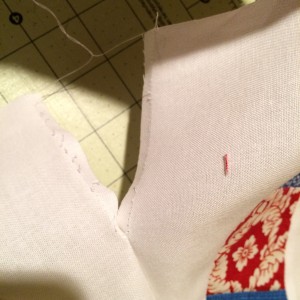
Take your awl and insert it under a stitch. Push until the scoop hits the thread and cuts it.
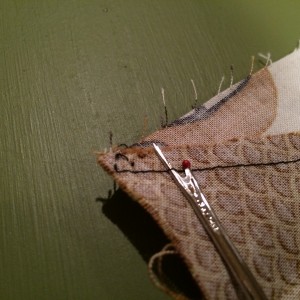
Skip a few stitches and repeat. Keep doing this all the way down one side of the seam. When you are finished, turn it over and using the awl again, slide it under a stitch, but don’t cut it. This time, gently lift the thread, then pull. It should come off all in one piece. Your two pieces of fabric will now come apart without stretching or tearing the fabric!
How to rip a seam (Method 2):
This method is usually pretty quick and works well on durable fabrics such as denim or heavy knits. I would not use it on delicate or thin fabrics. It’s also not as safe or effective on curved seams.
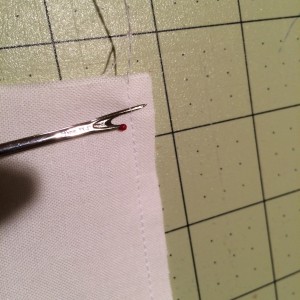
Gently pry open one end of the seam.
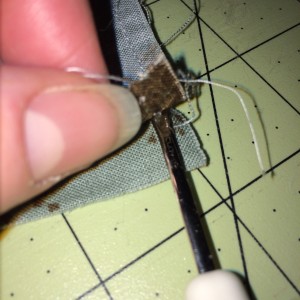
Place the seam ripper so that the ball is directly under the seam. Place the scoop so that it hits the threads. Push the ripper through so that the scoop cuts the threads.
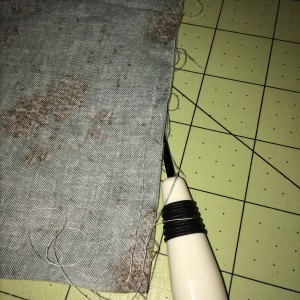
It’s helpful to hold the fabric really taut and steady.
This is actually the first way I remember learning how to rip seams when I was a kid, but I abandoned it when I discovered method 1, which I think is safer because you are much less likely to stretch or (GASP!) rip the fabric. And over time, with some practice, you will get much faster. And leave your friends amazed!
How (NOT) to rip a seam:
One method I’ve observed (and yes, even done a few times myself) is what I call the Brute Force Method. You open the seam a bit on one end, pick out a stitch, and then tug the fabric pieces apart so that a few more stitches come out. While it’s true that when you pull out one stitch, several on the sides will also loosen up, this is not a good technique. Doing it this way is going to stretch your pieces, and that can cause you some accuracy issues on down the road. While I’m sometimes tempted to do this when I get really frustrated, it’s a good idea to step away and not come back to it until I’m calm enough to use Method 1!
There you have it! I hope you enjoyed my little lesson on how to rip a seam (and how NOT to rip a seam!)
And let her rip if you have to…..but do it properly!

