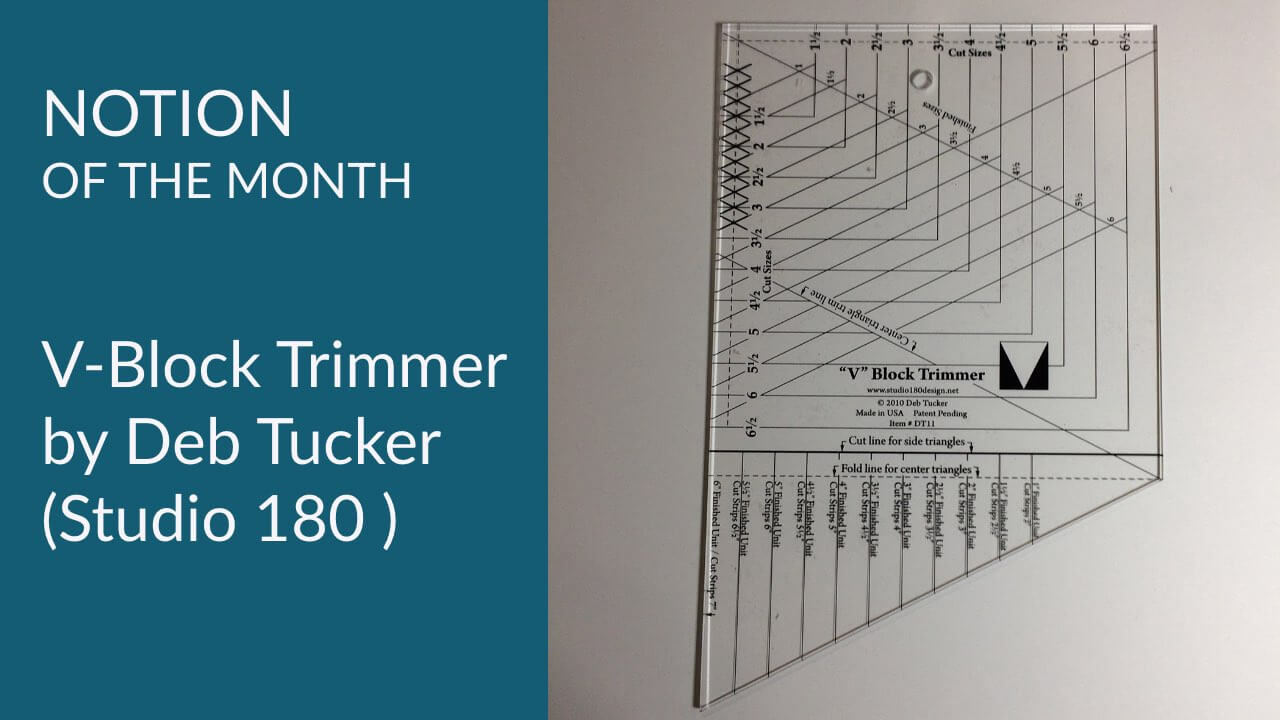
Notion of the Month: V-Block Trimmer by Studio 180
Estimated reading time: 5 minutes
Last week I shared my Tennessee Waltz Quilt, and I explained that the trickiest part of that quilt is getting the V-units right in the 54-40 or Fight Block. Last week I whipped up a few test blocks with one of my newest tools: the V-Block Trimmer designed by Deb Tucker of Studio 180. I thought I’d share a little of my experience with the trimmer to let you know what I think of this tool.
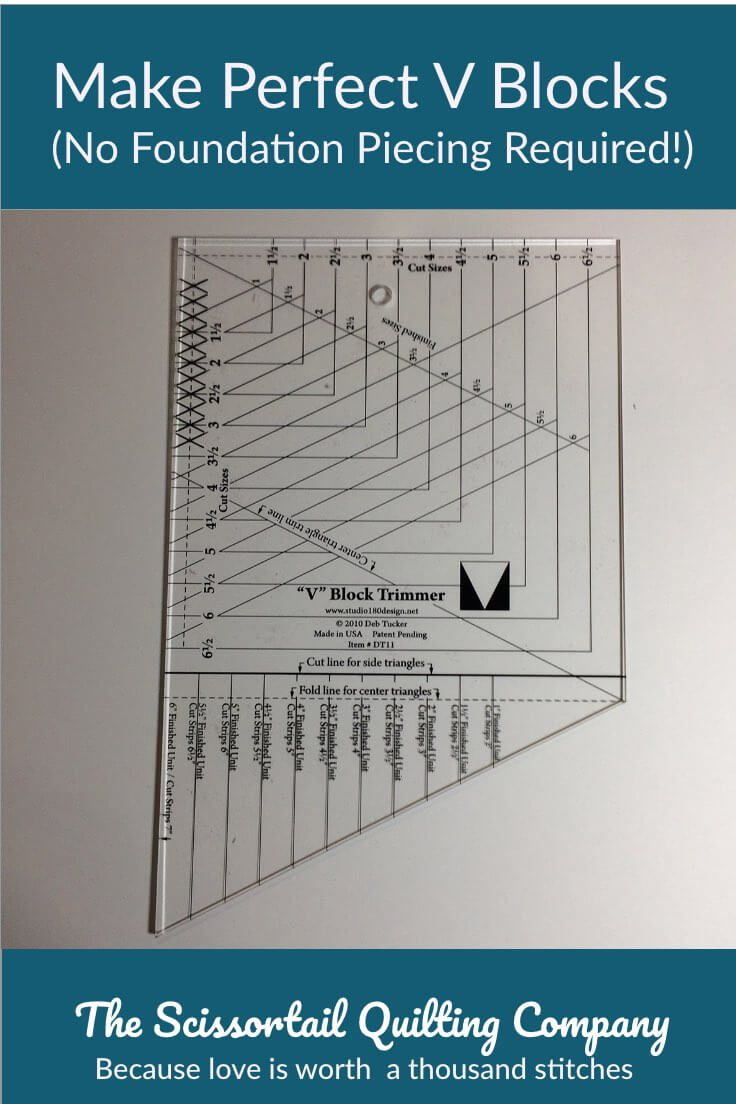
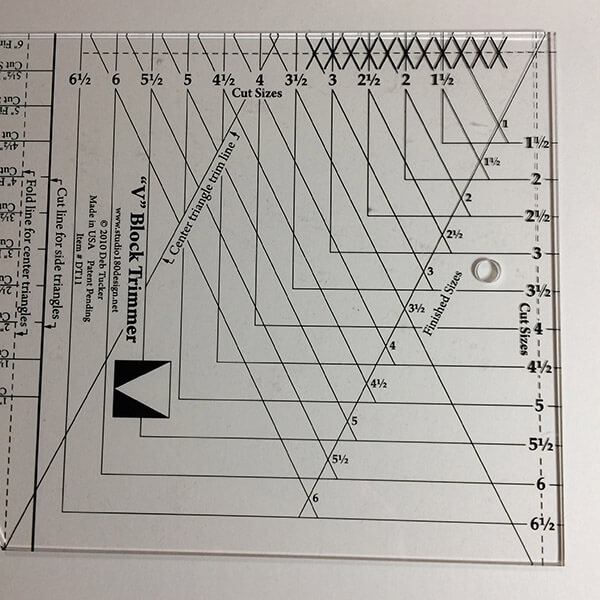
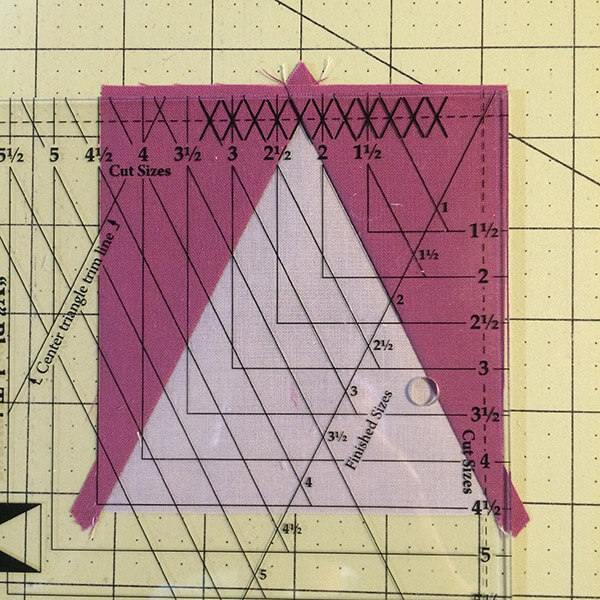
At the top of this post is a photo of my ruler, which I purchased at the Houston Quilt Show, but you can use the link below to get it quickly from Amazon. It measures about 7″ x 11″ and has a hanging hole drilled into it. (Very important to me, as I organize all my rulers on a board that hangs on the wall behind my cutting station.)
This post contains affiliate links, which means that if you click the link and choose to make a purchase, I will earn a commission. This commission comes at no additional cost to you. Please know that I only link to items which I personally use and feel that I can confidently endorse. Your support by using these links is greatly appreciated.
The V-Block is considered a basic unit in quilting, although it is not as common as Half Square Triangles and Quarter Square Triangles.

In addition to the 54-40 or Fight Quilt Block, it is also seen in the Maltese Star Quilt Block, the Periwinkle Quilt Block, the Pineapple Star Quilt Block, Cross and Stars Quilt Block and a block known as Optical Illusion. I’m sure there are others, too! Most quilters resort to foundation piecing to get accurate results with a V-Block, but I found the V-Block Trimmer by Deb Tucker to be very quick and effective.
The ruler is two rulers combined into one. Half of the ruler is a Half Rectangle Ruler.
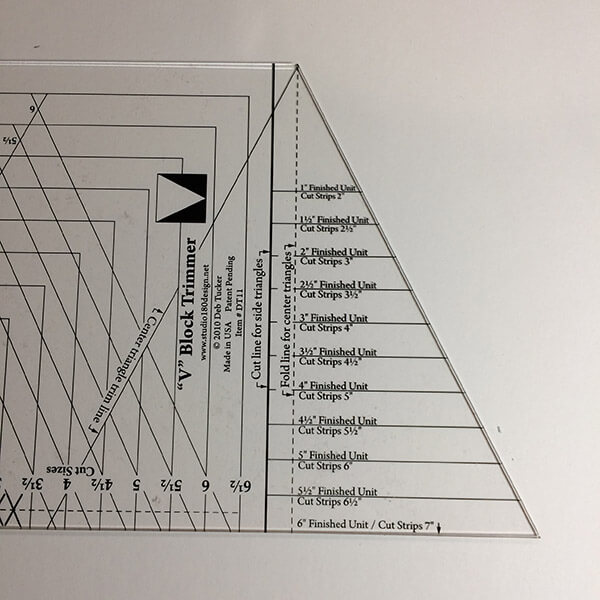
If you draw an imaginary line down the middle of a V-Block, you’ll see that each half is actually a rectangle. This side of the ruler is used when rotary cutting the patchwork pieces to the correct size. The other half of the ruler is a trim tool. (I’ll show how it works later in the post.)
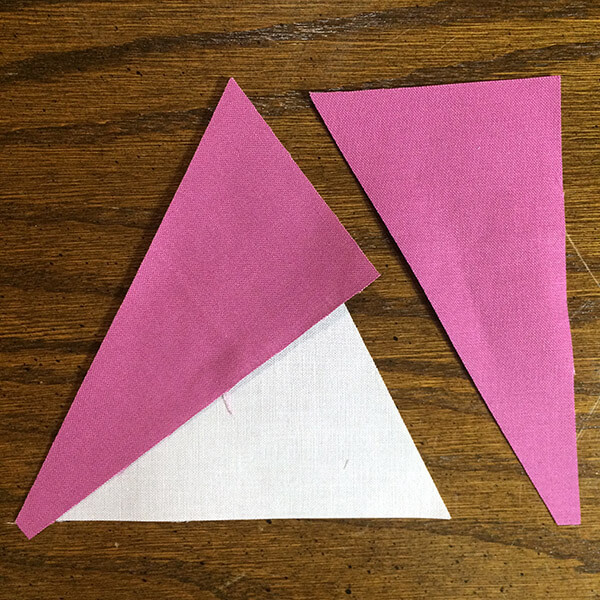
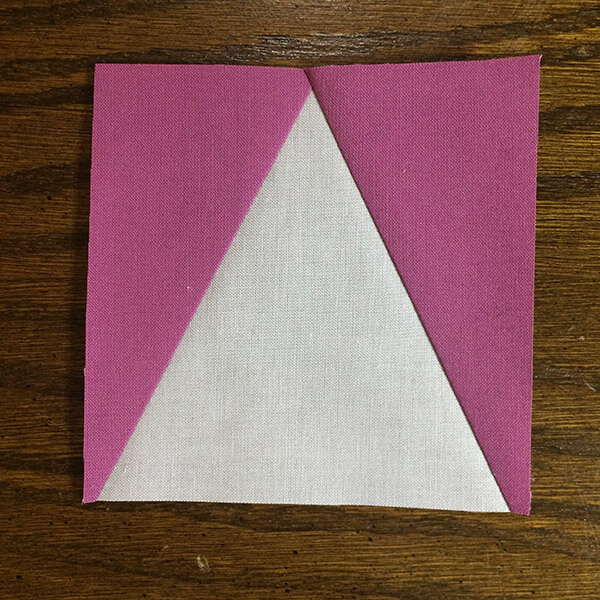
The tool comes with an easy to follow instruction booklet. Following the instructions, I quickly cut the center triangle and side triangle pieces.
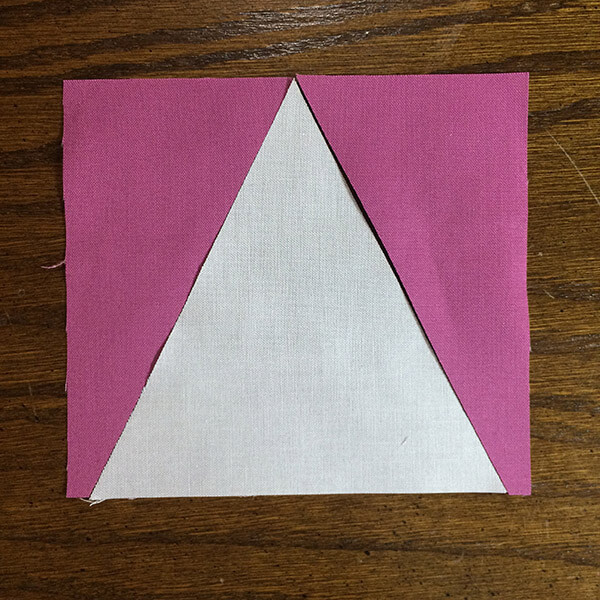
Here are some photos showing the steps to making the V-Block unit.

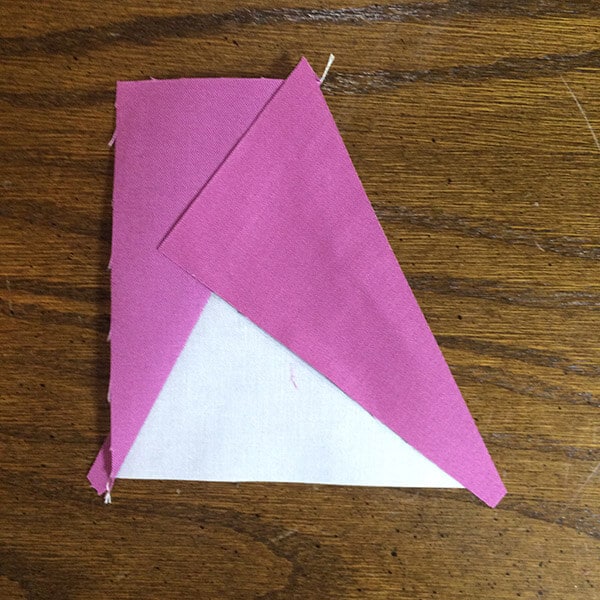
The secret sauce is that you cut the unit slightly larger, then use the “trim side” of the ruler to line up the points and trim the unit down to the correct unfinished size. This is very easily done because the V-Block Trimmer has a series of ‘X’ mark’s at the top that will line up with your block when it’s perfectly lined up to trim.
I made my first test block in under 5 minutes, and the first block turned out perfect.
I will be putting this ruler to very good use in the future and highly recommend it to anyone about to make the blocks I mentioned above. Again, you can purchase the ruler using the handy link below:
Studio 180 makes several tools that greatly improve accuracy. Next month, I will review some of Deb’s other tools, so please check back in with me in February. In the meantime, I’m curious to know if any of you have used this ruler or if you’ve made V-block units before using any other method? What worked best? What flopped?
Happy Quilting!
Maria