
A Quilt Binding Primer (Part 2): How to Make Quilt Binding
Estimated reading time: 9 minutes
Welcome Back! Today we continue our primer on quilt binding with a lesson on how to make quilt binding.
This post may contain affiliate links, which means that if you click the links and choose to make a purchase, I will earn a commission. This commission comes at no additional cost to you but does help me earn enough to support the cost of this website. Please know that I only link to items which I personally use and feel that I can confidently endorse. Your support by clicking on these links is greatly appreciated.
Last week’s post gave us a solid understanding of what quilt binding is and what it does. This week we look at how to do some binding calculations and how to make French (or Double) Fold binding.
If you are truly math phobic, you can always check out my Binding Calculator page, but I encourage you to read through the math instructions below so you have some understanding of what’s involved in the calculations.
Quilt Binding Calculation 1: How Much Binding Do We Make?
Calculating how much binding you need to make is pretty simple math. First, measure your quilt and plug the measurements into this equation:
2 x (length of quilt) + 2 x (width of quilt) + 15 inches*
*If you work in centimeters, then add 38 cm instead of the 15 inches.
Here is an example:
Pretend your quilt is 40 in x 50 in. When we substitute those numbers into our equation, we get:
Binding Length = 2 x (40) + 2 x (50) + 15 in
Binding Length = 195 in
So, now we know that we need 195 inches of binding. That wasn’t so bad, was it?
Quilt Binding Calculation 2: How Much Fabric Will It Take to Make Quilt Binding?
Our next calculation isn’t too difficult either, but it is a bit more involved because it depends on a few variables.
Variable 1 is your binding width.
As discussed in our last post, the typical binding strip is cut 2.5 in, but there are lots of reasons to tweak that depending on your quilt and your preferences. If you are just starting out, it’s best to start off using binding that is 2.5″ the first few times you bind a quilt. Each time, examine the results and evaluate whether you should tweak it an eighth or a quarter inch smaller or larger your next go around.
Variable 2 is how wide is the fabric.
Most quilting fabrics are sold in bolts that are 42-44″ wide or (WOF: Width of Fabric), but some are as much as 60″ wide. It’s important to note that not all of that width is USABLE width, so after you measure it be sure to subtract any unusable portions such as the selvages. If you aren’t sure, 40″ is usually a good safe number to use in the calculation, as long as you are using new fabric just cut off the bolt.
Here is the fabric calculation in two easy steps.
Step 1: divide the amount of binding you need to make by the usable width of fabric. If you have any remainder at all, you will round up. The result is how many strips you need to cut.
Binding amount/WOF, then round up = number of strips to cut
Step 2: Multiply the number of strips you calculated in step 1 by the width you have decided to cut your strips to determine the amount of fabric you need.
# of strips (from step 1) x cutting width of binding
= amount of fabric needed
An example:
Using the 40 x 50 quilt we used earlier, we know that we need 195 inches of binding, so let’s plug that in and see what we get.
Step 1: 195 divided by 40 (our WOF) equals 4 with a remainder of 35. We round that up, which means we need to cut 5 strips.
Step 2: 5 strips multiplied by a 2.5″ strip width = 12.5″ of fabric.
That’s a tad over 1/3 yard, but I like to add 5″ to this. My reasoning is that just in case I make a cutting mistake, I have enough to make two extra cuts. There is a time to cut corners and save money but this isn’t one of them. Make sure you will have enough. Any leftovers can go in your scrap bin.
One more decision before we cut the strips to make quilt binding
Are you beginning to see how much thought is needed to make quilt binding? It would be nice if there was just a “Cookie Cutter” technique, but you are making a piece of art and that can’t be rushed! There is one last thing to think about: how to cut your strips.
Your strips can be cut from the fabric in three different ways:
Those three ways are based on fabric grain. For an in-depth discussion of fabric grain, read this post on Understanding Fabric Grain. Below are the three ways you can cut::
- Straight Grain – Strips Cut parallel to the selvadge (See figure below.)Strips cut on straight grain have almost no stretch? This is your best choice if your border or edges are pieced and have bias edges
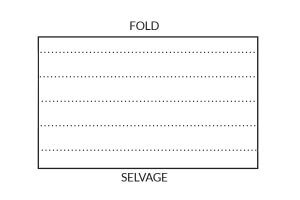
Image showing how to make straight grain cuts on fabric - Cross Grain – strips are cut width of fabric, perpendicular to selvedge (See figure below.)These are the most popular way because they are easy to calculate, easy to cut! and they are the most economical way to use the fabric.
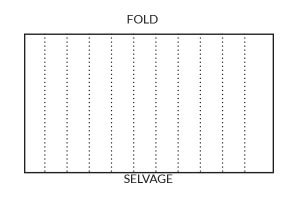
Image showing how to make cross grain cuts on fabric - Bias Grain – strips cut on the diagonal of the grain. Stronger than Straight Grain Binding; more durable, edges less likely to fray. Tends to lie flat and smooth in any situation. Works well on any quilt but because of it’s stretchiness it’s a necessity on quilts with scallops or rounded corners.
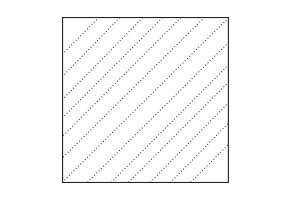
Image showing how to make bias grain cuts on fabric
I’ve made you a graphic you can Download now to help you decide which type of strip to cut.
Cut your Strips
Now that you know how many strips you need, how wide you are going to cut them, and you know what type of strips you are going to cut, carefully cut them from your fabric. Now we are ready to go to the machine and sew them together.
Instructions for How to Make Quilt Binding
So, you’ve done all your calculations, you’ve cut your strips, and now you are ready to sew those strips together and make French Fold Binding. Here is how you do it:
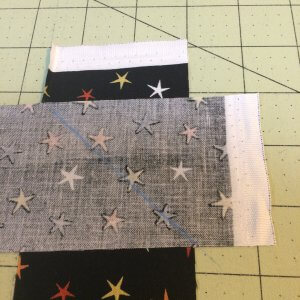
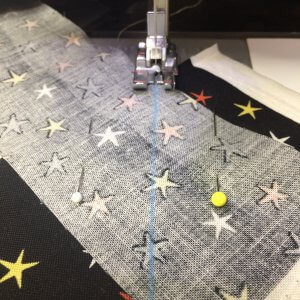
- Take two strips and arrange the ends perpendicular to each other with right sides together. Pin together. Mark a line from along the diagonal where the two strips cross overt as shown in the image below. (blue line…sorry if that’s hard to see!)
- Take the strips to your sewing machine and sew on the drawn line.
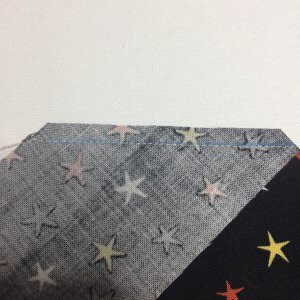
- Repeat steps 1 and 2 for all the strips you have cut, sewing them together, end to end.
- Trim the seam allowances to 1/4″.
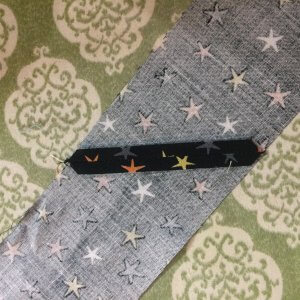
- Take your joined strips to your ironing board and press all the seams open. This is important to do, as it minimizes the bulk in your binding.
If you like, you can fold the strip in half lengthwise with wrong sides together, and press. I used to always do this, but lately I’ve been experimenting with how it works when I skip this step, and I simply fold it in half as I’m attaching it to the quilt. This has actually been working out well for me.
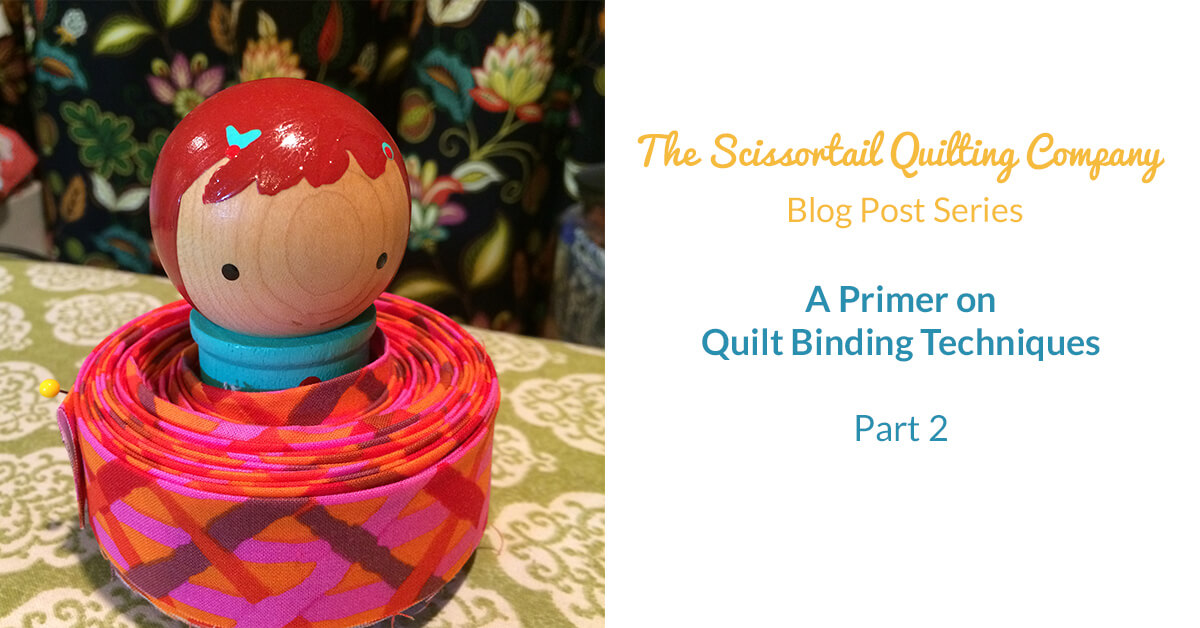
BUT, if you want to pre-fold your binding, it’s helpful to coil it into a roll and secure it with a pin until ready to use. Recently, I found this adorable Binding Baby who keeps my binding in a neat roll until I’m ready to put it on the quilt.
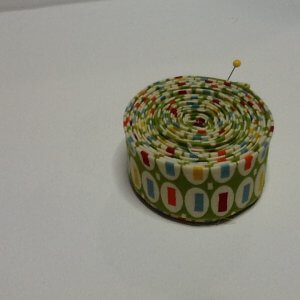

Isn’t she cute? The are made by Doohickey Designs and you can get one by clicking on the following binding baby below: (affiliate link)

Next week we will learn how to trim your quilt before binding it, so come back for Part 3 of this series on how to bind a quilt.
Until then,


