
Can this quilt be saved? (or How to Repair a damaged quilt
Estimated reading time: 10 minutes
Today I’m going to share how I repaired a damaged quilt. I made this quilt 4-5 years ago and then gave it to one of my dearest friends. To be honest, I did not believe that a quilt damaged to this extent could be repaired, but I found some inspiration from a post over on Darcy Quilts which I recommend you read. Some of the techniques I used were similar, but I modified them to work with damage on a larger scale, and (disclaimer) I was not going for “invisible repair” as much as I was going for “durable repair.” I’m pretty pleased with the results but would do a few things differently next time.
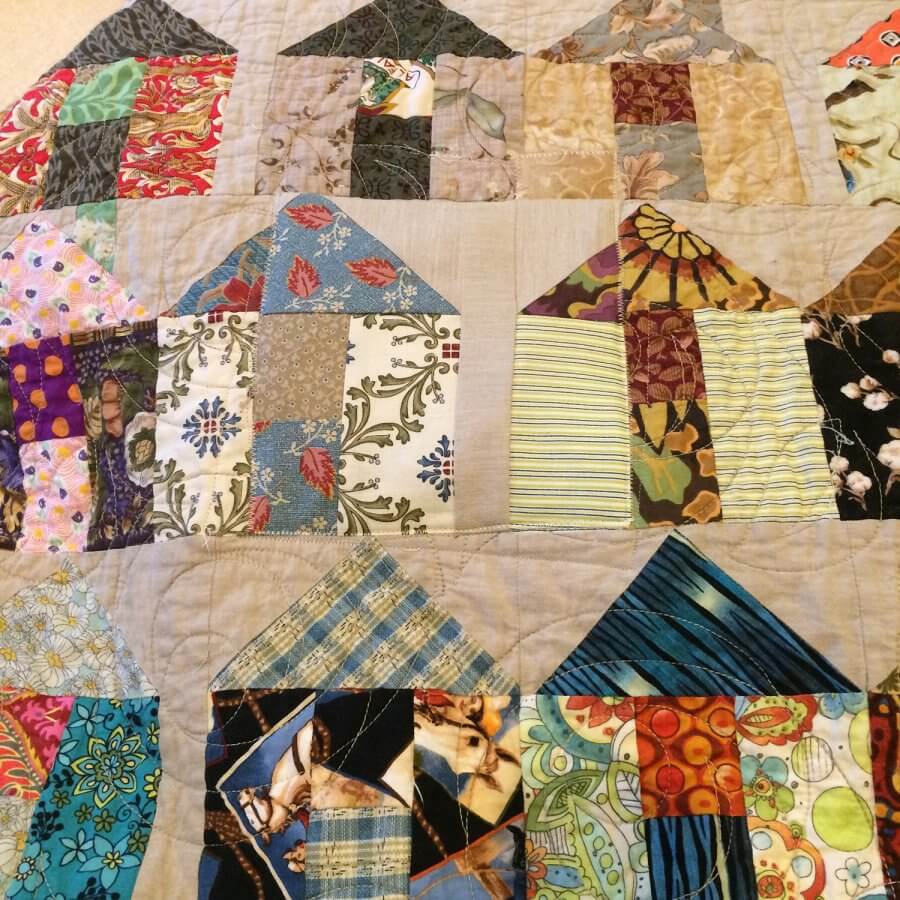
If you’ve followed my blog for very long or peeked at my gallery, you might remember this quilt:
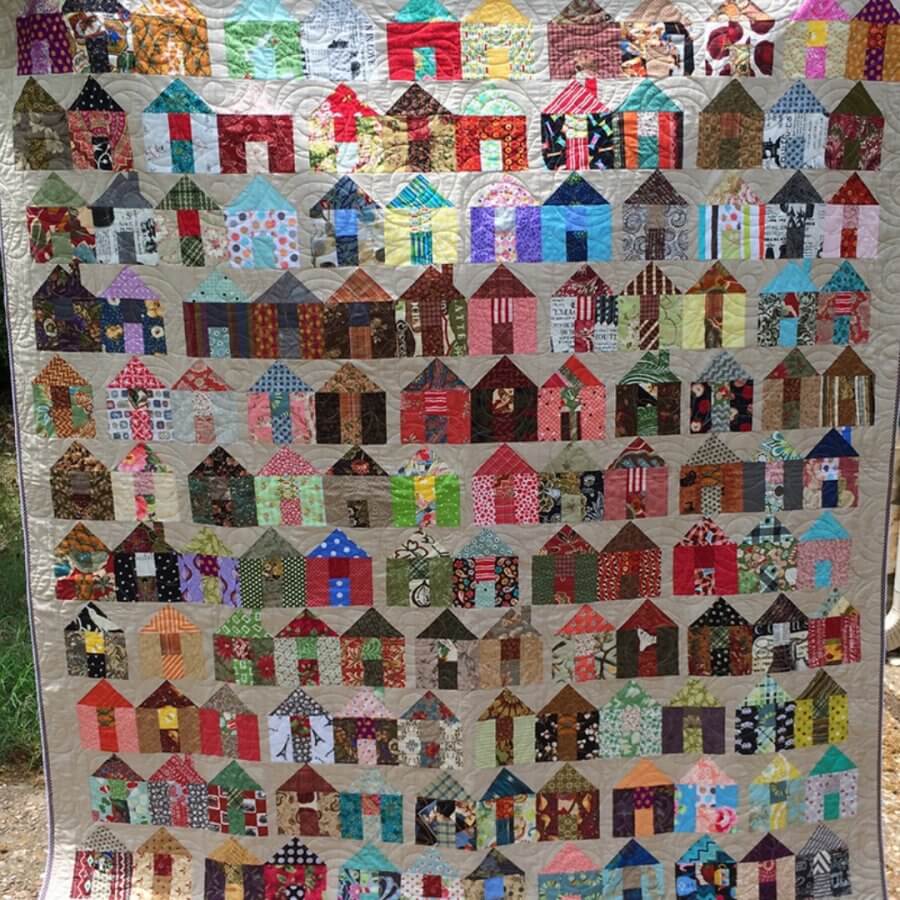
This has to be my all time favorite quilt, and yes, it was a hard quilt to part with. I blogged about the making of this quilt here if you want to read more about the pattern.
There are several reasons I love this quilt:
- It’s scrappy,
- The pattern design, Carrie Nelson’s “VILLAGE,” is just brilliant, easy, and fun to do, AND
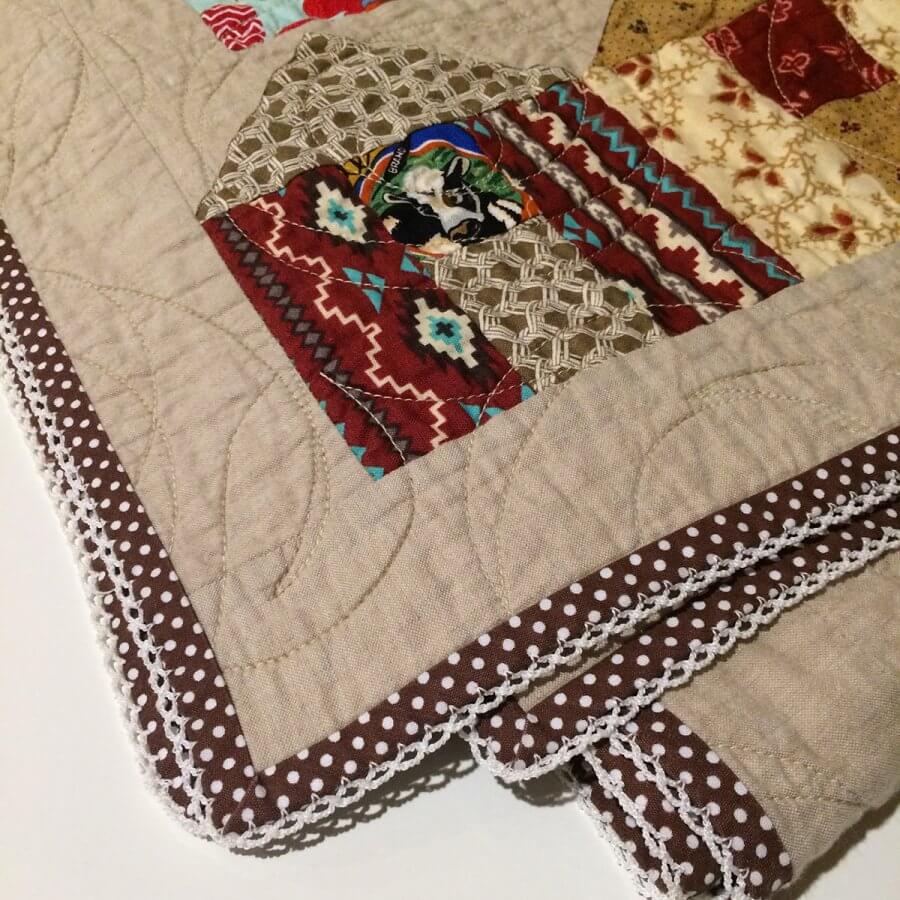
- I bound it with this special crochet-edge binding on it, which is a bit pricey, but I just adore the effect.
I was especially happy to see how well the crochet edge binding had held up to laundering.
While repairing this quilt, I realized (again) that I love it so much that I wanted to make another one, so I’ve already pulled a bunch of 5″ square scraps and plan to get going on it this week!

Before I get into the repair, I think I should give you some back story so you’ll understand just what this quilt and this repair represent to me.
A few years ago one of my dearest friends, Sandi, moved to Colorado and I knew I wanted to give her this quilt. Sandi is a knitter, but her mom was a quilter and I knew she would appreciate it. I mostly wanted her to have it because the houses in this quilt have a special meaning for me. I often tell my friends that when we get to Heaven, God is going to let me live next door to the people I love the most. Those people, my people, will be my village, and I wanted this quilt to remind Sandi of that. We might not always get to be next door to each other here, but someday I believe we will.
Her stay in Colorado was relatively short, but while they were there I would get random texts telling me she was wrapped up in the quilt and thinking of me. Of course, that made me happy to hear, but I was happiest the day I found out they were moving back to Tulsa.
You see, Sandi is a once-in-a-lifetime type of friend. I believe that if you go through life and you have one truly great friend you are extremely blessed. It is really hard to go through this cold dark world and find a TRUE friend. And when we do, we need to do all we can to hold on to them.
Sandi and I met in 1996 while standing in a long ladies restroom line and we clicked instantly. Over the years, we found that we could confide our most personal thoughts in each other and we were shaped by each other’s insight and spirituality. Our husbands would groan when we got on the phone because it would be hours before we would stop talking. We met at a time when we were both crazy busy (and probably a bit overwhelmed) with raising our boys. (She had four and I had two.) We shared recipes, scriptures, parenting and health tips, went on long walks, prayed together, taught bible classes together, threw parties together. Those were very sweet days in our relationship.
I often joke that I have a “type.” By that I mean, a certain personality that I click with. That person is usually brutally honest, open, and raw, often to the extent that would make most people shy away. But I find that type of person refreshing. When I think back over all the people who have become my closest friends, including my husband, they all have that trait. So, I pretty much always knew what Sandi thought and felt about things, even if those ideas differed widely from my own.
There’s one more thing to say before I get into the repair of the quilt and I hope it will help someone out there with their relationships, because as I stated earlier, the good ones are rare and precious. In 2005, before “cancel culture” was even a thing, I canceled Sandi. It turned out to be one of the biggest regrets of my entire life. Now, I wouldn’t go so far as to say that there isn’t a time and a place to pull away from people – bad companions do corrupt good morals – but to simply cut someone off because they think differently from you, or as in my case, they are going through something you’re not equipped to handle, is not a wise course of action. The details of our “breakup” are not important. What is important is that I realized after several years of missing her terribly that I had made the wrong call. My pride made it difficult for me to bridge the gulf, but my sweet husband who was listening to the little cries from my heart was the one who helped start the repair.
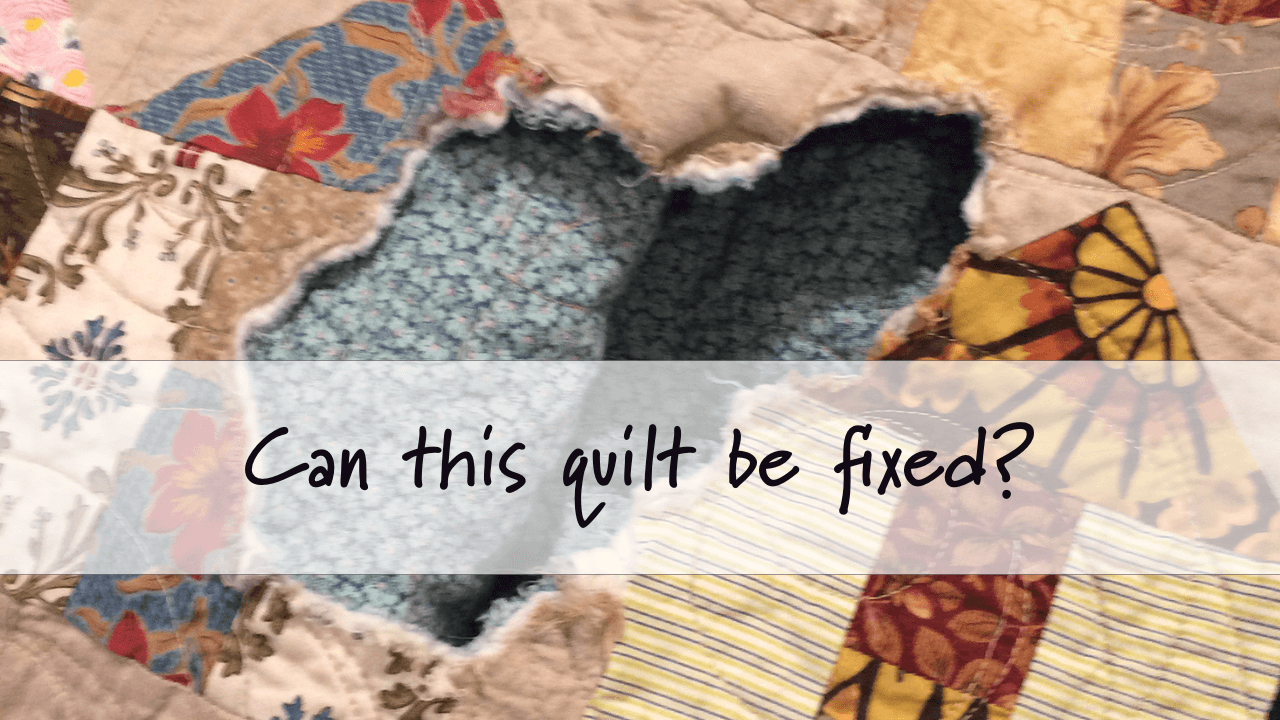
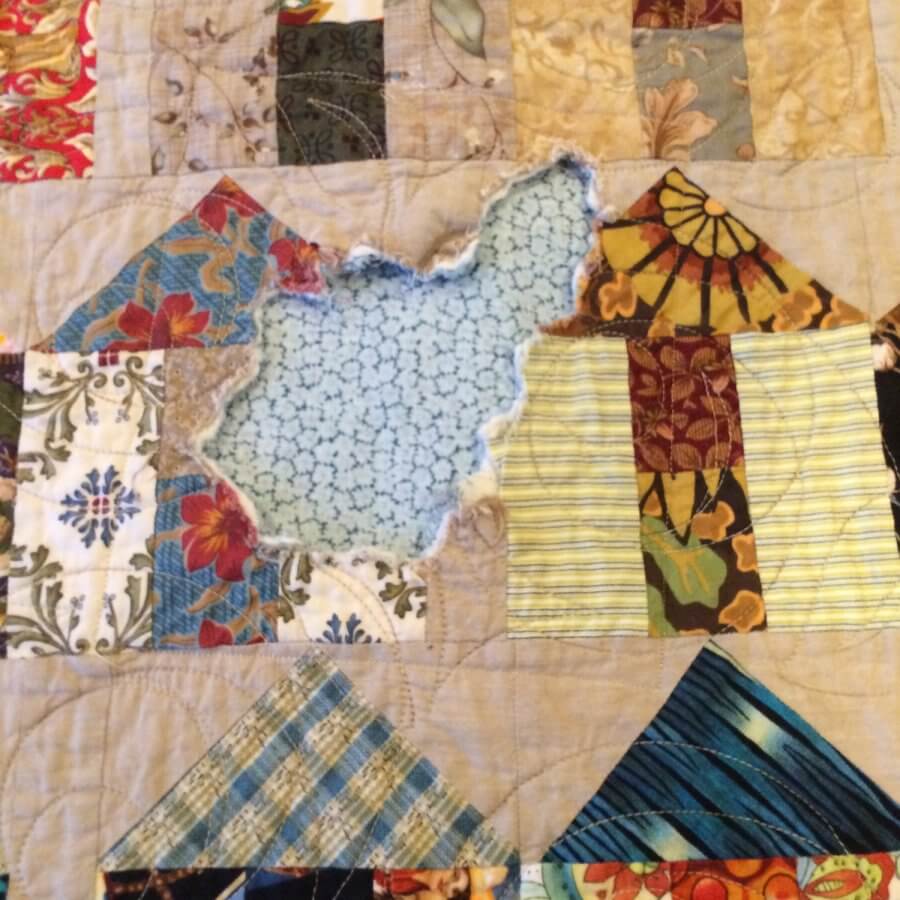
Which FINALLY brings me to this quilt. Sandi had been back in town several months when she sent me a text with a picture of the now damaged quilt.

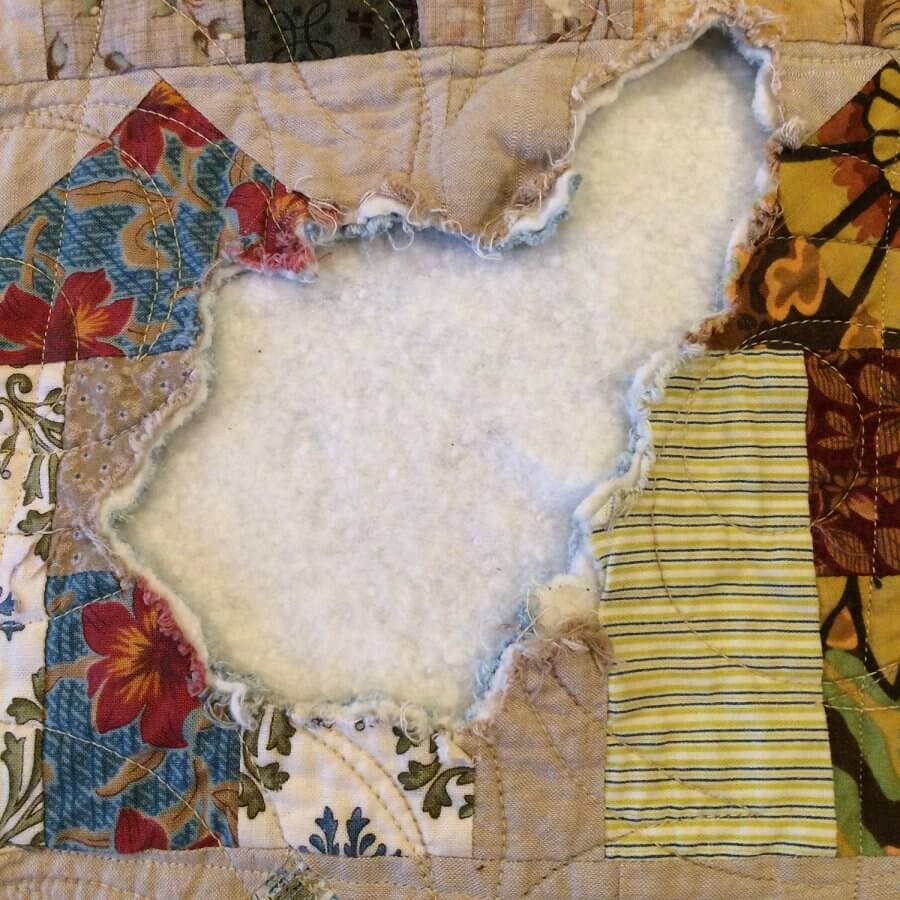
She had returned home from work to find that her dog, Coda, had munched a hole right in the middle of it. One of the things I’ve learned from Sandi is to be more honest about my feelings, so I will tell you that my first reaction was –
nausea.
Grief.
I felt like a child had died. After I calmed down a bit (I may or may not have had a few glasses of wine) I told her we could look at turning it into something else.
Recently, Sandi brought the quilt over to my house, and again my thinking was that we should repurpose it. But Sandi was insistent that she wanted it fixed. As a quilt. I was thinking, maybe a handbag, but she didn’t want it converted. She nixed the idea of a pillow or a table runner or framing a section of it. She wanted to use it, and could I please please fix it???
I stared at that hole in the quilt and then it hit me.
This quilt was just like us. There had been a hole but it had been repaired. Perhaps this quilt could be fixed, too. I knew I had to do my best to repair her quilt.
A little googling and I found Darcy’s post. I mulled her techniques around in my head and started coming up with a plan.
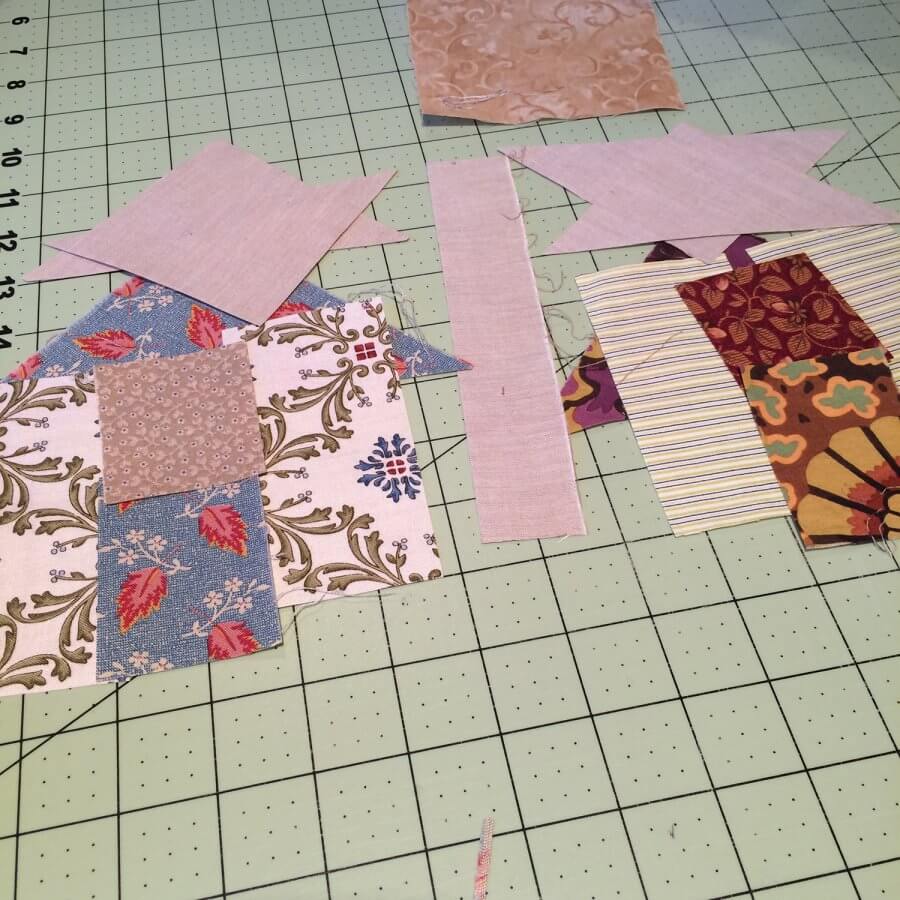
The first thing I had to do was find matching fabrics, and fortunately I’m a scrap quilter and keep just about every little scrap I have. I found replacements for all but one fabric, but was able to find a very close match for that one.
Since the quilt has been washed a few times, it was important to make sure these fabrics were pre-washed before I added them to the quilt, so I swished them around in hot water for about 15 minutes, then allowed them to dry. I threw them in the dryer for about 10 minutes for good measure, then starched and pressed them.
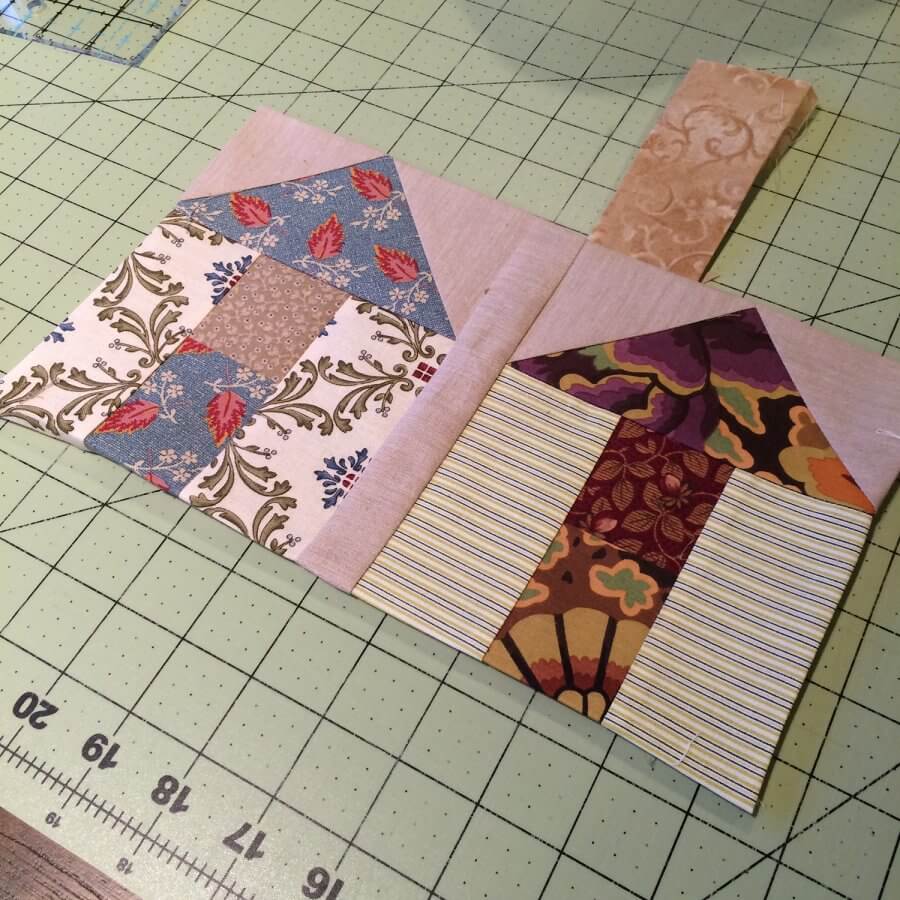
The damage was centered mostly between two quilt blocks. So, I remade those two blocks along with a piece to cover about a 1/2″ into the block above.
Next, I patched the hole from the backside.
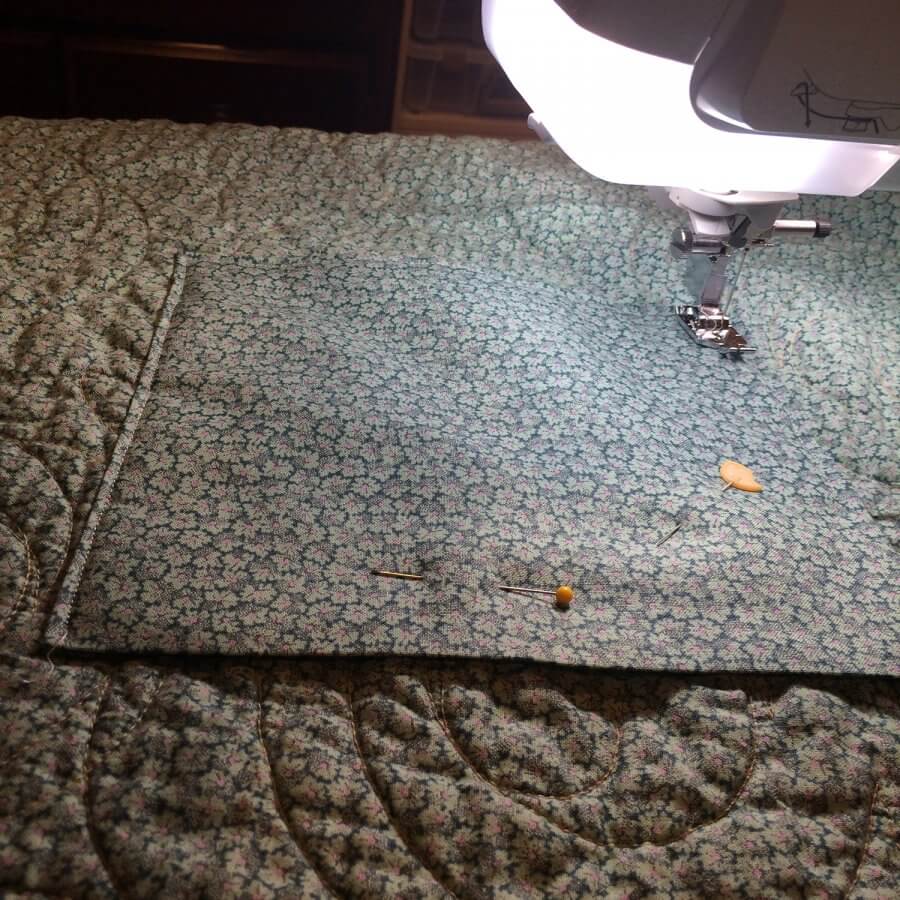
To accomplish this, I turned under the edges of a square that was slightly larger than the damaged area, then stitched it in place. Looking back, I wish I had used a zigzag stitch here. I would have probably had prettier results if I had hand-stitched this down but I was worried that the hand stitching might not be as durable. (more on this later)
Now that some backing was attached, I inserted a scrap piece of batting to fill the hole and smoothed it flat.
Next, I carefuly aligned my remade blocks over the hole and trimmed them down to cover just the damaged section. Next I lined up the seam line of my new block with the ditch of the old block (right sides together and began stitching this down on the top side.
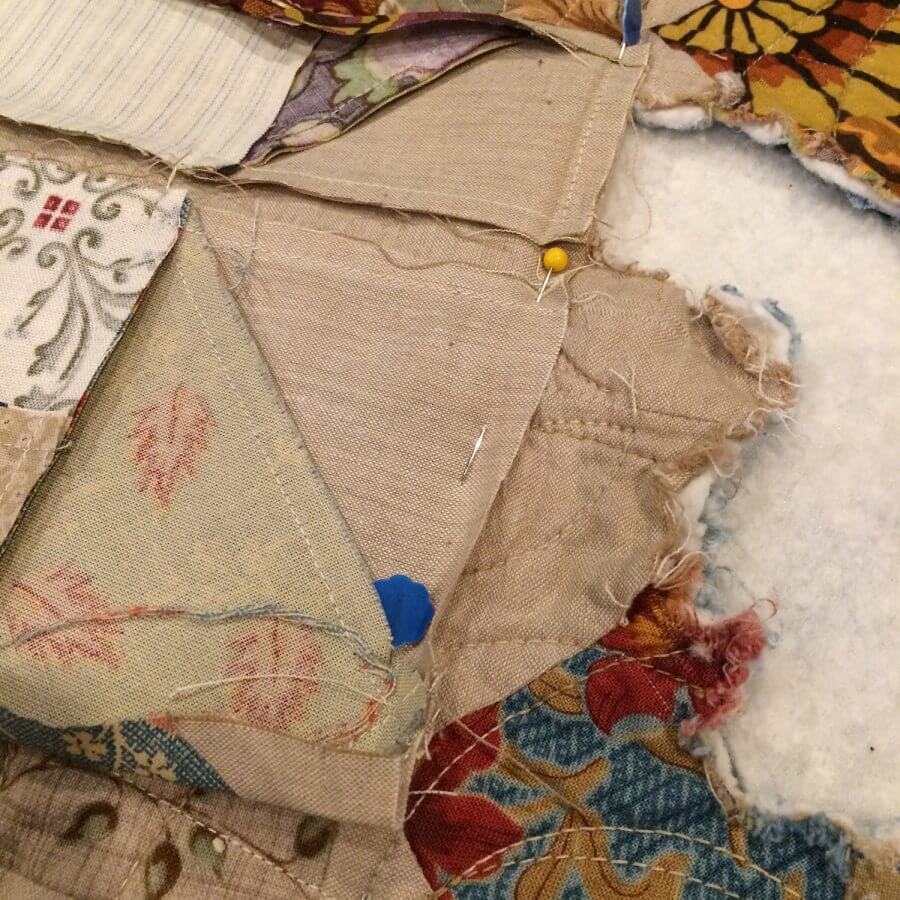
Once that was stitched in place, I folded it over the seam (right side up, now!) and “appliqued” the rest of the block in place.
It’s not exactly pretty, but it got the job done.
Next I traced the quilting design on a piece of tissue paper, then I aligned it over the damaged area of the quilt so I could free motion the design over the newly repaired section.
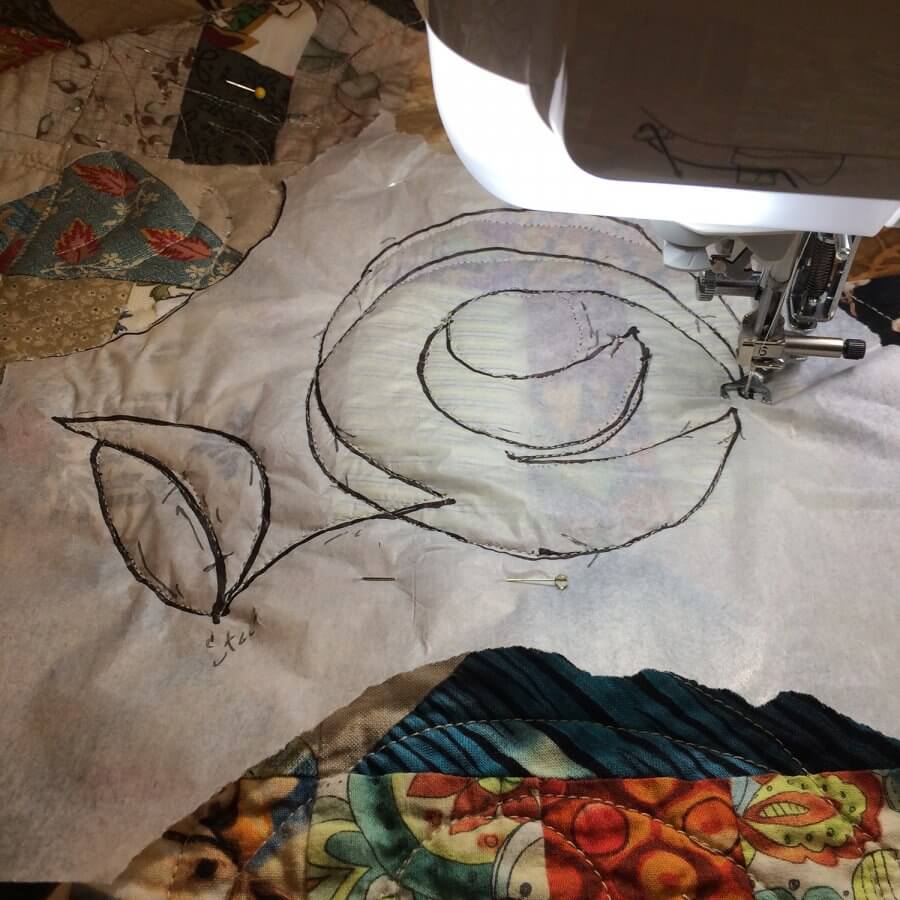
After I quilted it, I realized that I probably should have hand-stitched the front and back repairs, since the quilting stitches would be plenty durable to hold everything in place. But live and learn. I’ll know better next time, but I sure hope there never is a next time, because quilts, just like friends are very precious indeed!

