Sewing Room Organization Part 4: Storing Sewing Notions and Fabrics
Estimated reading time: 14 minutes
Welcome back to Part 4 of a series on Sewing Room Organization. The focus of this week’s post is how to best store sewing notions and fabric storage. But first, the legal stuff:
This post may contain affiliate links, which means that if you click the links and choose to make a purchase, I will earn a commission. This commission comes at no additional cost to you but does help me earn enough to support the cost of this website. Please know that I only link to items which I personally use and feel that I can confidently endorse. Your support by clicking on these links is greatly appreciated.
If you’ve been sewing for any length of time, you know that sewing stuff accumulates. A LOT of stuff accumulates, such as notions and leftover bits. Not to mention fabric. And that leaves most of us with lots of stuff to figure out how to contain.
As I’ve shared my “work zones” these past few weeks, you may have noticed that storage for some items (namely the things you use a bit more frequently) naturally flows into the work zones we’ve already looked at. I realize I am driving this point into the ground, but that’s because I am more efficient if I keep stuff where I will use it. But there are a lot of items that will not be used as frequently, and they need to be placed somewhere that makes sense for you. The exact storage solutions you choose will depend upon how much you need to store and how much storage space you have. So without any further delay, I’ll show you how I’m storing my sewing stuff.
Sewing Notion Storage Area #1: Thread Storage
Actually, we covered thread in Part 3 of this series of posts on Sewing Room Organization. You may recall that I store my thread near my machine in my “sewing work zone.” (Store it where you’ll use it!) Before we move on to how I store my other notions and my fabric, I thought I’d give you a quick update on my thread storage situation.
In that last post, I shared how I like to keep my thread in drawers, protected from sunlight and dust, and I like to store my bobbins matched up with my spools of thread. I prefer this handy little device called a Bobbin Buddy Clip (Image below is linked to Amazon.) to keep my bobbins and spools together.


However, I still had this one annoying issue: spools rolled around in the drawers. While I love these clips, you can’t use them with any system where the thread would sit on a dowel rod (Such as with the ArtBin Thread Boxes.) While I was writing last week’s post, a light bulb went off in my head. I walked into my sewing room to take a picture of my thread drawer. But first, I picked up a few of them and began to rearrange them a bit. I looked down at my hand and notice that one of the clip loops was hanging off my pinky finger, and realized that if I put something through the little hole in the clip, it would corral them.
I decided to test the waters. After I wrote that post, I put on my crafty hat, and created a nifty little device that is keeping my thread spools in line. And I added a little bit of cuteness to them, too.
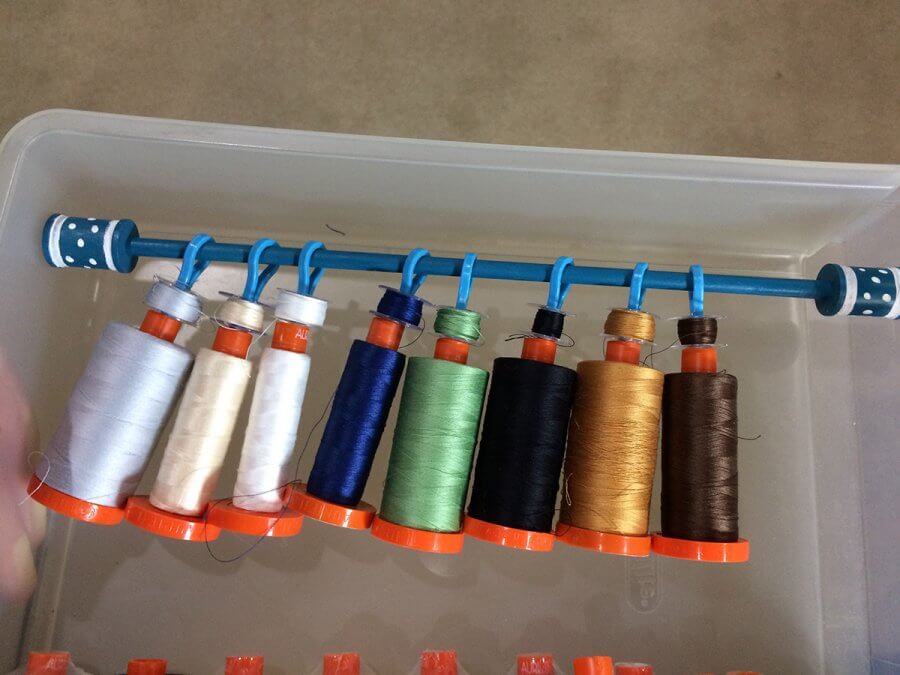
So far, I am LOVING my spool rails! I’ve been using them all week, and am very happy with the way my thread stays in place in the drawer. When I need a spool, it is easily removed by simply pulling it off of the clip. As soon as my big order of more buddy clips arrives, I plan to make a few more and get my thread super organized. I’ll keep you posted on how this is working out for me.
Sewing Room Storage Area #2: Notions and whatnots
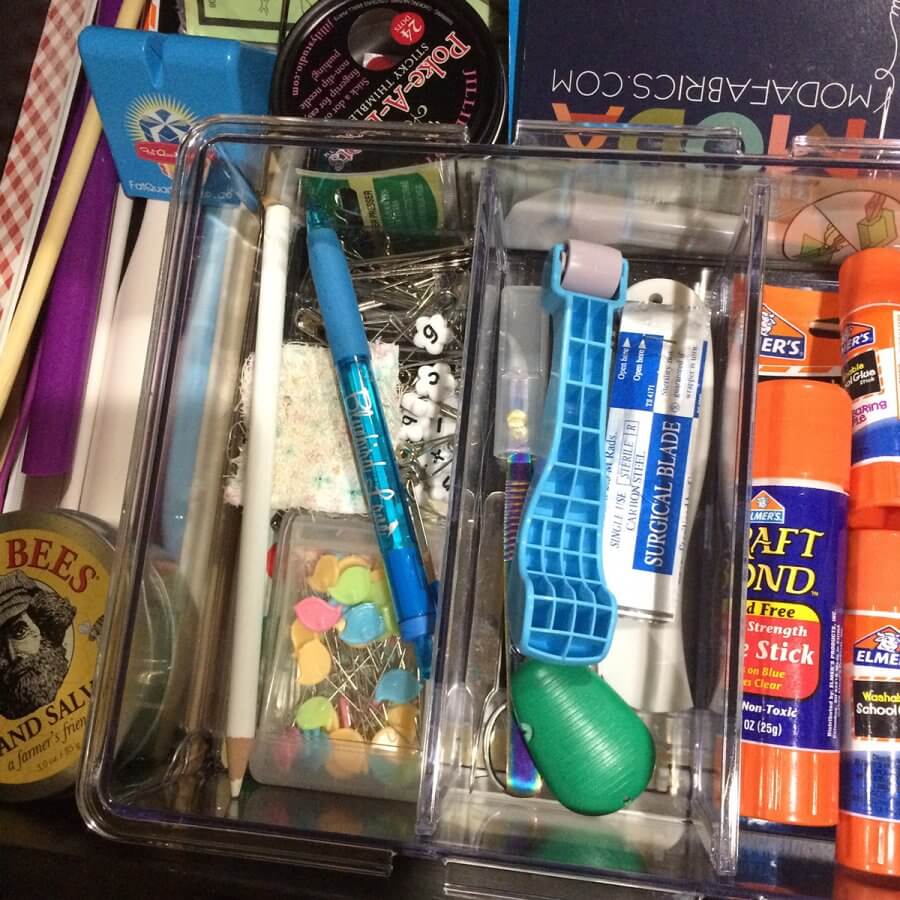
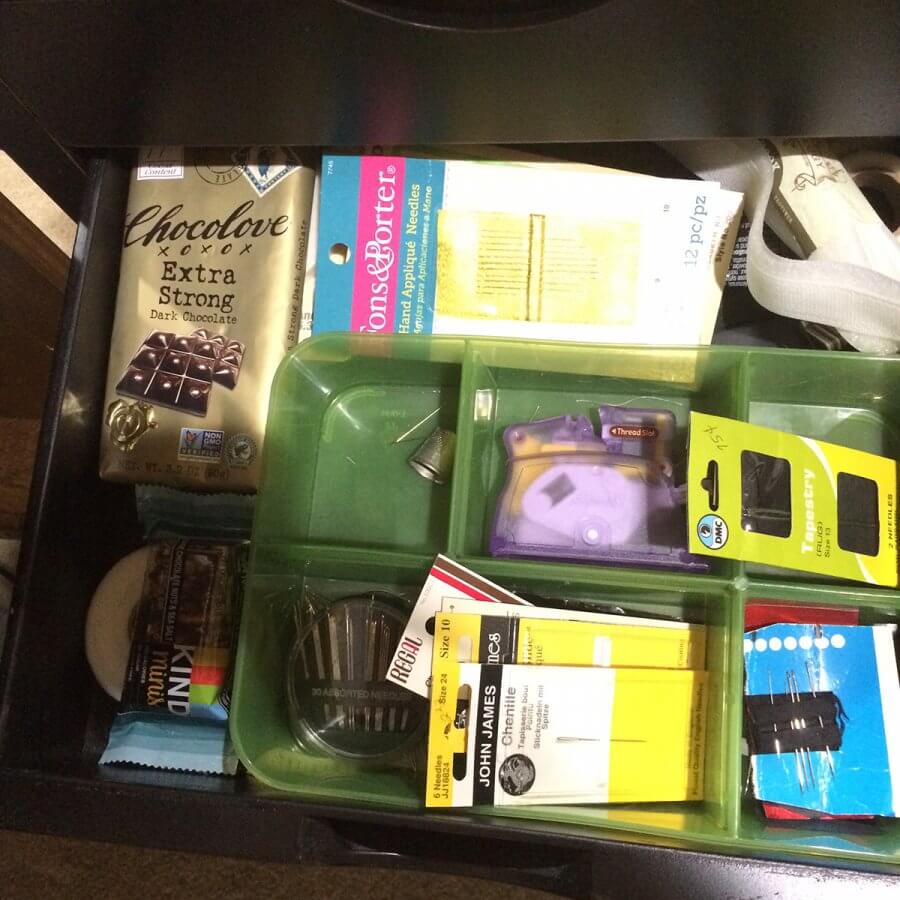
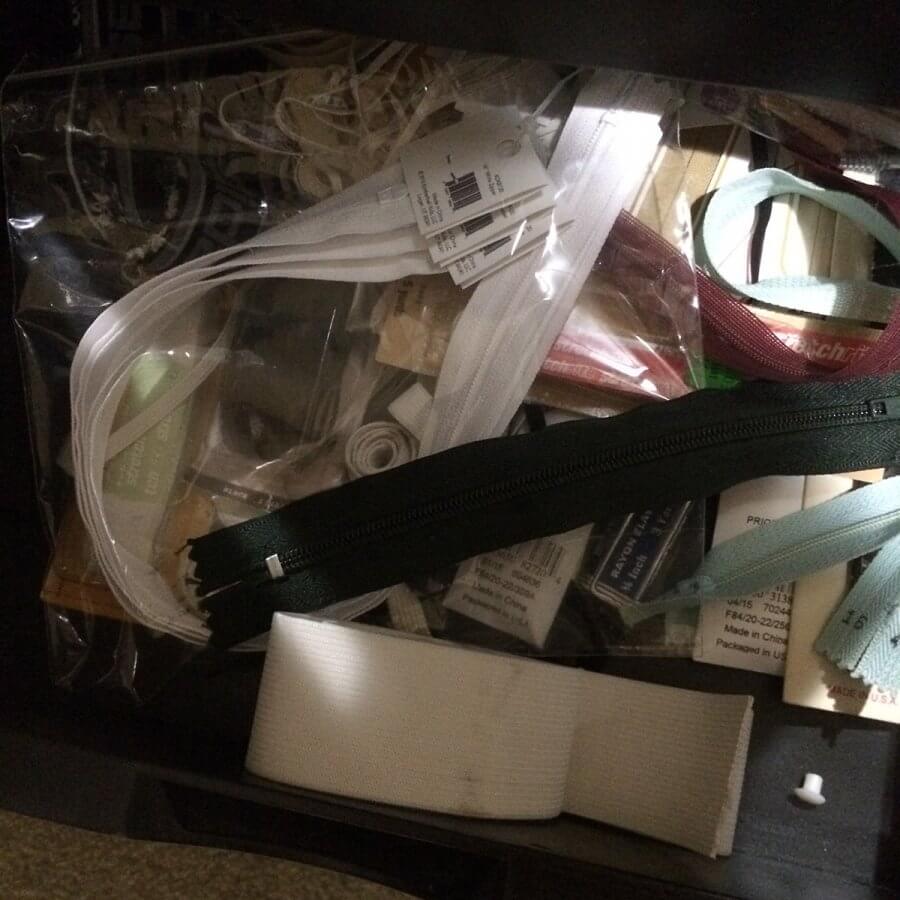
In addition to thread, there are a plethora of notions that I have accumulated over time. So what does one do with all those sewing tools, gauges, gadgets, buttons, snaps, velcro, buckles, elastic, rickrack, bias tape, zippers, and you name it? I would be completely lost without my handy dandy cart. You’ve seen this guy before – he does triple duty in my sewing room as a mini-pressing station, a mini-cutting station and as the center for my notions storage.
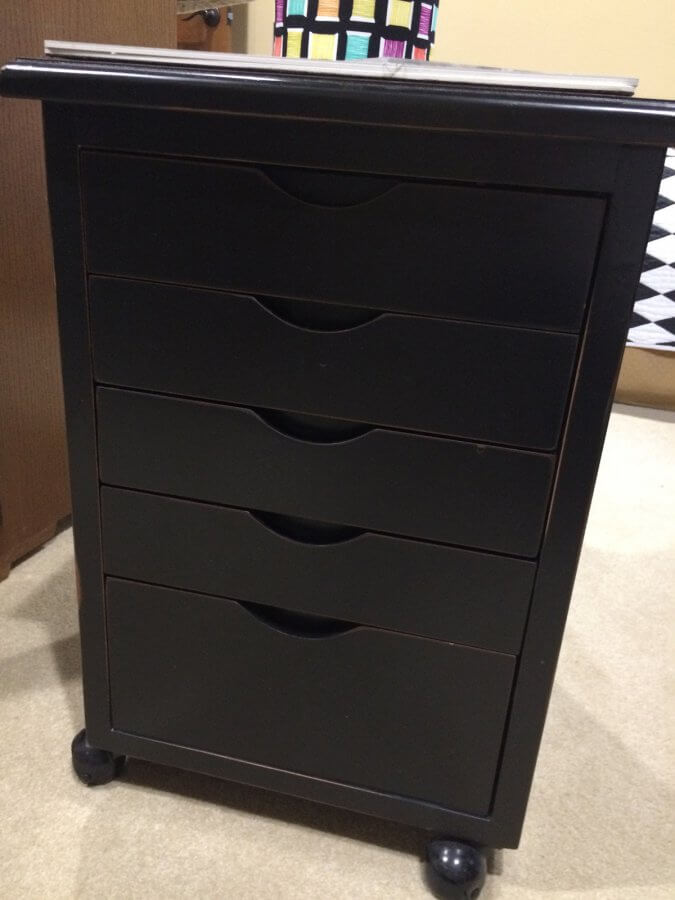
I purchased this guy from Hobby Lobby some years back, but I’ve seen similar ones at Homedecorators.com. Originally, I used it as a computer cart, but now it works in my sewing studio as my Notions Cart. It sits beside my sewing machine and I won’t say that it’s extremely organized, but it’s where all the little bits and bobs go. And believe it or not, I recently purged quite a bit of stuff out of here. Here are a few photos showing what remains:
I failed to take a picture of the 4th drawer, but it’s mostly snaps and fasteners.
The last drawer, which is the deepest, is stuffed full of leftover binding. I keep thinking that one day I will make a bias tape quilt using up these leftover bits. But who knows, maybe I’ll end up purging that drawer in the near future.
There are many types of storage carts on the market in several price ranges. Below are a few that I have used before that might work for you.
I’ve shown you the Ikea before, and I think it’s a real workhorse. It will set you back about $55.

And I’ve used these before, too. They are not as sturdy but they get the job done for about $35


Sewing Room Storage Area #3: Books, Fabric and Kits
In my second post in this series, I showed a floor plan of my sewing room. Along the wall with the window are four “cubby” storage units. Two of them are 2×3 units and two of them are 3×3 units. (You may recall from the end of that post that the 2×3 units were once used in my perfect pressing station, which is defunct for now, but will be resurrected as soon as I can lose the bed in this room.)
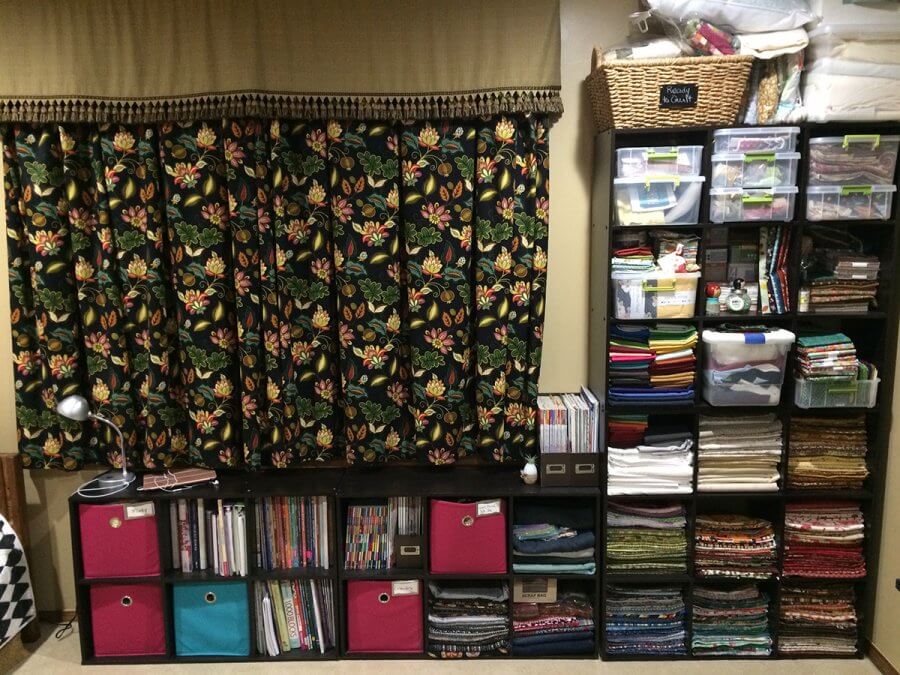
First, let’s focus on what is in the 2×3 units on the left, which contain mostly books and magazines. One of the fabric cubby baskets holds orphan blocks. Another holds embroidery supplies. Another holds crochet yarn and hooks. Another holds scraps of wool and silk which I use occasionally in applique or crafty projects.
On the right, I’ve stacked the two 3×3 units one on top of the other, and these contain my main stash. Now there are about a million ways you can organize your stash. By color, by designer, by size, etc. I use a combination of those methods. The top two rows contain mainly kits. Several of the upper cubbies house my favorite designer collections. (French General and Laundry Basket fabrics are always kept together) And one cubby holds my Japanese Taupes. Two cubbies contain solids, with the bulk of one of them mainly whites.
In the bottom 3×3 unit, fabrics are sorted by color because when I’m pulling from my stash, I’m usually looking for a certain hue.
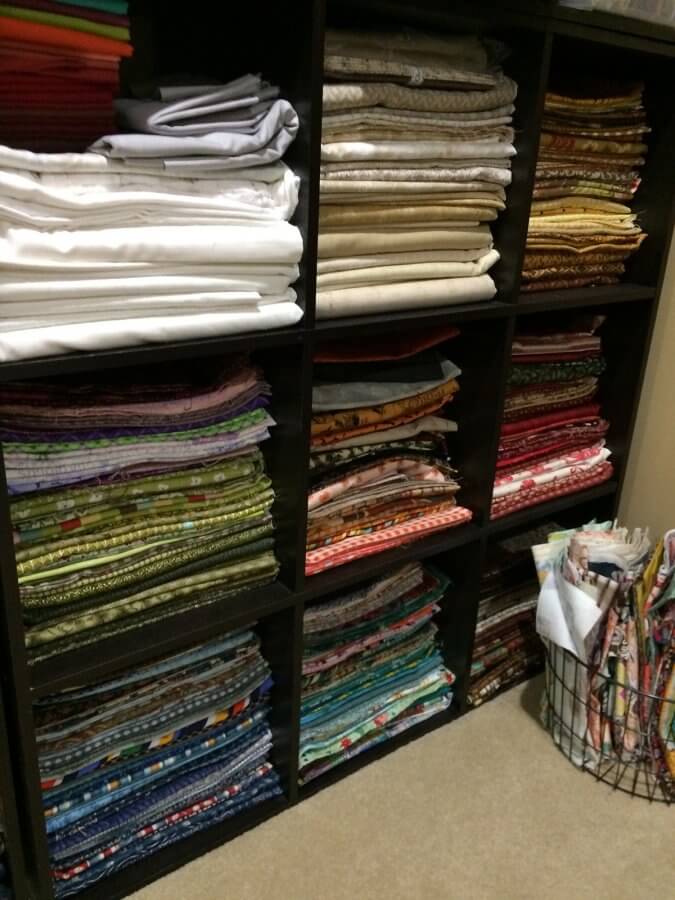
I should tell you that fabrics that go on this shelf are usually yardage or fat quarters. However, a few scraps go in here, too, and I’ll explain more about that in the next section on scrap organization.
These cubby shelves work pretty well for me. I’ve gotten into the habit that whenever I bring new fabric into my stash, I fold it to fit and then decide whether to store it by color or with a certain collection. The biggest drawback to my solution is that my fabric isn’t really protected from dust. It didn’t break the bank to buy them, and if I ever upgrade to some cabinets with doors, these could easily be put to work in closets.
One last thing to point out before we move on to scrap storage: On top of the units I store batting, leftover batting, and the basket holds quilt tops that are ready to quilt. (That area is kind of a mess right now, lol!) But I do keep a “Batting Reference Card” in my scrap batting box that helps me remember the various battings I’ve used in past projects and whether I liked or didn’t like them, how lofty they were, how they’ve held up over time, etc. You can download a copy of it here.
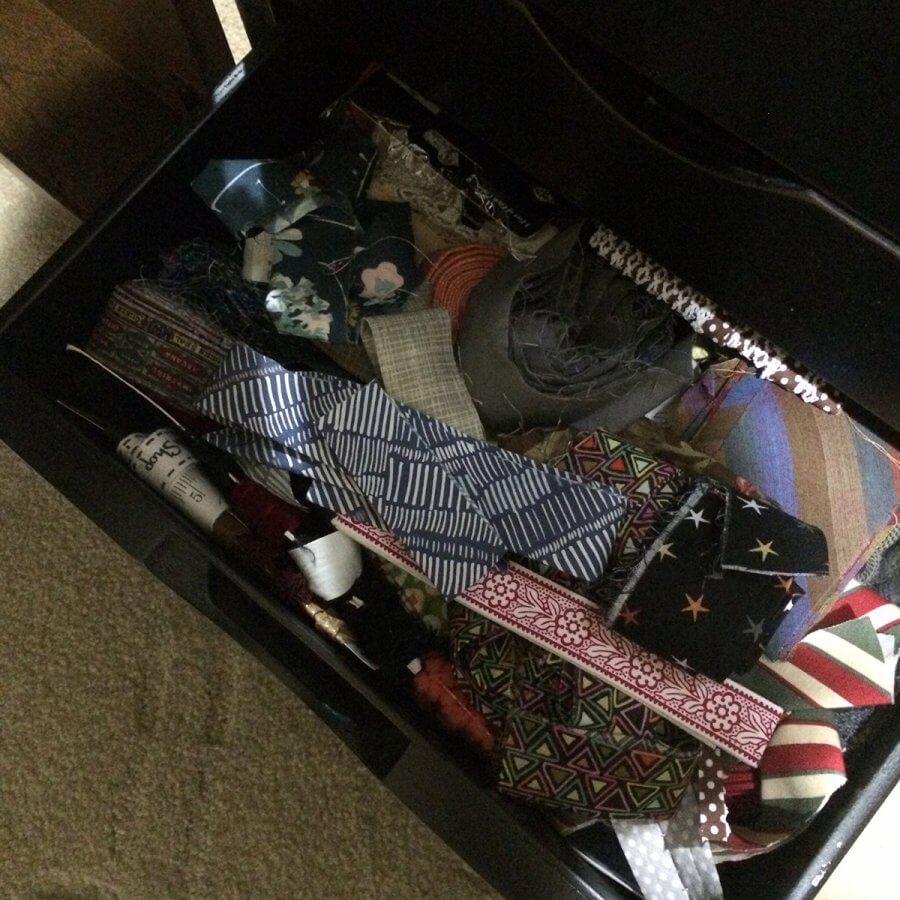
Sewing Room Storage Area #4: Scraps
Most of you know that I consider myself a scrappy quilter, and I love my scraps. I have some fabrics that have made their way into MANY quilts.
When I first started quilting, I wasn’t quite prepared when the “scrap tornado” first hit. At first, I stored them all in a basket. I would try to pull from them, but since they were not in any kind of order they tended to get overlooked. My friend (and quilting mentor) Emma gave me a tip that changed my life.
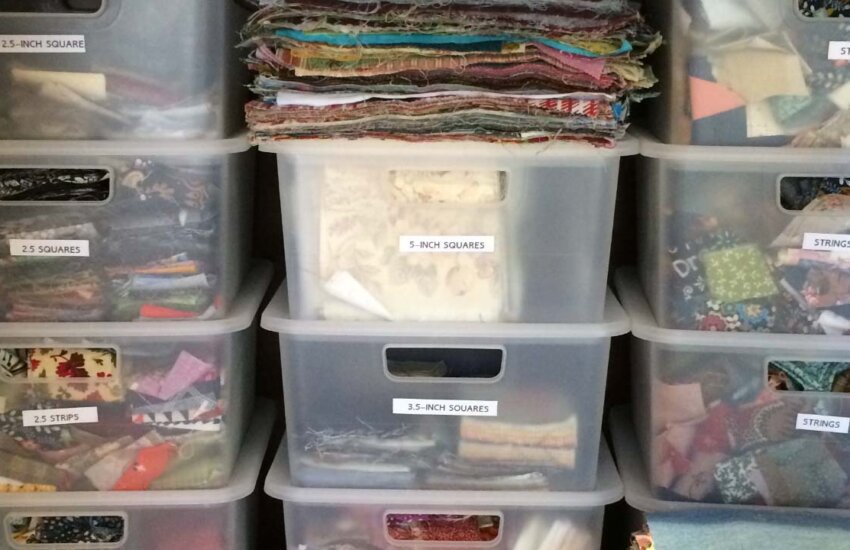
She recommended that I take the leftover pieces from a project and turn them into “precuts.” This only takes a little bit of time, so at the end of each project, I evaluate what’s left. If there is yardage or fat quarters, those are returned to the stash. But everything else gets cut into 10″ or 5″ squares, or 2.5″, 2″ or 1.5″ strips. Originally I was cutting into 2.5″ and 1.5″ squares, but I found that to be too time-consuming. Plus, you may end up needing it as a strip, and it could always be sub-cut later, so now I just keep those as strips until I know how I’m going to use them.
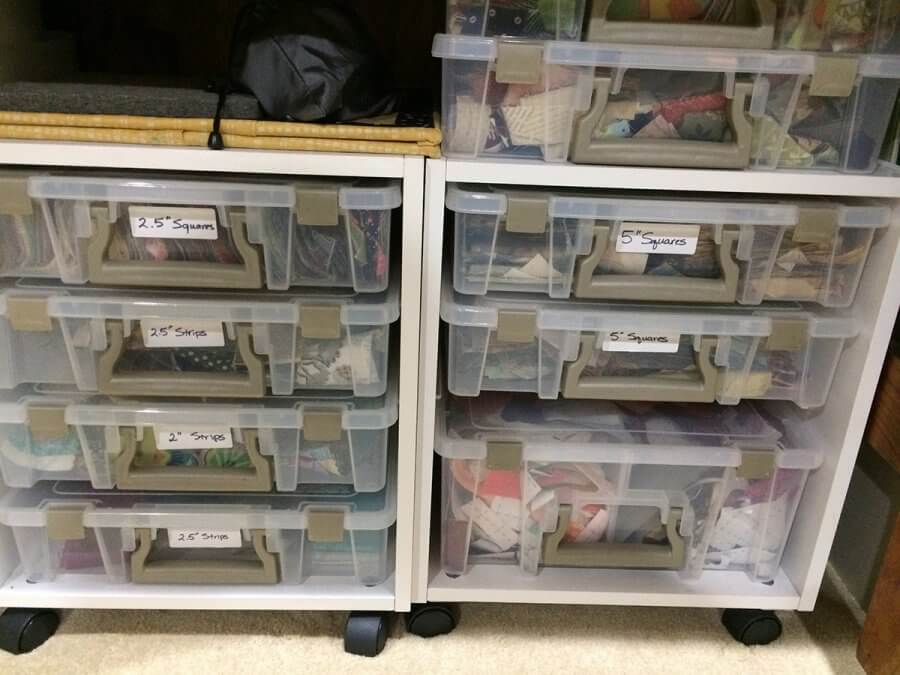
I keep my scraps under my cutting table. Two Art Bin storage cubes fit nicely in this space, and you can see that I’ve labeled the bins so I can easily know what’s inside each one. Except for the big one (bottom right.) It holds scraps and bits of fabric that have fusible applied for use in applique.
The only “scrap precut” that I do not keep in these containers is my 10″ squares. I keep those stored by color in the fabric cubbies. So on the top of each stack of reds, there is a stack of 10″ precut reds.
I recently purged my 5″ square bins because they were overflowing. If you’re interested in buying a pack of 100, they are up for sale in my Etsy Shop.
The Right Storage Containers
Finding the right storage containers will largely be a matter of personal taste. For me, I’m a bit partial to ArtBin Containers for holding my scraps and Works in Progress (WIP) projects. Several reasons I’m sold on these: First, I like the fact that ArtBin makes a storage cube designed to hold the containers. The cube makes it easy to access a drawer that’s in the bottom of a stack. Second, ArtBin Containers come in a variety of sizes. Third, they are made of a very durable and strong plastic (not easily broken or cracked.) Four, I LOVE the handles, which makes them great for taking to sewing group meetings. Five, they can be customized with various inserts. And one last thing that just endears ArtBin to me: They don’t change the color of the handles every other season. (It’s just so annoying to go back to the store 4 months later when you realize you need more of a storage bin, and you are unable to get it in the same color you bought last time. It’s the little things, right?)
I’m linking you to some of my favorite ArtBin products on Amazon below:
ArtBin Storage Cube:


ArtBin Super Satchels:


Yes. I’m long winded
This post has (once again) gotten pretty long, so I’ve decided to save the discussion on my design zone for one last post. Please come back for Part 5 (wow, who would have thought?) and I promise to wrap this up!
Oh, and one more thing to share before I go. I’ve convinced several of my quilting buddies to share THEIR sewing spaces with you. After this series is complete, I plan to do a few other posts where I share some amazing tips and solutions that my very talented friends have put into practice in their sewing spaces.