Sewing Room Organization Part 3: The Sewing Zone
Estimated reading time: 9 minutes
If you’ve been following along, welcome back to part 3 of a little series of posts on Sewing Room Organization. In Part 1, I discussed some basic organizational tips taught ingrained into me by my mother (love ya, Mom!) At the end of that post I talked about the concept of setting up “work zones” in your sewing space. Then in Part 2, I walked you through the Pressing and Cutting Zones in my quilting studio. Today I continue the tour by showing you my zones where my sewing machine is set up. Once again, this post has turned out so very, very long that I am splitting this up, and hope to wrap up the series next week in Part 4. We’ll see. I’m not sure if there is just a lot of ground to cover or if I’m getting way too long-winded!
This post may contain affiliate links, which means that if you click the links and choose to make a purchase, I will earn a commission. This commission comes at no additional cost to you but does help me earn enough to support the cost of this website. Please know that I only link to items which I personally use and feel that I can confidently endorse. Your support by clicking on these links is greatly appreciated.
As I’ve said before, my sewing space is always evolving around here. While it’s far from perfect, I hope to point out what is working for me, as well as what is not working, in hopes that it will give you some ideas.
Sewing Work Zone 3: Sewing
This is definitely the heart of my sewing room. This is where the magic happens, right? (Ah, such a happy place…)
You’ll notice as we go that most of this follows the “Store it where you’ll use it” rule. So, let’s get into it.
Sew useful: a Sewing Table (or cabinet)
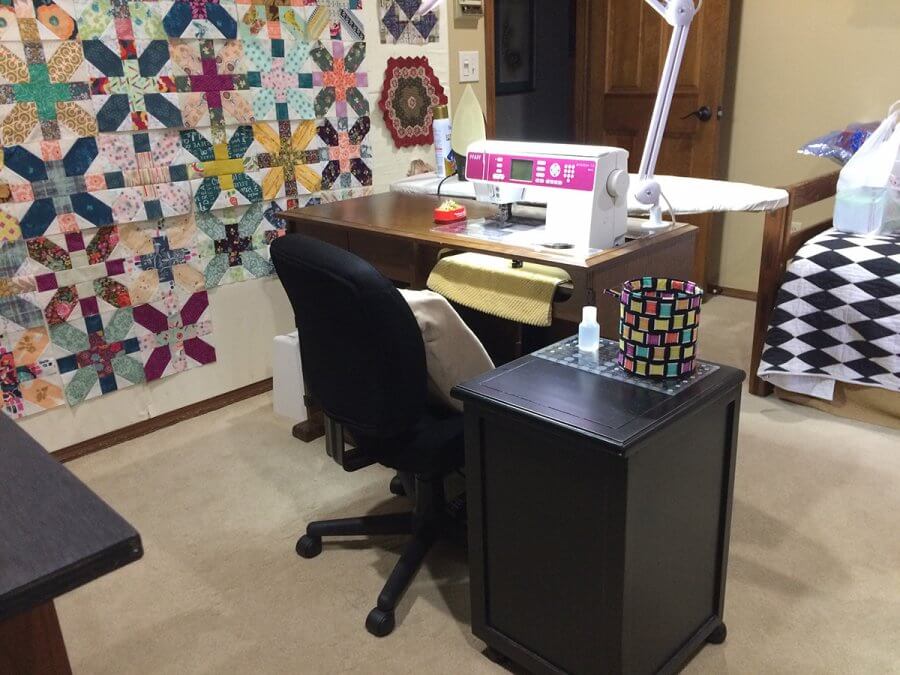
First of all, a few things are always beside the machine: a magnetic tray with pins, thread snips, and a seam ripper. I also like to keep a little basket for stray threads and little scraps too small to save.
For a long time, I did my sewing on a folding table. Five years ago I took some birthday money and bought this cabinet from a woman on Craig’s List. It was a huge improvement over the folding table, but I wouldn’t say it’s perfect. It is made from solid wood by the now defunct Parsons Sewing Cabinet Company. It also has an electric lift and I was able to get a custom insert fitted for my machine. While it’s a beautiful piece of furniture, after a few months, I removed the cabinet doors — they were in the way.
This sewing cabinet has the same problem that my current ironing station has — it’s just too small. This cabinet would be perfect for someone who sews occassionally, but I sew almost every day, and quilts take up a lot of space. My goal is to purchase a larger cabinet next year that has a quilting extension leaf. (But that can’t happen until I lose the bed in this room!)
Back to the cabinet – it has two drawers. The drawer on the left holds notions for actual quilting and finishing.
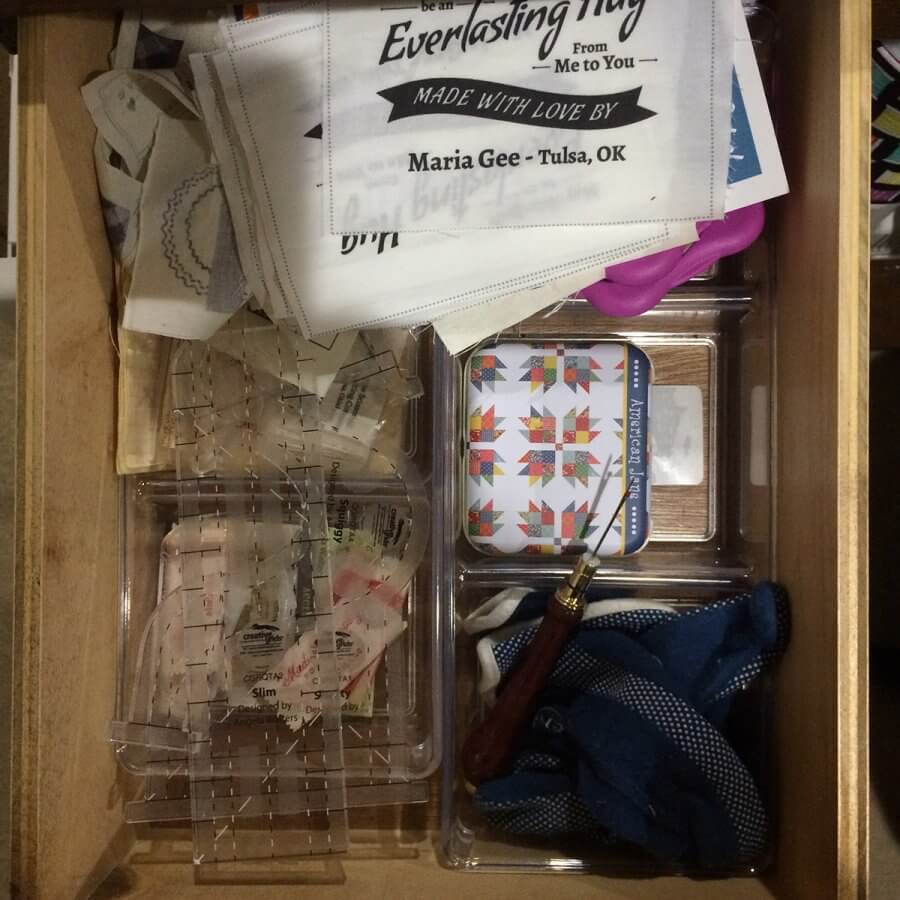
You can see in the photo that I keep my quilting gloves in here along with any specialty quilting rulers. I’ve bought all of Angela Walters quilting rulers and am trying to up my home quilting game. Towards the back of the drawer are quilt labels. (Notice the handy seam ripper!)
The drawer on the right side contains all the little things that go with my sewing machine, as well as items to use for cleaning and maintenance.
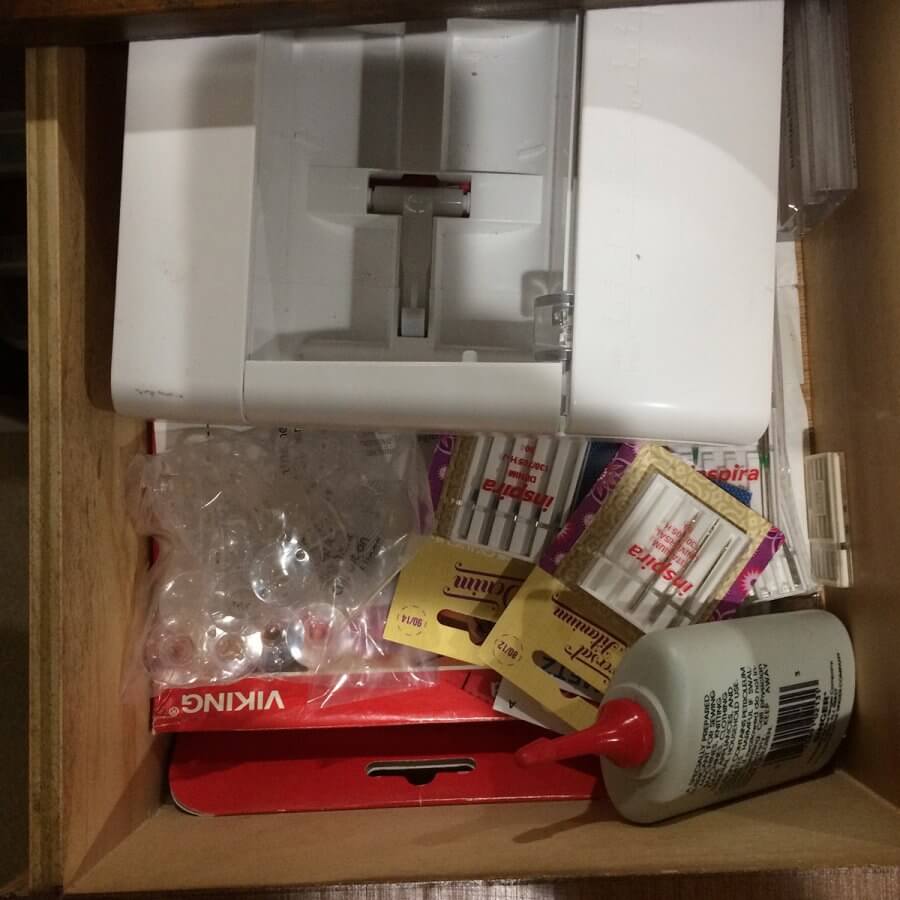
So, here you will see the case that slips over my machine that contains various presser feet, machine oil, spare bobbins, and lots of needles. I go through a lot of needles because I’m a big believer in changing your needle after every project. It’s such a cheap thing to do to extend the life of your machine. (For more on machine maintenance, see my post on how to clean and maintain your sewing machine.)
Below the drawers, there are two shelves.
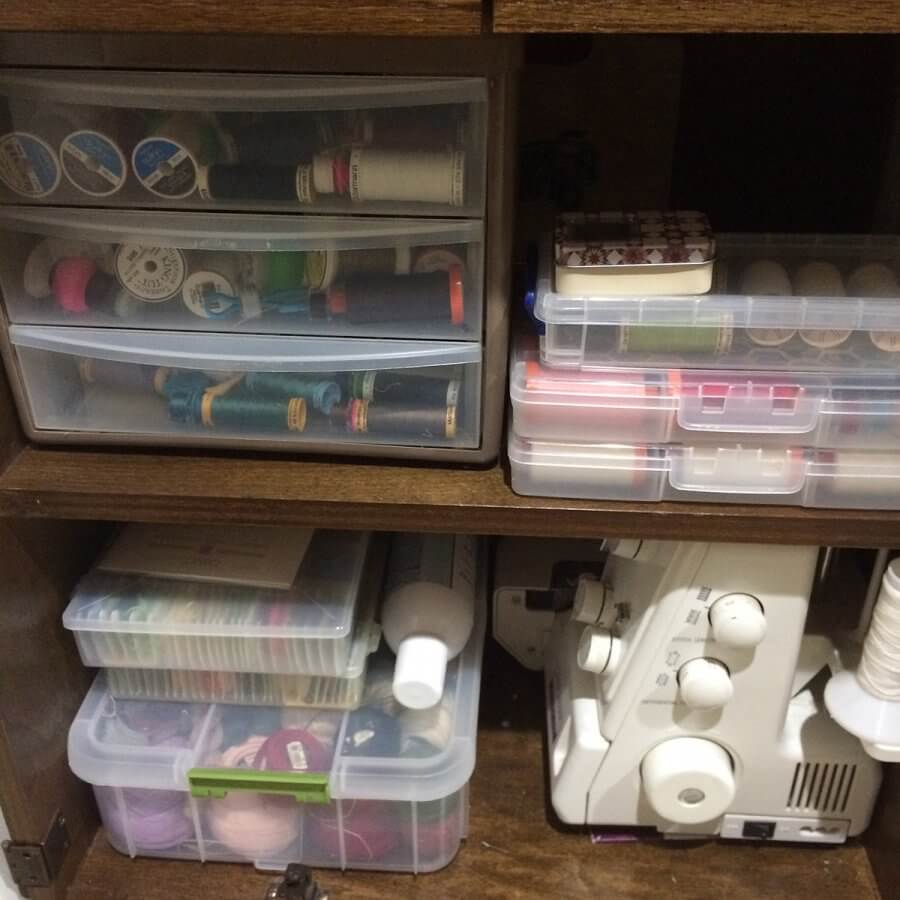
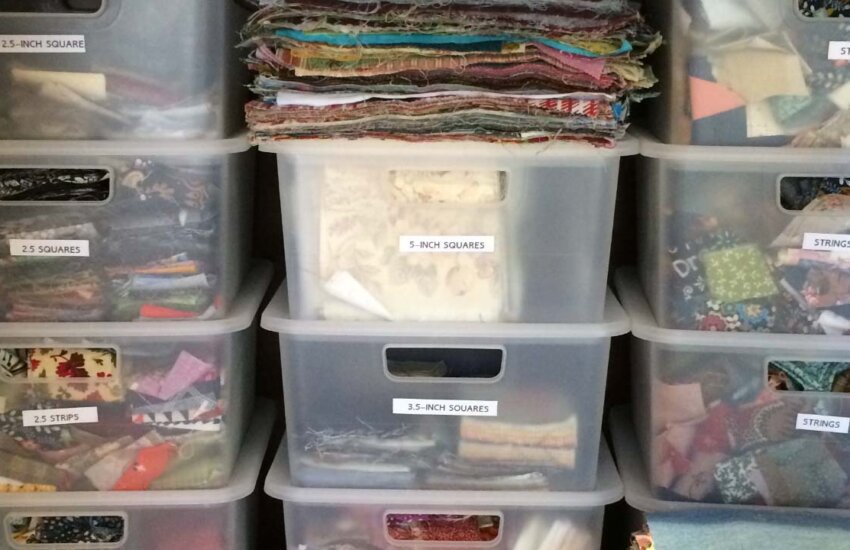
I store my serger down here (which I RARELY use — It should probably get purged, but I can’t seem to make myself part with it.) And I also store all my thread in containers on these shelves. The top shelf holds sewing and quilting threads, which are divided up by fiber type. Poly threads are in the top drawer. Cotton 50 wt is in the middle drawer and the bottom drawer contains cotton 40 wt. On the right side of that top shelf are a few Aurifil boxes with more 50 wt cotton, and a small box of hand quilting thread.
The bottom shelf holds embroidery thread and pearl cotton (which I use for hand quilting.) Spare serger threads are in the back wrapped in a clear plastic bag.
A quick word about thread storage.
There are a few lovely solutions out there (I love Martha Stewart’s thread rack that hangs on the wall) but I have yet to find a solution on the market that I think is really viable for me. I keep telling my husband that if I could solve the issue of how to store my thread, we could retire (because my gut tells me I’m not the only one struggling here!) I am constantly trying to find a better method for thread storage, but so far all of them fall short as far as I’m concerned.
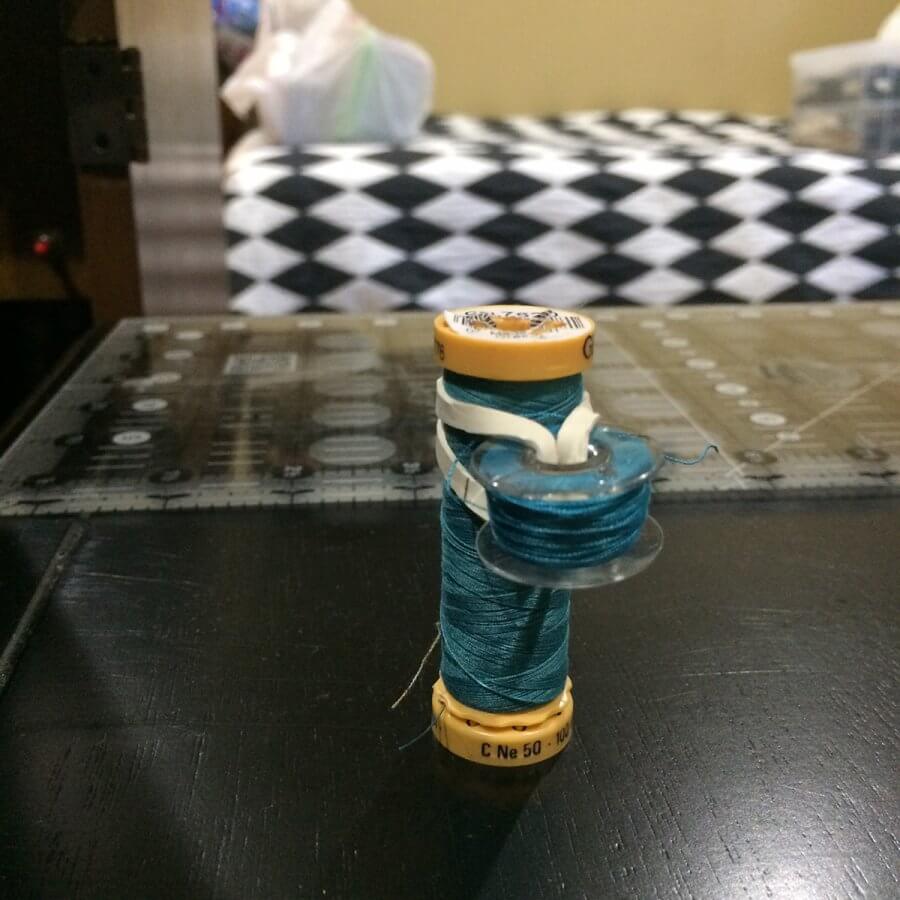
For starters, my main requirements are that my thread stays covered and out of the light. I’ve been told the two worst enemies of your thread is dust and light, as they cause it to deteriorate more quickly over time. In addition, I also want my bobbins stored with the thread. (Store it where you will use it!) I’ve tried several ways to do this, including the rubber band trick:
And here are some nifty little notions that do the trick, too.
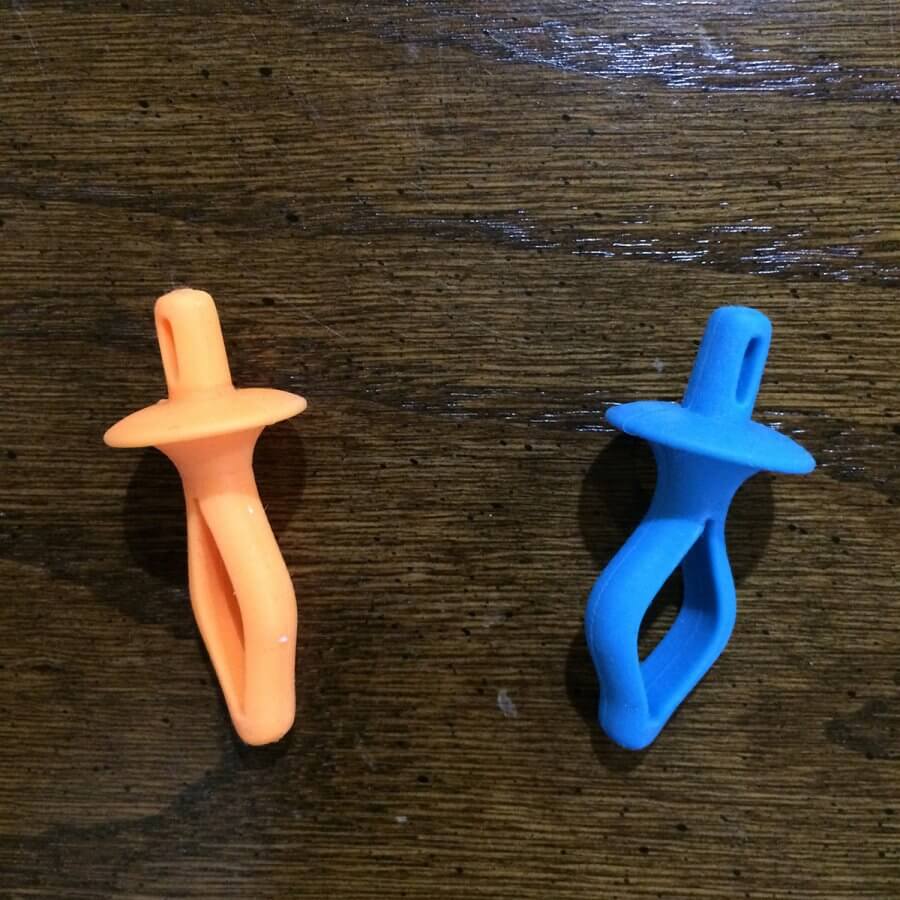
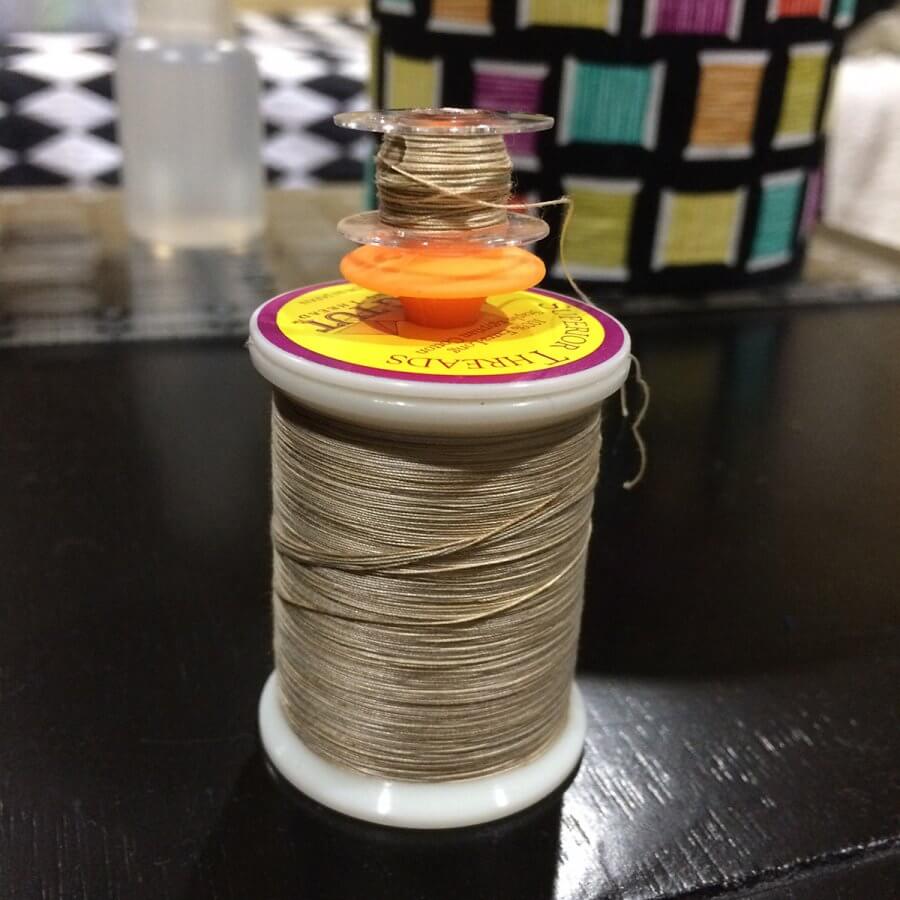
These are called Bobbinis and you can find them on Amazon. I have quite a few of these, but my favorite way to hold my bobbins with my thread is with these little guys (Called Bobbin Buddy Clips):
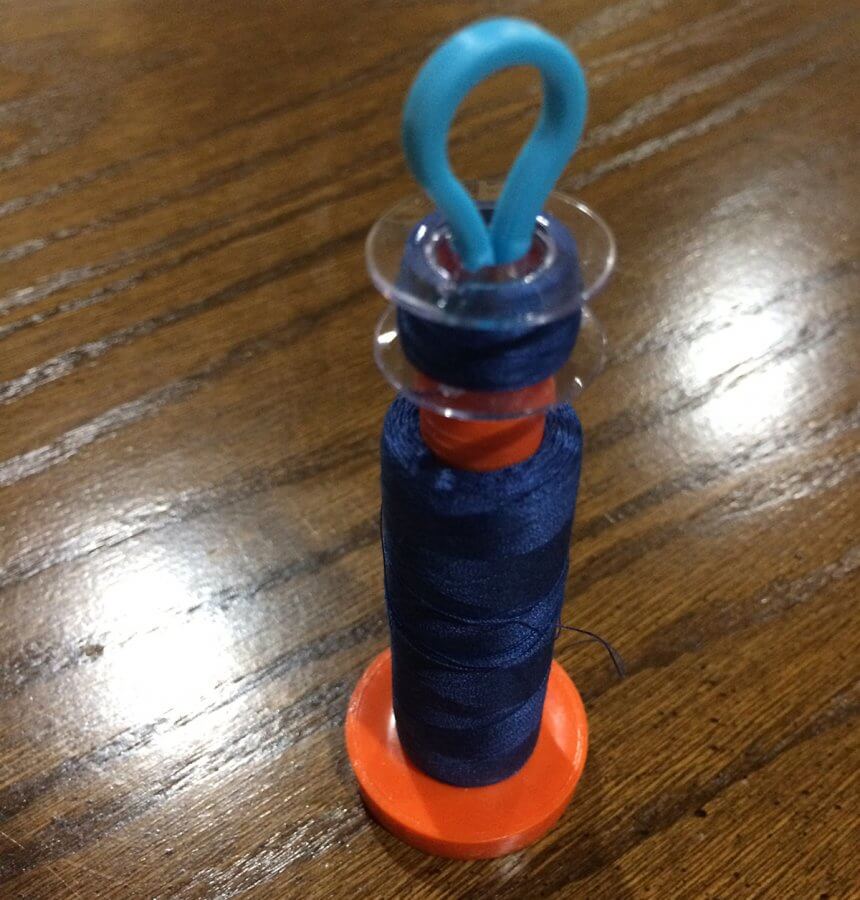
One thing to note is that if you are using any kind of thread organizer that has little dowels to hold the spools, the spool will not go over the dowel when these guys are inserted, so they may not work for you. If you store your spools in drawers (like I do), it will be fine.
Today while writing this post I discovered something that just might solve my biggest problem of all … the thread rolling around in the drawers. I realized that I could put something through the loops of these guys and they would pretty much stay in place in the drawer. So, I’m testing it out with a straw, and plan to run out later today and pick up some dowel rods.
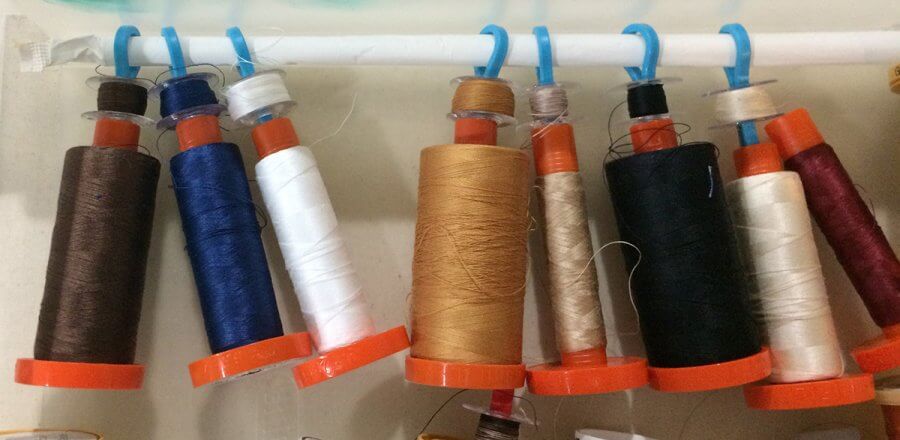
I think it’s going to work out pretty good because when you need a thread, you can just pull it off of the clip. Once I get this completely prettied up I will post again with beauty shots.
You can find the Bobbin Buddy clips on Amazon (Just click on the photo):

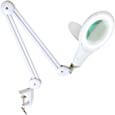
Good Lighting is a Must
My husband gave me this fantastic adjustable magnifying lamp.
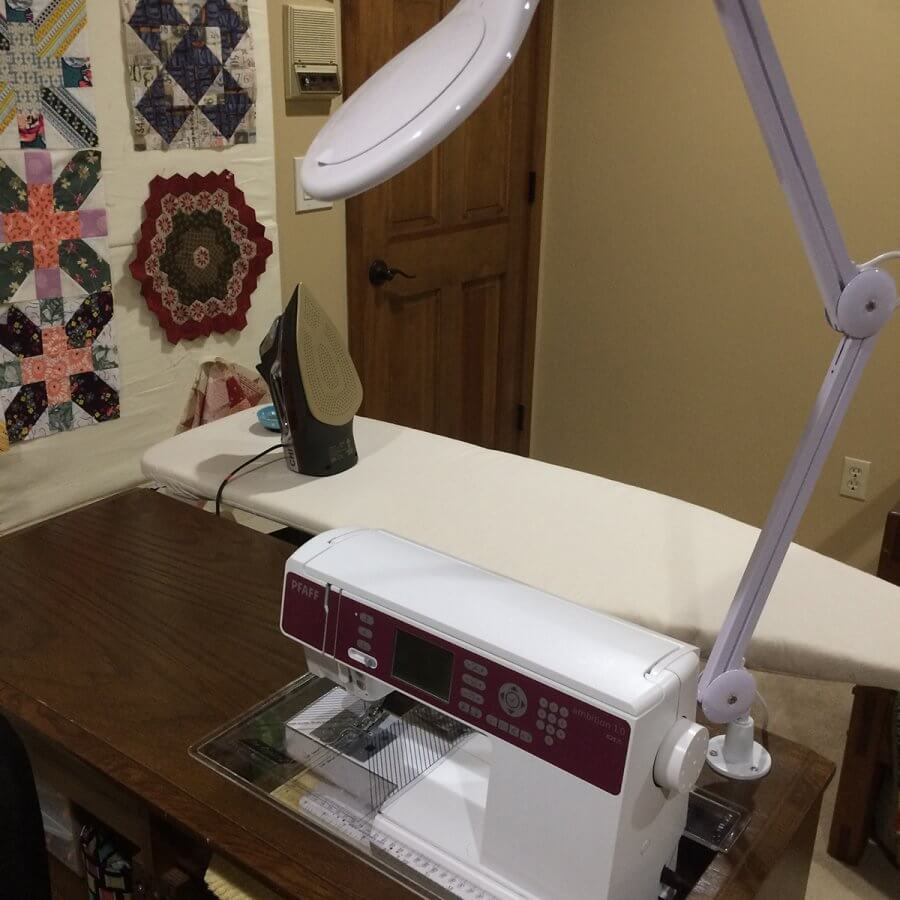
We attached the base of the lamp to the back corner of the cabinet so the light would be above the sewing area. I cannot tell you enough how important good lighting is to your sewing space. Here is the link to the lamp hubby bought me:
One last item before I wrap up this section on my sewing station, and this will be a good segway into storage for the next post. To the right of my machine, I have a little cart, and it doubles as a mini-pressing and mini-cutting station (You saw that in the last post.) I just swap out the rotating cutting mat with my mini pressing mat when I need to press.
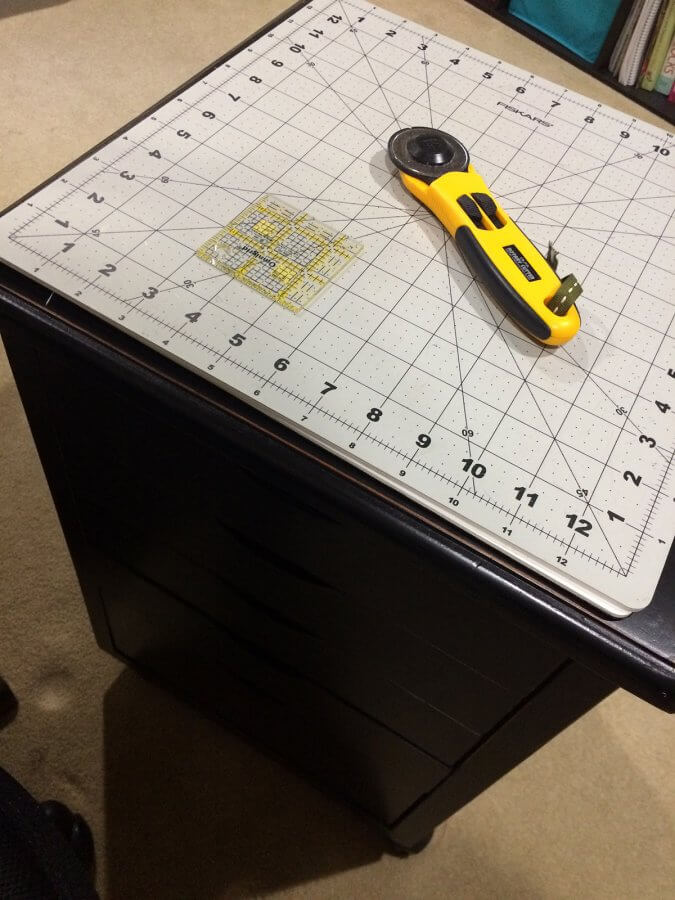
For me, having something to the right of my station is critical, because I need a place to hold items (like that ever handy seam ripper) but having a mini press and mini cut station beside me is just a big plus. A lot of people I know use a TV tray.
Ok, so I’m going to wrap up this post for now, and will continue the series next week. In the next post, we will discuss how I store the bulk of my supplies (notions, fabrics, scraps, etc!) If you have ANY questions, please feel free to shoot me an email.
Until next time,