
How to Clean and Maintain your Sewing Machine: Basic Sewing Machine Maintenance
Estimated reading time: 17 minutes
Welcome back! Today’s post is on a topic I have wanted to write about for a VERY long time. In fact, I started this post over a year ago. Yes, I admit I’m a bit pokey on these posts, but this is a topic I been determined to finally get out there because I think most new quilters and sewists will find it useful: How to clean and maintain your sewing machine.
Even if you’ve been sewing for a long time, there may be a few tips here on basic sewing machine maintenance that are new to you. In fact, I’ve run into quilters at retreats and sew-ins who’ve been quilting for over 25 years and didn’t know some of these tips. We are all always learning, aren’t we?
This post may contain affiliate links, which means that if you click the links and choose to make a purchase, I will earn a commission. This commission comes at no additional cost to you but does help me earn enough to support the cost of this website. Please know that I only link to items which I personally use and feel that I can confidently endorse. Your support by clicking on these links is greatly appreciated.
I was a slow learner when it came to how to clean and maintain my sewing machine
Despite the fact that I had been sewing since I was a child, I really had no idea how to correctly maintain my machine (or even how important it was). I knew that it needed the occasional squirt of oil. And when I bought my Pfaff Ambition, I thought my days of oiling were over, as I was told when I purchased the machine that I was getting a “self-lubricating machine.” All I would need to do is brush away the lint from time to time, and all would be good! (More on that later!)
Some of you may remember that I took a part-time job at a quilt shop back in 2014. The shop also happened to sell and service machines. I actually thought I knew how to clean my machine, but realized early on during a training session that I had not been cleaning my machine correctly. So, to help you avoid the same humiliation, I’m happy to pass along what I learned during my time there.
Note: These instructions are generic. Please consult your machine’s maintenance manual for specific instructions regarding your machine.
The reality of machine ownership
In a perfect world, your machine would just take care of itself, right?
We can dream…But the hard reality is that your machine is, in fact, a machine, and it is subject to wear and tear and all the maintenance that goes along with owning a machine. Bummer, I know. If you are fearing the future and an upcoming world ruled by AI (artificial intelligence), this should give you hope!
Owning a sewing machine is very much like owning a car. I’m sure you realize this if you own a higher-end machine, since the prices of those machines are usually comparable to the price of a small car. Oil changes are that little thing that extends the life of your car, and the proper care and maintenance of your sewing machine is no different. It’s annoying to take time out for an oil change, but you know you gotta do it if you want your car to last, right? The same holds true for your sewing machine.
Make your Sewing Machine Last
No matter how much money your machine cost you, you will extend the life of your investment (and make your life so much easier) by taking the time to take care of your sewing machine properly. And know this: taking the time to clean and maintain your sewing machine will not take hours out of your schedule. In this post, I show you how to properly maintain your machine, in just a few minutes of your time. And with a little habit training, you’ll be doing this on a regular basis without thinking twice about it.
An important side note:
One other important thing to note before we get into the actual process of how to clean and maintain your sewing machine: Doing routine maintenance does not exclude you from needing to take your machine in for a yearly physical with a technician. Ideally, you should have your dealer or an authorized technician inspect your machine once a year. I’m always amazed at the little improvements I notice when I do this – and it’s the little things that can make a difference – such as a bobbin that is winding just a little bit tighter, or the stitch looking just a bit straighter.
Tools to maintain your sewing machine:
Most of this was probably included in your sewing machine’s accessory box, but there may be a few additional items you should add to the arsenal:
- A Small screwdriver. One was probably included with the purchase of your machine. If yours has gone missing, I recommend this one or one like it that is short and stubby:


3. Good quality sewing machine oil
4. A soft cotton or microfiber cloth
5. New Sewing machine needles. Schmetz is a good brand, but I prefer Inspira needles. When I worked at the shop I learned that the Inspira needles are specifically engineered to work better with machines that have needle threaders, and I can confirm that I notice that my needle threader seems to have a harder time working properly when I use a different brand of needle. I could write an entire post on needles, but for now, I will make life simple and say that when sewing patchwork and using 50 wt. cotton thread, you should be using either a 80/12 or 90/14 sharp needle. (I actually prefer the Microtex needles for patchwork.) Buy a bunch of these and always have a stash on hand.

The important thing about needles
Your needle is the least expensive part in your sewing machine, at about 50 cents each or 20 cents each if you buy them in bulk. If you keep a fresh one in your machine, you can save hundreds of dollars in costly repairs. That is because the main cause of costly damage to machines is from using a damaged needle. Often a needle can be slightly damaged with a burr or be slightly bent from use and it won’t be obvious to the naked eye. I actually put a new needle in once, and then had 15 minutes of frustration. I changed the needle again and all the problems went away. So, it’s possible that even a new needle will have issues. This is why it’s important to really know and pay attention to your machine.
She is talking to you, be sure you listen.
The more you get to know your machine, the easier it will be for you to tell when your machine is needing some love. I can’t stress enough how much your sewing machine will love you for giving her a new needle every time you clean and maintain your sewing machine.
How often should you clean and maintain your sewing machine?
That actually depends on how much you are using your machine. My basic rule is that I do this at the start of every new project. But if I have a project that is extending out over a long period of time, I will often stop and perform maintenance every time I change the bobbin.
You will be able to hear it. There may be a cracking or popping noise. Or the humming sound of your machine may have a slightly different pitch.
You may even be able to see it. You might notice a few skipped or crooked stitches. You may be getting more “bird’s nests” or you may notice that the fabrics are not pulling as well into the feed dogs.
You will just know, just like you know when your kid is getting sick.
Bonus tip: if you collect old machines that are sitting idle in your home, it’s a good idea to pull them out at least once a year. Give them a little basic maintenance, then a little test drive. This will help keep those old parts from locking up.
How to clean and maintain your sewing machine:
Step 1: Unplug your machine and take the thread out.
- So here is a little tip that can potentially save you a lot of machine headaches down the road: When you unthread your sewing machine, clip the thread just before it enters the tension discs. Then, pull it out through the needle. GOING FORWARD.
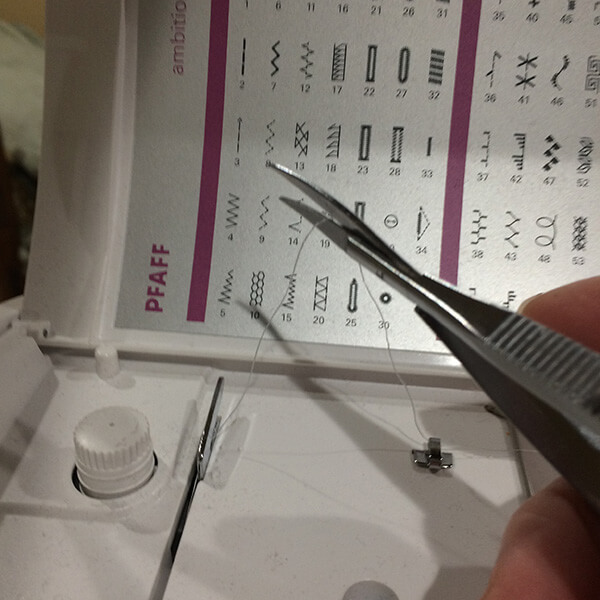
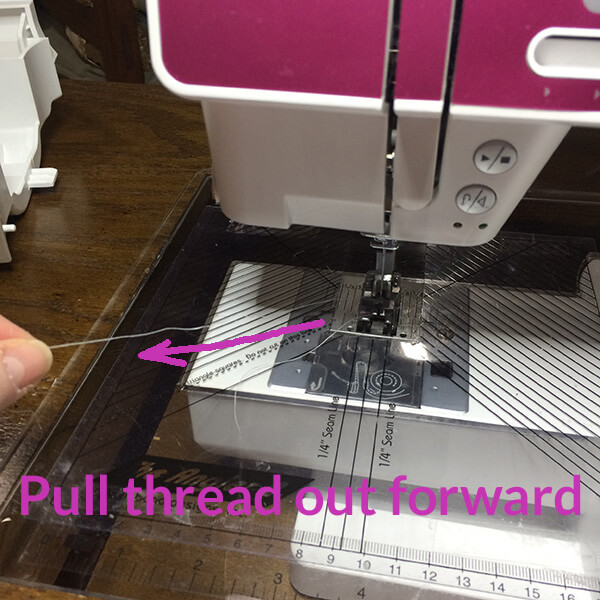
- Most people naturally want to pull it back through the discs up to where the spool is. But your machine is not intended for the thread to ever go backward. While you might waste 8-10″ of the thread, you have less risk of damaging the tension discs in your machine if you pull it out FORWARDS. In addition, there is less risk of accumulating lint back behind the discs, which helps your machine perform better between yearly cleanings.
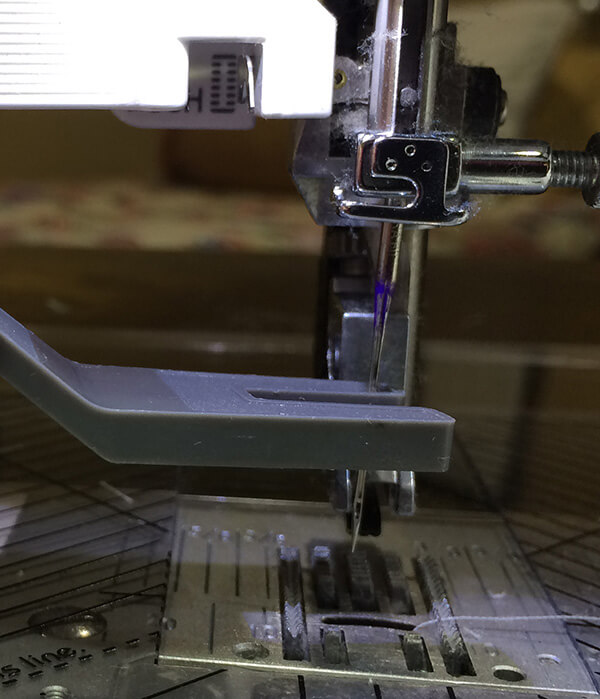
Step 2: Remove the needle from your machine.
- The needle is usually held in place by a screw, which you should untighten just enough to loosen the needle.
- My machine comes with a special tool to use when removing the needle.
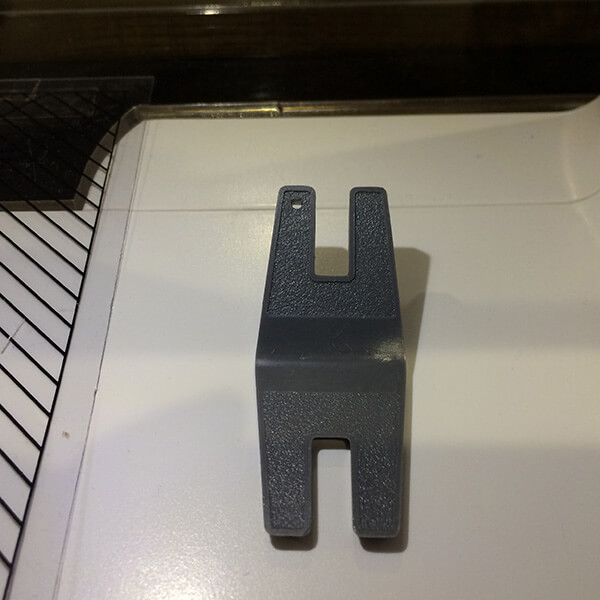
- At first, I thought this was a ridiculous tool. I mean, how hard is it to grab the needle and pull it out? And then one day I accidentally dropped the needle and it was swallowed up into the depths of my machine. (Of course, this would not have happened if I had removed my needle FIRST instead of removing it after I had removed the switchplate!) I ended up having to take the machine into the repair shop to have it removed. And was SO humiliated. Needless to say, I now think this little device is amazing!
Step 3: Remove the switch plate.
- Using your stubby screwdriver, remove the screws that hold the plate in place.

- Lift the plate up, to reveal the bobbin hook mechanism below.
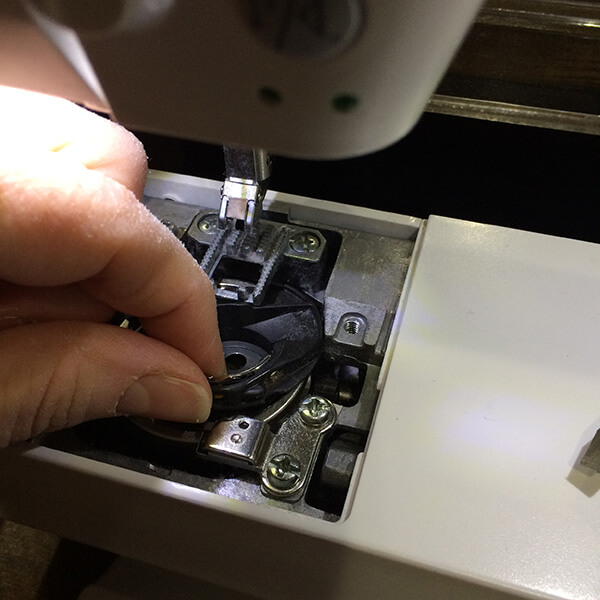
Step 4: Take out the bobbin case.
True story: I didn’t realize that you were actually supposed to take the bobbin case OUT of the machine to clean it. I thought you could just swish the brush around the inside of the bobbin case and you were good. Nope. The first time I took my machine to the quilt shop, the mechanic removed what looked like a very thick felt pad from underneath my bobbin case. Yep. It was jam-packed with lint. I think a bird could have built a nest with the stuff that was below!
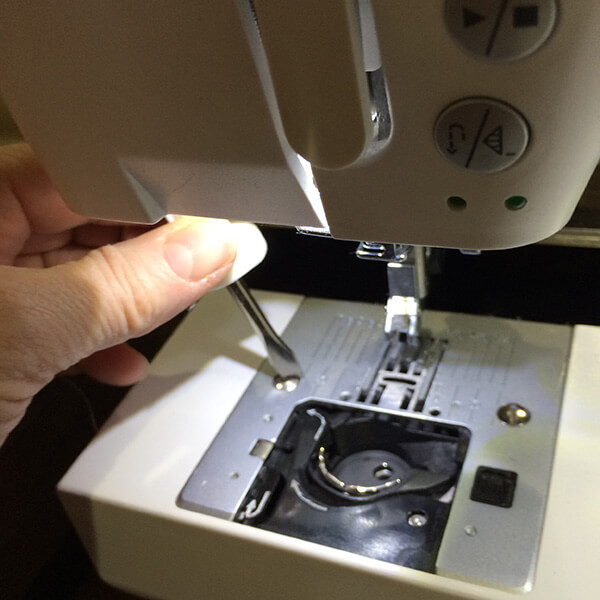
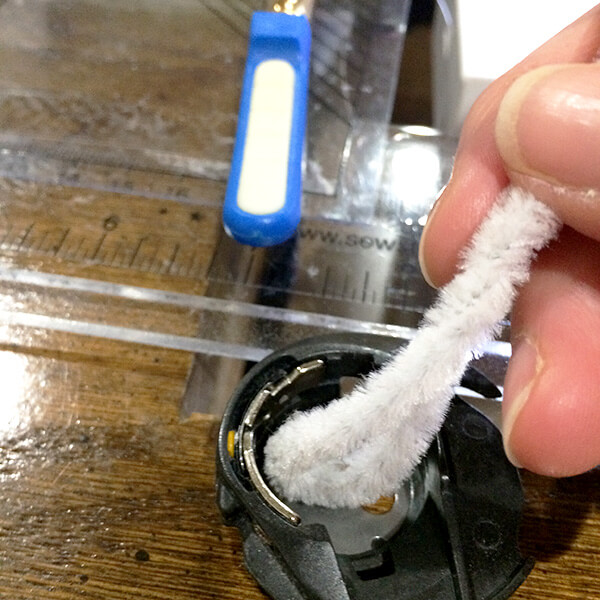
- Here is a photo of me removing my bobbin case from the hook mechanism below. This may look a little different for you depending on what type of machine you have. Some bobbin cases drop in horizontally, some drop in vertically. My Pfaff has a drop in (horizontal) bobbin. To remove it, I jiggle it a bit (I know that sounds highly technical!) and pull up and out to the side.
- Most Berninas and some other brands will have a vertical bobbin that removes from the front bottom of the machine. These typically have a latch that must be pulled open first before removing. Consult your manual.
- You will be amazed when you see the accumulation of lint underneath your bobbin case. As mentioned earlier, for a LONG time I did not realize that I was supposed to actually pull my bobbin case out of the machine to clean it. I had routinely cleaned inside the bobbin case, thinking I was doing the job.
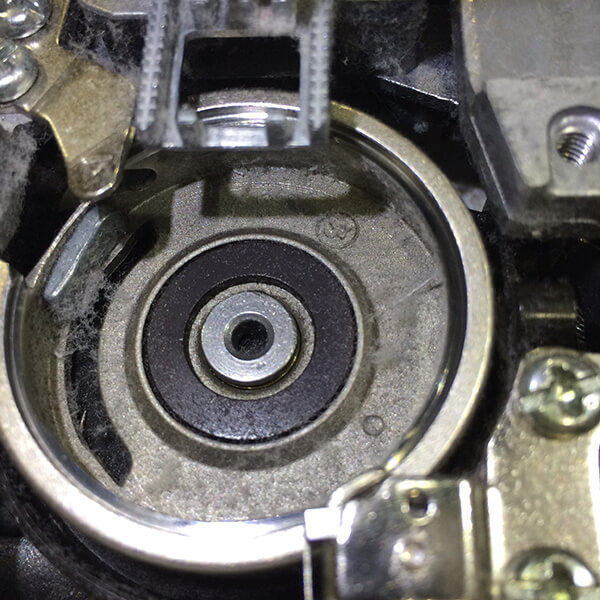
Step 5: Remove the lint and dust.
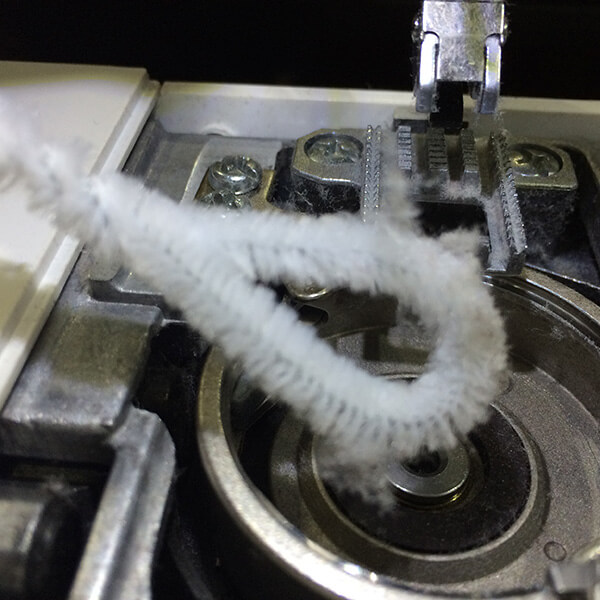
- If you are using a pipe cleaner, first make a loop on the end that looks like the photo below.
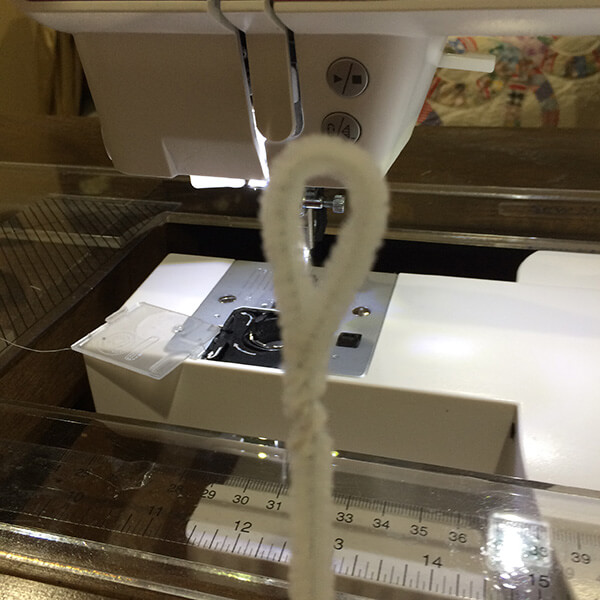
- Apply ONE drop of oil to the tip of your pipe cleaner or lint brush.
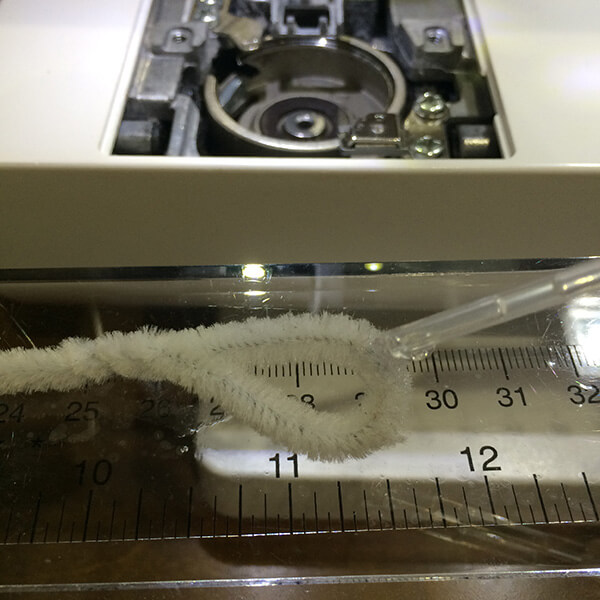
- Gently swipe your pipe cleaner or brush around the hook device. You may need to wipe your cleaning device off a few times. Swipe it down around the hook, too, reaching down below into your case. Everywhere you can lightly dip that thing, swipe it in and pull out as much lint as possible.
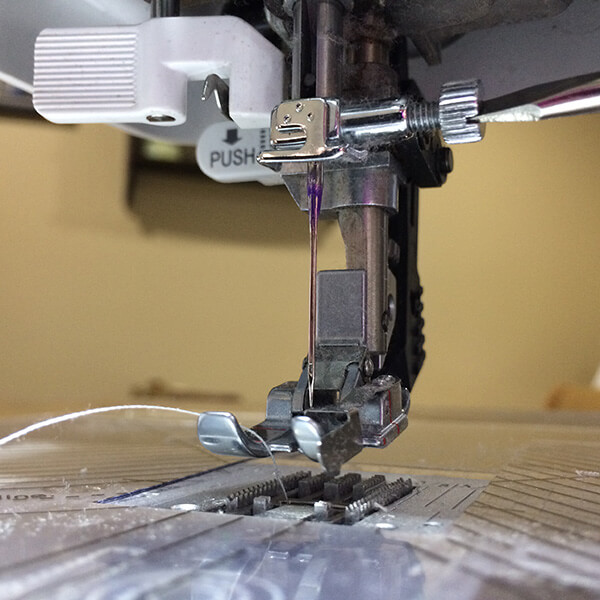
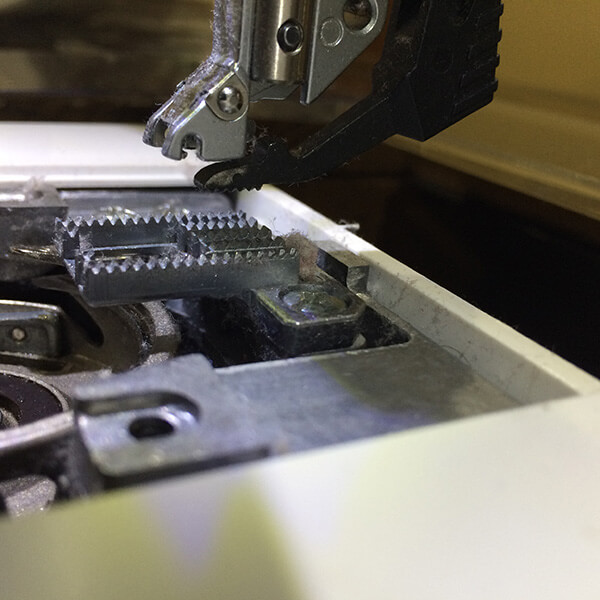
- Be sure to sweep the lint out of your feed dogs. I do typically use the little brush to do this. This spot is often overlooked, and when lint accumulates in the feed dogs, the fabric does not feed correctly. I know this from experience! There have been times when my feed dogs were cram packed with lint!
- NEVER blow into the machine to get the lint out of the hook device. This may force lint deeper into the machine and affect the other parts below. The idea is to pull it OUT.
- I also like to run the pipe cleaner around the inside of my bobbin case.
- If you want to get really serious about removing the lint, you can purchase a vacuum attachment set like the one below. I do not use this every time I clean my machine, but I do use it a few times each year between annual exams.

- Take your microfiber rag and use it to wipe off the throat and rest of your machine. (Do not add chemicals or cleaners to the cloth. Over time these cleaners can damage and discolor the plastics in your machine.) Often the crud you removed from under your bobbin will fly up or drop onto your machine. You don’t want it laying there just ready to pounce back inside. Get rid of it for good!
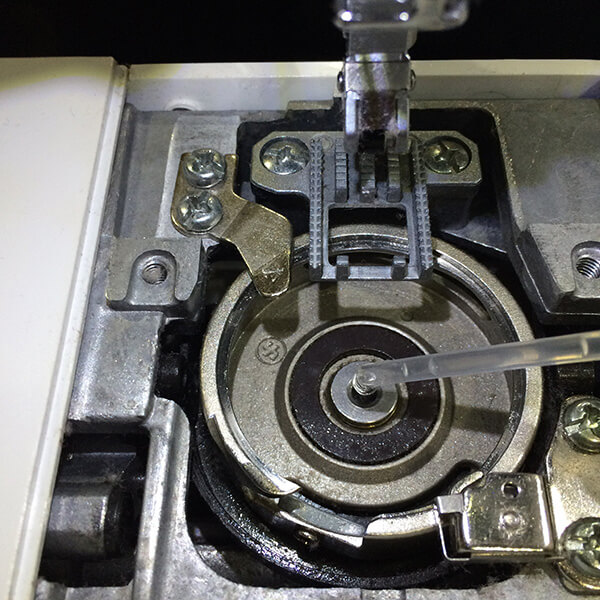
Step 6: Apply a drop of oil to the hook device underneath the bobbin.
- NOTE: As I mentioned earlier, some of the newer models (and mine was one of these) claim to be self-lubricating. These machines use high-grade Teflon parts. Heat is generated from the friction of moving parts. In these new technologies, oil is released from the parts when friction occurs. Most trained and reputable sewing machine mechanics will tell you that this is great in theory. But they find that the parts last longer if you do oil them. I tend to trust my mechanic. He is who actually sees what is happening in the trenches on a day-to-day basis. If you have a “self-lubricating” machine, I would recommend that you consult your dealer/mechanic.
- For most machines, the drop of oil should go right in the center. Check your manual for exact information for your device
Step 7: Put her back together
- Reinsert the bobbin case, then screw the switchplate back into place. Drop in your bobbin.
- Insert your new needle and thread your machine
- Sew a test strip to confirm that everything is ready to go!
So, that’s it!
Please let me know if you have any questions! Until next time…


