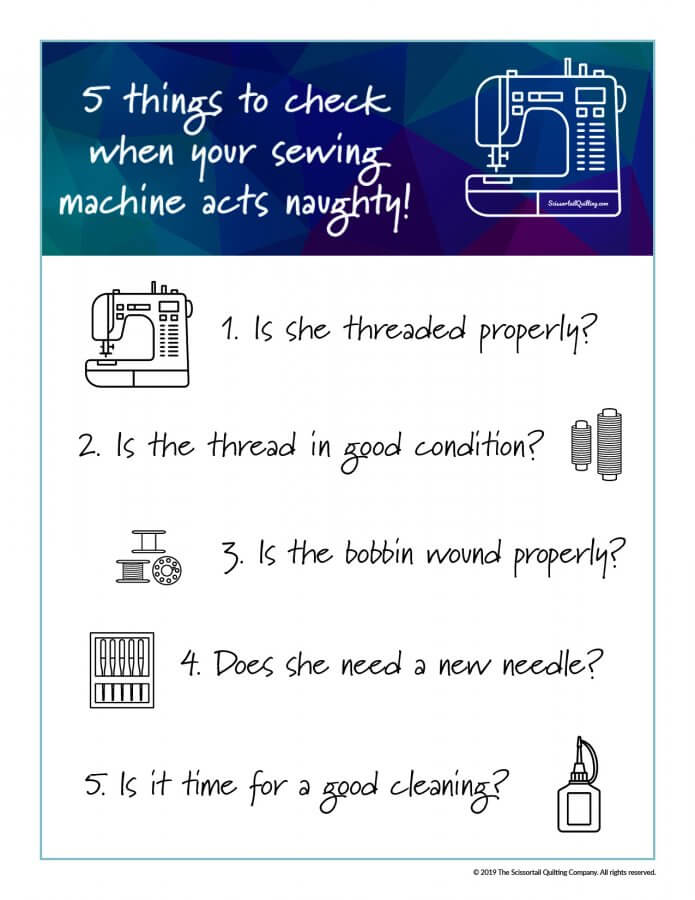
5 Things to check when your Sewing Machine Acts Naughty
Estimated reading time: 8 minutes
Usually sewing time is a blissful affair. You sit down with your favorite beverage, maybe fire up a good movie on Netflix, grab some fabrics and start feeding them through your machine.
But I must admit that occassionally there are days when my sewing machine decides she does not want to cooperate. And on days like this it’s tempting to want to kick her to the curb.
It’s not you, it’s me.
I’ve learned over the years that it’s usually not her fault. More often than not, and this is so hard to admit, it’s because of something I have or haven’t done.
If you’re wondering what could possibly be wrong with your machine and need to do some sewing machine troubleshooting, I’ve put together a little checklist to help you out. Perhaps your machine is skipping stitches or maybe your bobbin thread keeps getting knotted up. Hopefully, this little Sewing Machine Troubleshooting Checklist will help you diagnose and correct the problem in no time!
At the bottom of this post is a PDF download of my sewing machine troubleshooting checklist so you can print it and keep in handy.
1. Is she threaded properly?
This may seem like the silliest thing to ask, especially if you’ve just threaded her, but when I worked at the quilt shop, this was one of the most frequent problems people had when they brought their machine in with “problems.” More often than not, we would rethread the machine and then it would work perfectly, much to the bewilderment of the machine owner.
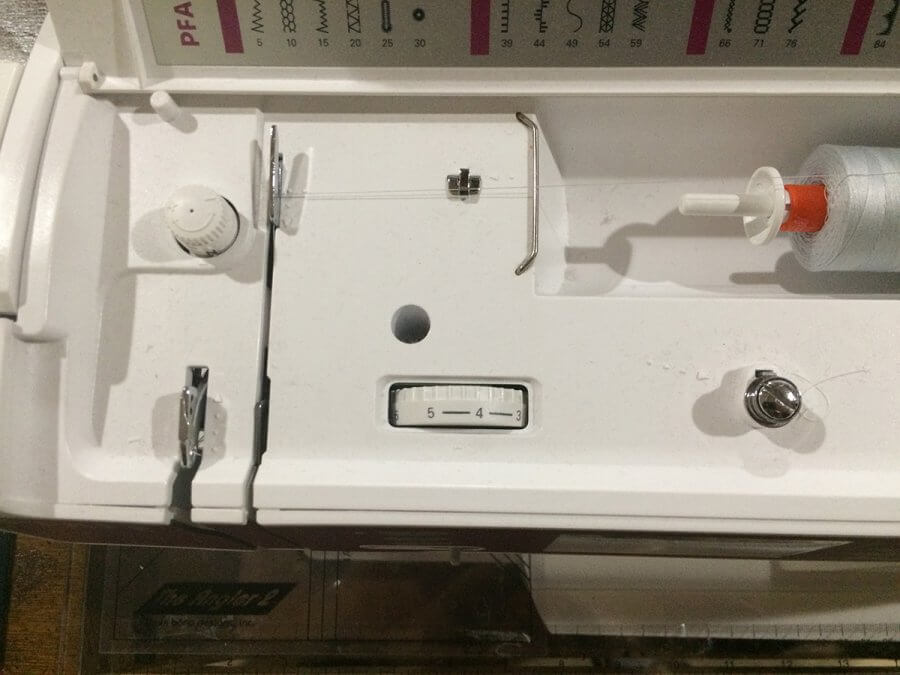
What tends to happen is that the thread doesn’t go into the tension discs properly if you aren’t loading it carefully. So here is a tip to help make sure your thread goes into the slots the right way: When threading your machine, hold the thread tautly between both hands as if you were holding dental floss.
Another common mistake is threading the machine with your presser foot in the down position. Your presser foot should be raised and in the UP position. This releases the tension on the discs, so the thread can slide in between them easily. If you try to force thread into the tension discs when they are “engaged” it will be difficult to get the thread to insert properly. And over time this could even damage the tension discs.
When you are ready to thread your needle, lower the presser foot. The tension discs should clamp down on the thread, and if you gently tug on the thread, you should feel the resistance. This lets you know the thread is correctly in place.
It is also important to make sure your spool is loaded in the correct direction and has the proper-sized end cap to hold it firmly in place. If you are using a large end cap over a small spool of thread, it is likely to trap the thread and cause problems. The end cap should never be larger than the width of your spool.
If you are using
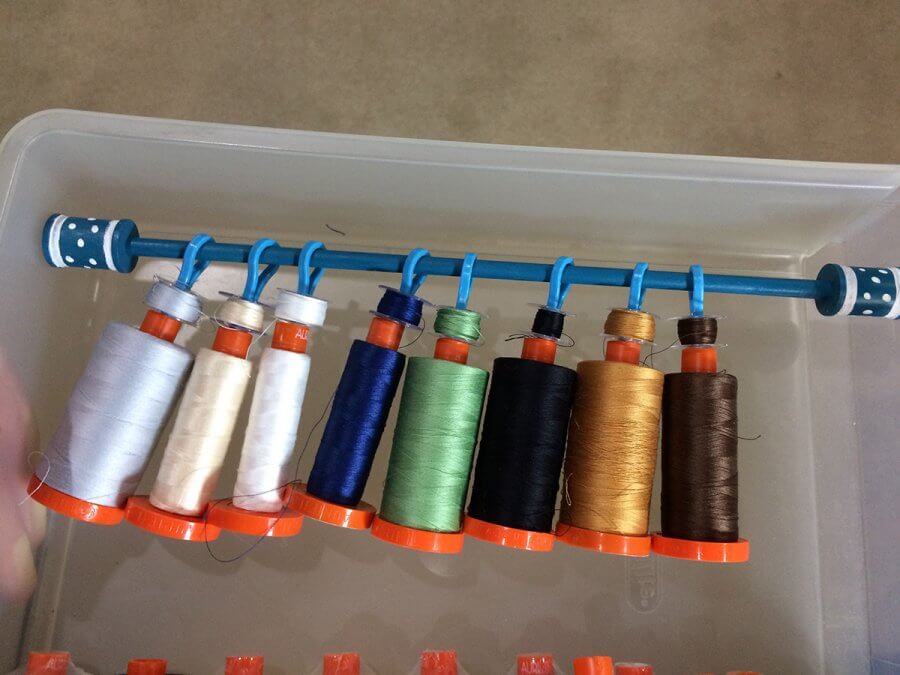
2. Is the thread in good condition?
When your machine is acting naughty, this is another simple, yet often neglected problem. We have a
Light and dust and time all work against it. This is why I try to not purchase thread if I don’t think I will use it up within a few years. Also, your thread will also last much longer if you store it covered and out of direct light. (See my post on storing fabric and notions.)
How to test your thread
When it comes to thread, there are two things you want to test: quality and strength.
The best way to test for quality is to look at the “twist” of the thread. A thread that is twisted too tightly will curl and coil up as you are using it. If twisted too loosely, you will have a lot of fibers coming out the side.
I’d recommend that you compare several different brands. Pull out a strand and inspect it very closely. If you happen to have some “bargain” thread in your sewing notions, cut off a piece of it and inspect it, then cut off a piece of your “better” thread and compare. It won’t take a microscope for you to see the difference. Good quality thread will be spun very tightly and will have few stray fibers sticking out from the coil. That bargain thread will have a LOT more fibers coming out of it compared to your better threads. Why does this matter? In the long run, that bargain thread is going to clog up the tension discs in your machine.
A simple way to test for thread strength is to pull on a section of thread from the spool. If it breaks easily, then toss it. (Or if that pains you, at least don’t use it in your machine.) If you’re concerned that maybe you were just pulling too hard, then do another pull test on a new fresh spool of thread for comparison.
3. Maybe it’s the bobbin
A lot of people don’t realize the importance of a correctly wound bobbin. It’s not enough just to have thread would on the bobbin. It needs to be pretty tightly wound.
The bobbin test
To make sure your bobbin is wound correctly, take your fingers and squish the sides. It should feel very firm. If it’s squishy, wind the thread back on the spool and rewind the bobbin. There is a tension screw on a sewing machine’s bobbin winder, and you may have to experiment with the tension on several bobbins of
If you are having your machine routinely serviced, a bobbin test and adjustment is generally part of the process. I’m usually amazed at how much nicer my bobbin works after my machine’s “annual exam.”
Other bobbin issues
With some machine models, the bobbin or bobbin case can slip out of position. If this is the case, just “pop” it back into place and make sure it’s firmly positioned.

4. Does she need a fresh needle?
As I’ve said before, a fresh needle is one of the kindest things you can do for your sewing machine. Many sewists tend to think that as long as it ain’t broke, don’t worry about it. This is a dangerous attitude that can wreak havoc on your machine long term.
The truth is that your needle might not be broke, but it could still be a problem. Sometimes needles get slightly warped or bent while sewing, especially if you’ve been working with a lot of bulk under the needle. (This is why it’s important to not tug, pull or push the fabric through. Instead let the feed dogs do the work and keep your own muscles out of it!)
Needles can also develop burrs, and it’s even possible that a brand new needle can be defective.
Many times a fresh needle will cure all ills. It’s a good practice to put a fresh needle in your machine every time you begin a new project. Keep in mind that a new needle is probably the least expensive part in your sewing machine, but it can potentially save your hundreds of dollars in damages caused from a defective needle.
5. Does she need a good cleaning?
If you’ve gone through the troubleshooting checklist this far, and still have issues, maybe it’s time for a good cleaning. (Check out this post on how to clean and maintain your sewing machine.)
Unfortunately, it’s possible your machine needs something else not on this list. But if you’ve gone through this Sewing Machine Troubleshooting checklist and have thoroughly checked everything, it may be time to make an appointment with a service tech.
I hope this little tutorial helps. If you’d like to keep a handy reference, then download the PDF by clicking the image below!