Sewing Room Organization Part 2: Organizing your Pressing and Cutting Work Zones
Estimated reading time: 20 minutes
Welcome back to my second post on sewing room organization. In my last post, we discussed some basic principles and motivations for getting our sewing spaces organized, and we touched on the concept of setting up work zones. This week, I will walk you through two of my sewing room work zones (pressing and cutting) and explain how it’s working (or not working) for me. I had originally hoped to write about all of my work zones in this post, but it kept getting longer and longer, so I decided to turn this into a three-parter. Next week I’ll finish up with Part 3 and will tell you about my sewing, storage and designing Zones. As I’ve said before my sewing room seems to always be a Work In Progress. By no means do I have this all completely figured out, but hopefully there is something in here that will inspire you…
This post may contain affiliate links, which means that if you click the links and choose to make a purchase, I will earn a commission. This commission comes at no additional cost to you but does help me earn enough to support the cost of this website. Please know that I only link to items which I personally use and feel that I can confidently endorse. Your support by clicking on these links is greatly appreciated.
Is a Dedicated Sewing Zone REALLY Necessary?
Before we get down into the details, let me say up front that I believe that if you are serious about quilting (or any other type of sewing or craft) you will be much more productive if you can have a space dedicated to it. Plus, being able to leave projects out until you can work on them later, and being able to shut the door to keep little ones and pets away from sharp tools is much preferred over having to pack everything up whenever you run out of time. Now, I realize a dedicated space is a luxury some of us just can’t afford. If you can’t have a dedicated space, then try to find some semi-portable storage that will house most of your tools and equipment. This will allow you to easily move in and out of your workspace. I would recommend a rolling cart for this. I have the IKEA cart shown below. A cart like this is a great investment, as it can be used for SEW many things. If you one day are able to have a dedicated space, your cart can still be very useful in there. (Mine now does duty in the laundry room.)

How much space do you need?
You DO NOT need a big space in order to have an organized sewing studio. While a big space might live in our dreams, I think it’s important to keep in mind that bigger spaces usually mean more distance between your various work zones. So, a smaller area might actually be more efficient — especially if it’s well thought out. Also, I’ve lived long enough to figure this out: the bigger the space, the more clutter I am apt to bring into it! AND, the more stuff I have, the more difficult it is to keep it clean and free from distractions. I think the key to a small space is to make it work efficiently for you by carefully thinking through how you set up your work zones and being very selective about the tools you bring in.
My Sewing Room Work Zones layout
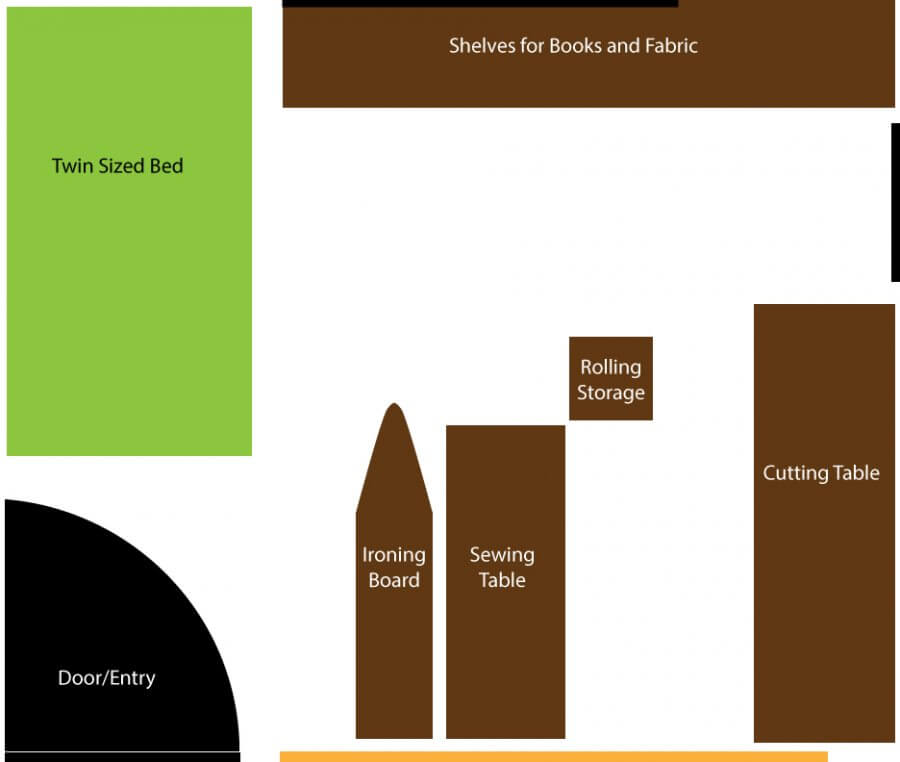 My space is a nice size, but it certainly isn’t huge. It measures approximately 11.5′ x 13′, but it also does double duty as a guest room. A twin bed sits in the corner opposite my sewing area. My room has evolved quite a bit over the last 6 or 7 years, and I’m sure it will continue to evolve. (FYI: When my son gets married next year, I hope to move the bed to his room, and would like to set up a sitting area with a TV so hubby or friends can hang out while I sew OR so I can sit there to do handwork.).
So without any more delay, let’s walk through the work zones in my sewing studio. Maybe you’ll see an idea in here that will work for you.
Sewing Work Zone 1: Pressing
If you’ve been quilting very long you know that properly pressing your fabrics and your blocks is critical to getting good results with your quilt. It’s helpful to have plenty of ironing space free from clutter. I don’t think my ironing space is large enough. I’ll tell you more about that later. Below is a photo of my main pressing station, but I actually press in two locations. The first spot is my large ironing board which sits in front of my machine. (But sometimes I move it over to the right of my machine.) 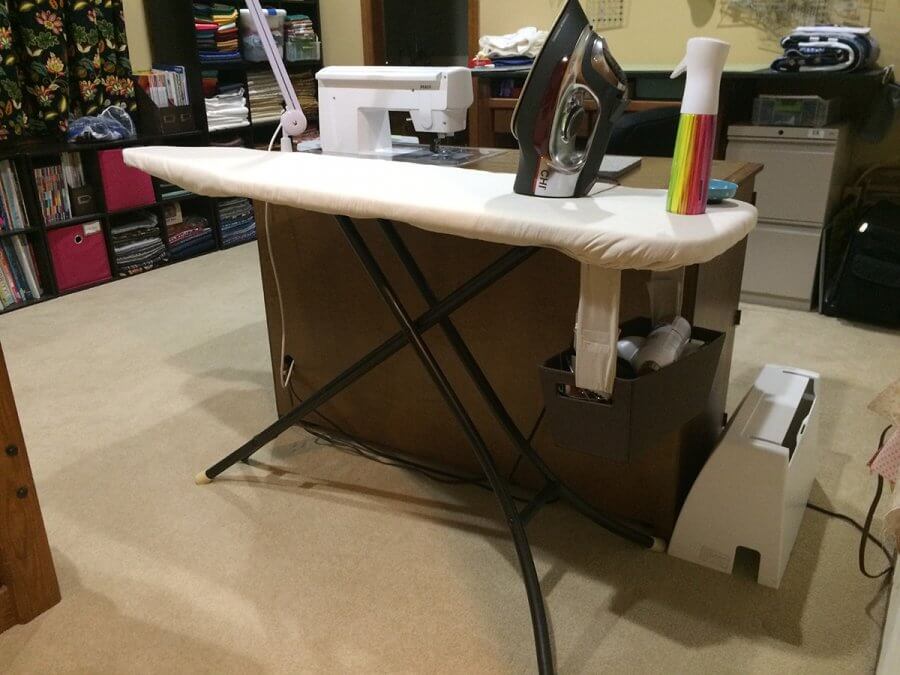 This pressing station is pretty basic and consists of an ironing board, an iron and a basket of equipment that hangs below my ironing board. The basket is held by a little strap I made from some scrap fabric and velcro that slides under the cover of the ironing board.
 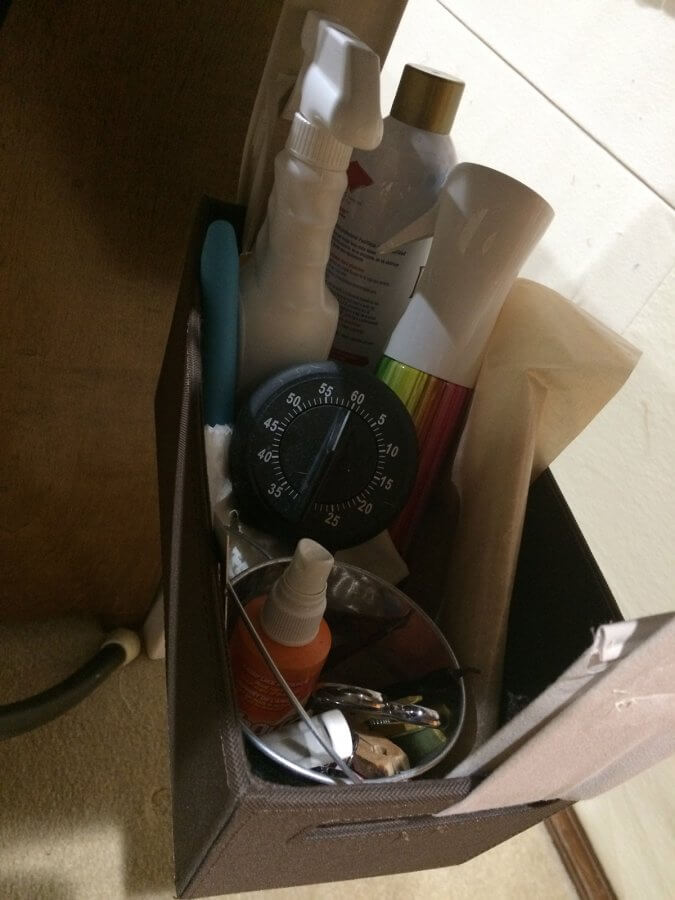 That basket contains all the little things I might need while pressing — starch, a pressing sheet, a pressing “finger,” a few clips, scissors for trimming threads, a seam ripper (need one of these EVERYWHERE!), a spray mister with water, and some iron cleaner. (Rule #2 Store stuff where you use it.) You’ll also notice I have a timer tucked away inside this basket. I’ve discovered that when I fuse interfacings to fabrics I’m a bit impatient, so it’s helpful to set a timer. This helps me apply the heat as directed – for a full 30 seconds! My Riley Blake magnetic pin cushion usually sits on a corner of my ironing board (it’s handy when pinning long rows or borders.) The magnet in this one is super strong and I don’t have any problems with the pins getting knocked onto the carpet.
 (My husband has actually commented that he envies this little magnetic dish, so I’m on the lookout for a masculine version to put in his Christmas stocking … it’s doubtful he is reading this, so I don’t think I spoiled the surprise.)

I recently purchased a new ironing board cover, as my previous one was getting scorched and faded. There are lots of pretty ones on the market, but this time around, I decided to go plain jane. While I love pretty designs, it’s become very important to me to not have visual distractions when I’m working on my quilts. I feel like I can see and evaluate my work better if I don’t have a competing design to contend with as I work. (Crazy, I know!) The feature I really like about my new cover is that it has a layer of wool built into it. Wool, in case you didn’t know, is AWESOME at radiating heat and actually helps deliver a nice clean press. The cover I purchased is made by TIVIT, is available in multiple sizes, and I’ve linked you to it in the image below: In addition to my main ironing station, I also keep a “mini” pressing station beside my sewing machine that I can pull out when I’m doing patchwork.

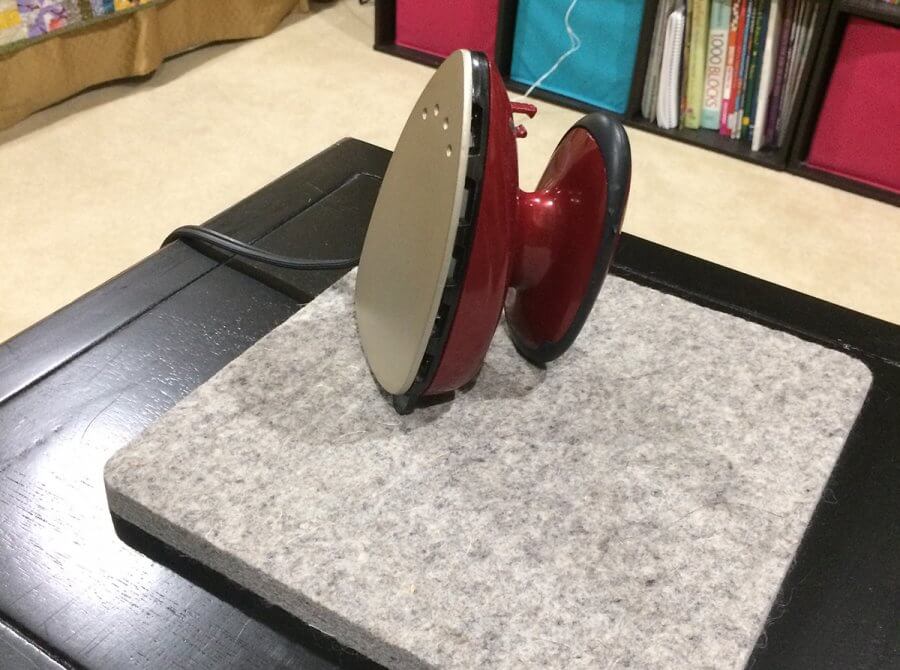
This saves me a lot of time since I don’t have to hop up and down and travel from my machine to my ironing board a jillion times. (Although, I could probably use the steps…) This mini station consists of my mini wool pressing mat and my travel iron. (The images below are linked to Amazon).


What I really need is my Jumbo Ironing Station
Earlier I stated that I wish my ironing station was larger. A few years back, I had a great ironing station setup. It was like having an ironing island right there in the middle of my room. (I’ve looked EVERYWHERE for a photo of it, but I guess I never took one, and that’s a shame because it was pretty awesome!) Unfortunately, I had to take it down because I needed the space so this room could double as a guest bedroom. (I still have all these components and hope to put it back together when we no longer need the bed in that room.) If you have the space for this kind of setup, it’s wonderful to have because the larger surface makes it easier to work with large sections of a quilt. It’s fairly easy to set up, and here is how I did it: I used two 3×2 storage cubbies and set up them up about 36″ apart from each other, tall side up. (Something like the unit shown below would work great.) Then I centered a large board (approximately 50″ x 28″) over the two units. I covered the board in several layers of batting and heat resistant fabric and then a layer of pretty fabric. I then screwed some 12″ pieces of 1″x 4″ boards underneath to act as “stoppers” so the board would stay in place between the cubbies.

My quest for the perfect iron
One last thing about my “ironing station.” Several people have asked about my iron. As a quilter I have gone through more irons than I can count, but I’ve been especially happy with the iron I am currently using. It’s a CHI, the same company that makes those wonderful flat irons you use on your hair. It gets super hot, and glides over fabric like butter. But to be totally up front, it’s not perfect. This is my 2nd CHI. The finish came off the first one when working with some fusibles for some applique. CHI replaced the iron no questions asked, so I am still a happy customer. I ordered a larger Teflon pressing sheet and will be more careful to keep my iron protected when working with fusibles. I’ve decided that there just isn’t any such thing as the perfect iron any more (and if I could get my hands on a good one made in the 1950s I’d pay good money for it!) But the CHI and me are getting along pretty good.
Update 7/16/23: I do still recommend the CHI iron, but would point out that it has a ceramic-coated plate, which can wear out over time, especially if exposed to starch and glues. These days I tend to lean towards wanting an iron with a stainless steel plate. View my Product Recommendation page to see the Rowenta iron I am currently using along with all the other ironing products that I prefer.

Sewing Work Zone 2: Cutting
This was the area that was recently giving me some trouble. Here is the before photo:
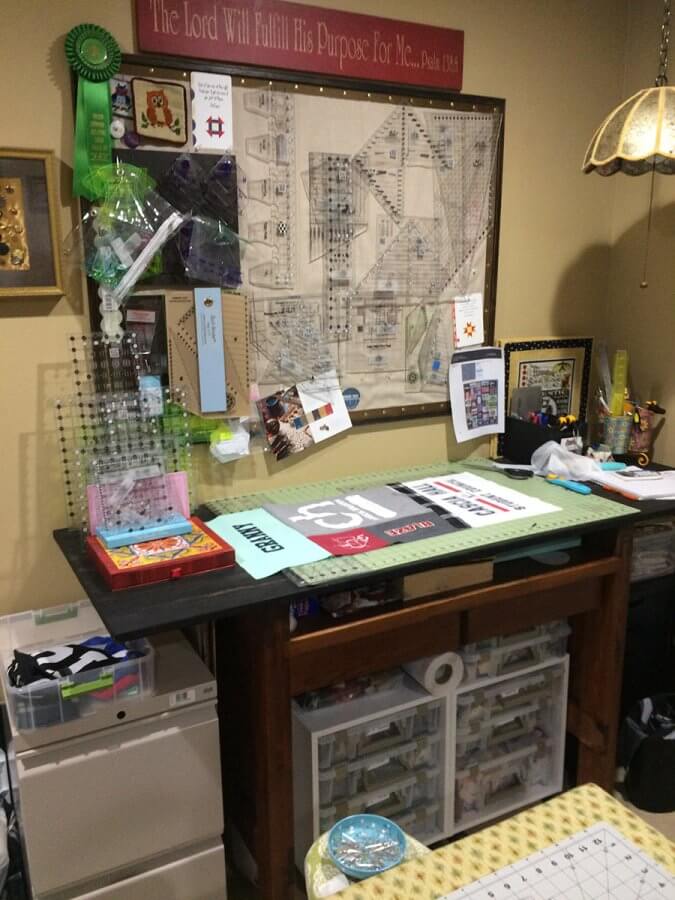
Technically, it wasn’t awful. I love my little hanging lamp in the corner (made by my husband’s grandfather, which provides great task lighting right above where I’m working!) The table is a nice size (I’ll tell you more about it later), but this set up had some issues for me. When you notice one of your zones isn’t quite right, step back and figure out what is annoying you. For me, there were two issues:
- First, the rulers wouldn’t stay up on the wall. The bulletin board was crowded and the cork in the bulletin board was beginning to deteriorate from the overuse and constant reconfiguration. The rulers would randomly fall onto my table. (Money waster. Not a good thing for a $20 ruler to fall and then crack.)
- Since I was out of space on the wall, a lot of clutter was living on my table. If I needed to trim a quilt, I first had to spend time taking everything off the surface of the table, then put it all back when I was done. (Time waster.)
I knew the solution was to make better use of the wall space and get the clutter off the table. I had seen a Pinterest post where someone had organized a craft room using an IKEA hook and rail system that was designed to hold tools in the kitchen. First, I had to purge. I sorted through all my rulers and decided it was time to part with the duplicates I wasn’t using. I looked at what I was left with and counted how many hooks would be needed. I then planned out what I thought I would need, then ordered the rails and a small pegboard system from IKEA. 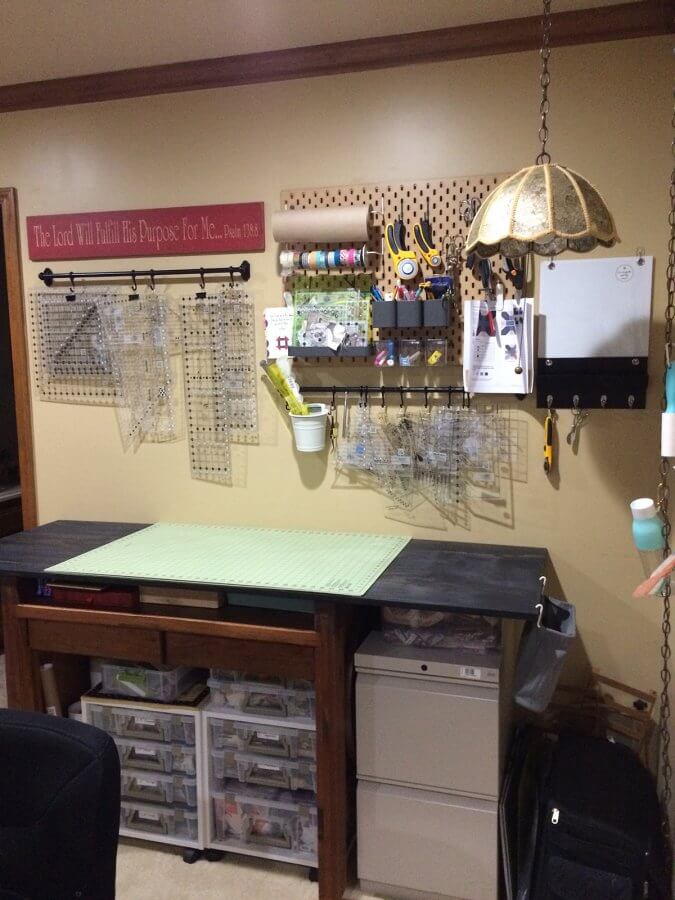 The idea was to hang all the longer rulers on the rail on the left, then hang all the smaller rulers on the rail on the right. My goal was to get EVERYTHING off the table using the pegboard. Here are the links to the items I ordered: The pegboard:
Please note, you cannot use standard peg board accessories with this pegboard. You will need to use IKEA designed pegboard accessories (but they are very well designed).

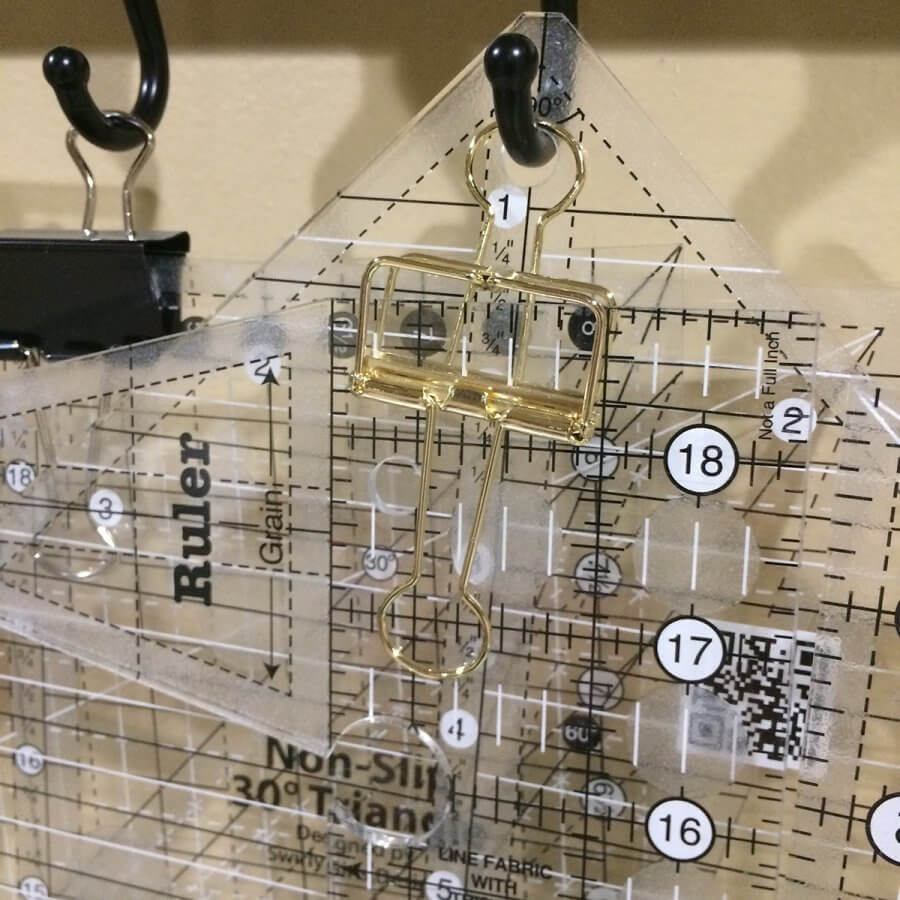
The Rails: Once the order arrived, there were a few problems. (Of course!) First, the hanging holes in some of the rulers were too small to fit over the hooks. (AARGH!) I got around that by using binder clips to hang the rulers.
 The other problem was there wasn’t really enough hanging space for all my rulers, (even after purging.) But here is what saved me: I realized that the little gray metal tray that I had ordered on a whim from IKEA to use on the pegboard would hold all the smaller rulers. It hangs at a slight angle so the small rulers naturally fall back towards the wall. Perfect. Then I found a little marker board and additional tray with hooks at Office Depot that I hung to the side. It’s working great!
 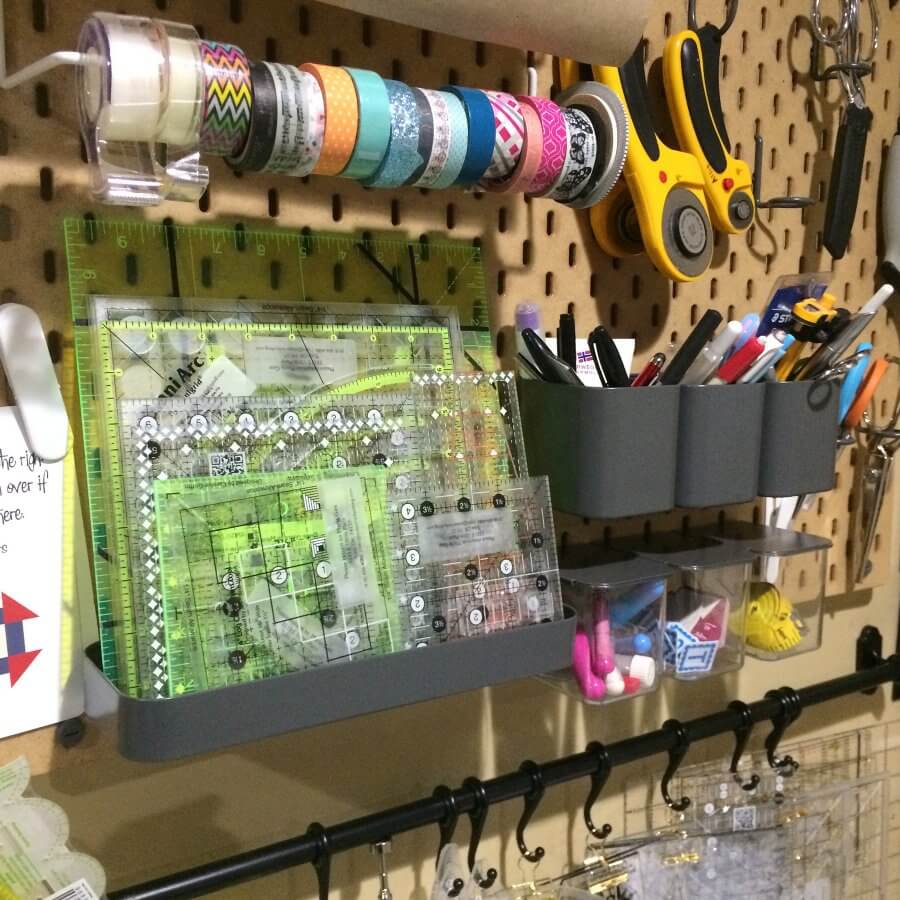 Let me tell you what else I have over here. The pegboard holds my marking utensils, my measuring tapes, my circle cutter. I had hoped to store freezer paper for applique on the roll holders, but that didn’t work. Instead, I used one of the roll holders to hold tapes (washi tape, tiger tape, glow tape for marking lines on rulers) and the other roll holder contains a roll of kraft paper, which I often use for whipping up a quick pattern or template. Of course, my rotary cutters and scissors are hanging up there, and as you can see, I was able to get all the clutter off my table! Mission accomplished! Oh, one more thing about the pegboard. I went a bit overboard when ordering accessories and I ended up with more stuff than would possibly fit on one pegboard. One of the items I bought was a little fabric sack that I thought would be great for holding scraps. I couldn’t use it on the pegboard, but it fits just perfectly on the side of the table. I’m able to swoosh the fabric to the side and it just falls into the bag! I’m loving that! Here’s a pic:
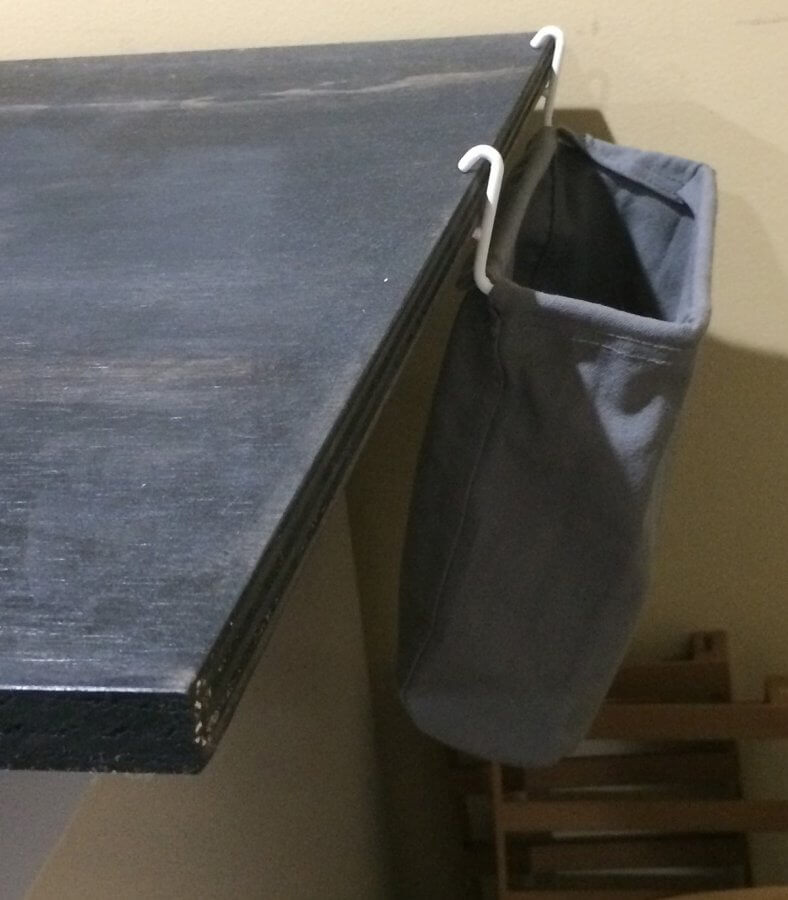

The Right Cutting Table for your Cutting Zone
Now a little about the cutting table itself, which is actually a child size desk. This was the desk that we got our son when he was about 4 years old. (Does anyone remember CARGO furniture? We have a whole set of it! We bought it 2nd hand and it’s got to be at least 35 years old. And let me tell you…It’s INDESTRUCTIBLE!) When I first started quilting, I commandeered the desk and put 4″ casters on the bottom of each leg. Now, the top surface of the desk is surrounded by a ledge, which was originally designed to attach a little storage hutch. So there are small holes in the ledge where you could insert dowels to hold the hutch. I placed a 25″ by 70″ piece of plywood on top and secured it with dowels in those holes. So, with the modifications, the table sits at a height that is perfect for me. I do think it’s important that you raise whatever table you are using so that it is a height that is ergonomically correct for you. For most of us, this height would be the measurement from the floor to the top of your hips. You should not have to hunch over to cut.
Tip: An easy way to get your table a bit higher is to invest in a good set of Bed Risers.
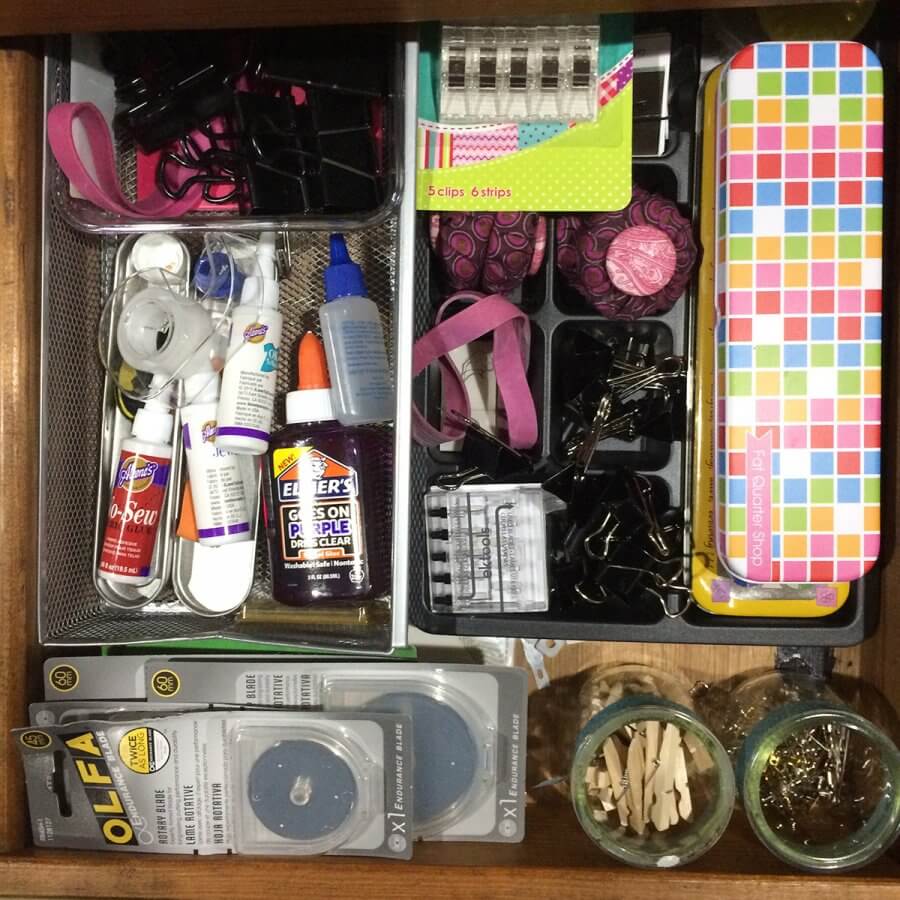
Moral: I don’t have a fancy expensive cutting table. I have something better – a piece we had outgrown that has been re-engineered to keep it useful. Before spending a lot of money, look around at what you have and see if any of it can be repurposed. Or check out garage sales and items for sale on Facebook. A little more about the desk: it has two drawers. One drawer holds spare rotary blades (Store it where you use it!) and miscellaneous notions such as glues, pattern weights, binder clips, etc. One of the metal tins holds my good curved safety pins; the other tin holds clips.

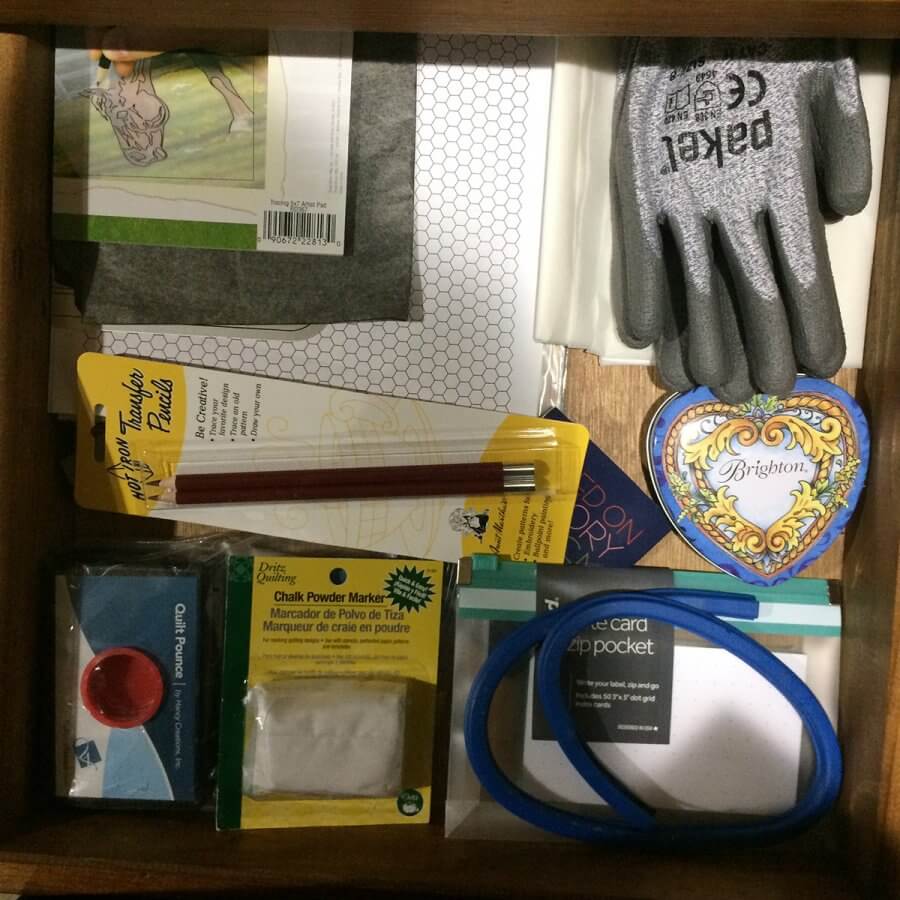
The other drawer holds some marking tools (the pounce pad I use when marking quilts), and papers that need to be stored flat (tracing paper, foundation paper, template plastic.) The little Brighton box holds bits of leftover bar soap, which is still my favorite marking utensil. And see those bizarre gray gloves? They are industrial strength cut resistant gloves. My husband bought these for me after I got a little nick from a rotary blade. (I should probably use those more often, but they are a nice reminder that hubby cares!)
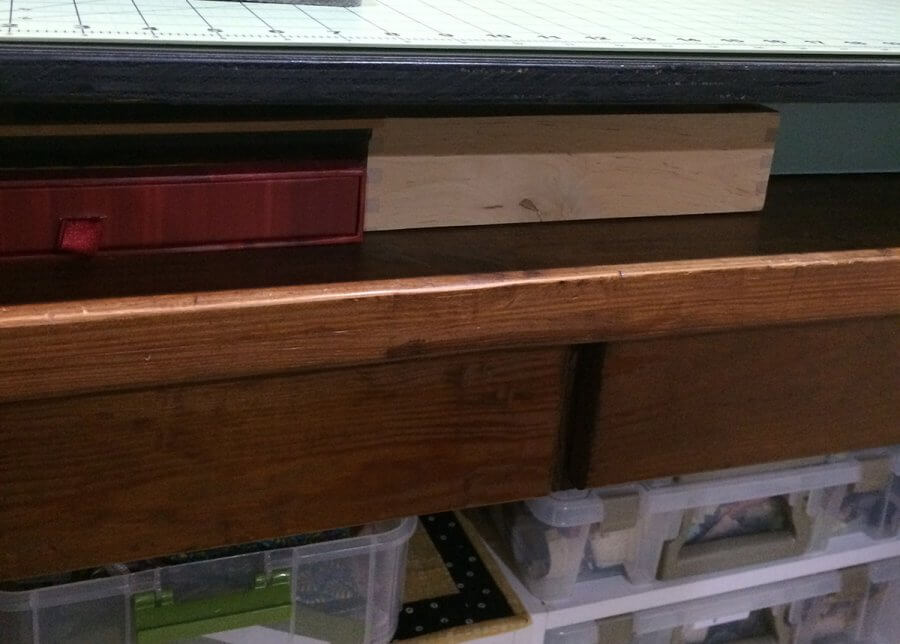
A neat little cubby area was created in the space between the drawers and the plywood top.
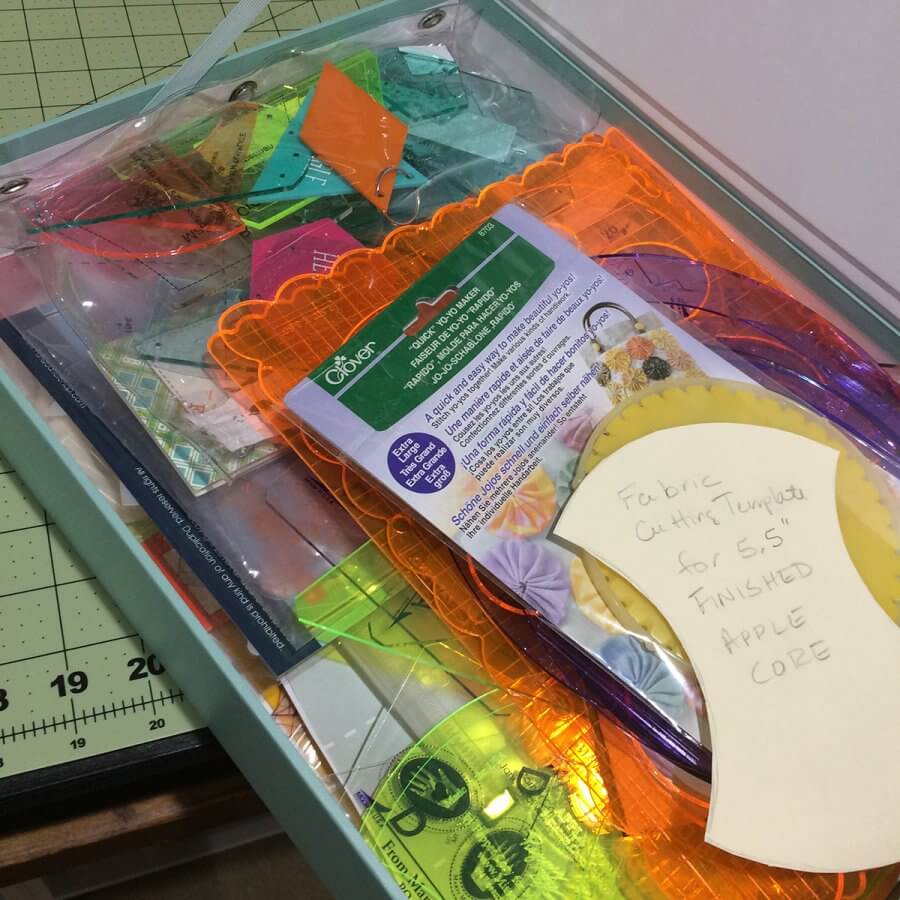
I keep several things under here: Freezer Paper, my set of Karen Buckley Square Rulers (left in photo), a wooden IKEA tray/box with a “hand sewing” kit (This can be grabbed at a moment’s notice and taken to another room.), and in the right of the photo you can see a turquoise box with my templates (mostly for applique). 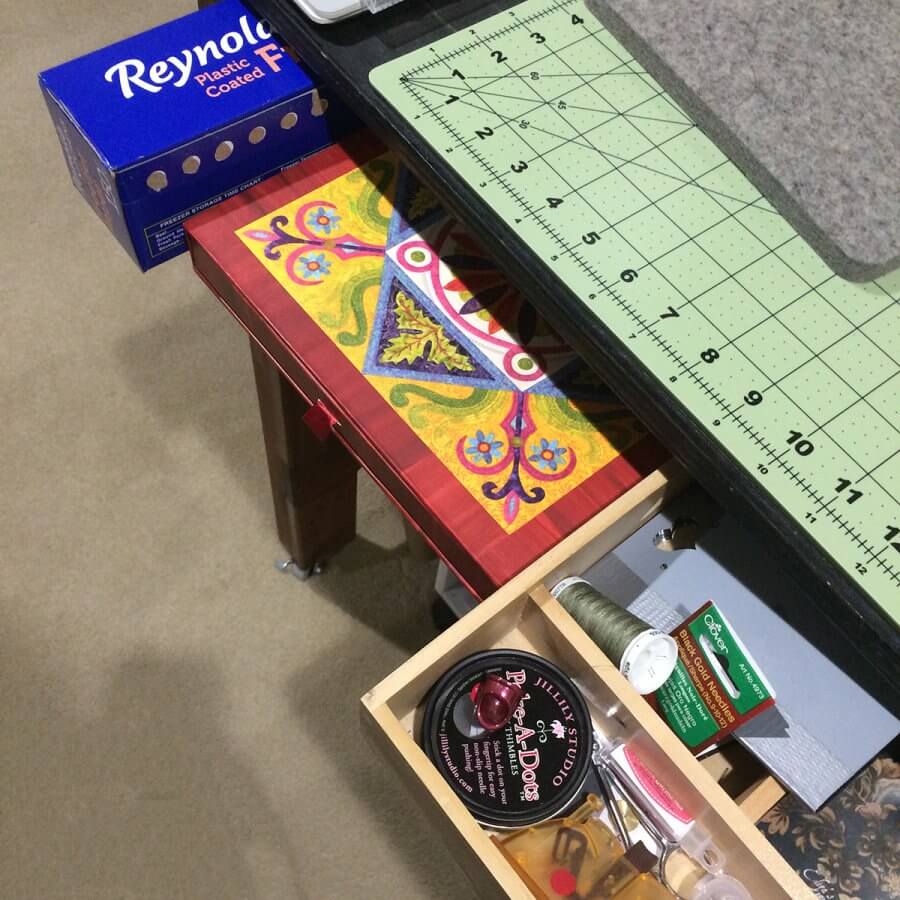
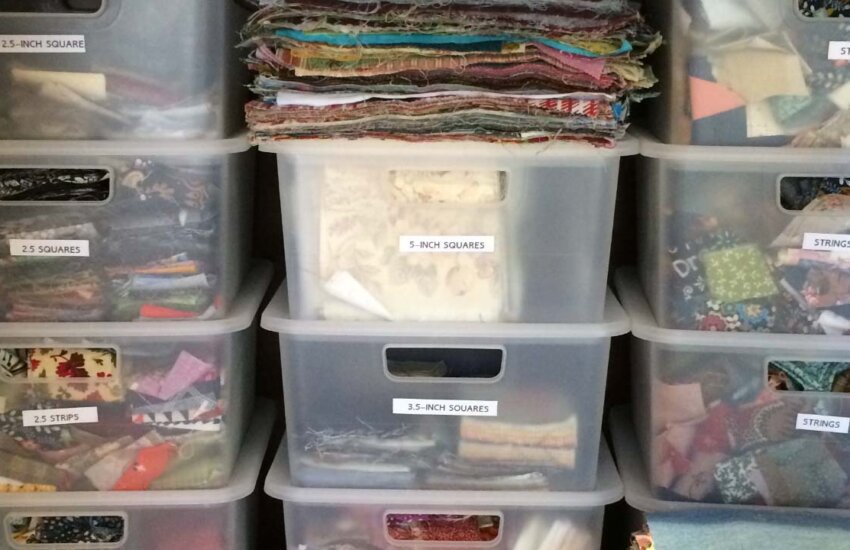
You may have noticed in earlier photos that under the desk I have two rolling carts of Artbin containers. These hold stop my scraps. I’d love to tell you about them now, but I’m absolutely worn out after walking you through those two zones. That will have to wait until I get to fabric storage in a future post. In my next post, I will show you my sewing zone. Until then…