
How to Make a String Quilt Block
Estimated reading time: 10 minutes
Hello! Last week I posted an article on how to trim and match points on string quilts, and in particular how to do this on a pattern I wrote earlier this year called the “Let’s Mingle” Quilt. There are lots of varieties of string blocks out there, and I’ve pinned quite a few on my Pinterest Board if you’d like to take a peek. Today I thought I would share a technique for how to make a string quilt block that is really simple and is a perfect introduction to foundation or paper-piecing.
It’s one of those rainy days with gentle rumbles of thunder here in northeastern Oklahoma, the kind of day I like to just linger by the window with my coffee. Hopefully, you’re having one of those kinds of days, too, and you can sit back and absorb this little tutorial. Several times on this blog I’ve mentioned my friend, Emma, who first introduced me to quilting. Today just happens to be her birthday, and thinking of her made me remember the time she showed me this technique.
Shortly after Emma had thoroughly infected me with the quilting bug, I asked her what she did with her scraps. That day, she showed me several ways to use “strings” of fabrics in quilts to use up leftover scraps from other projects. What follows below is the technique she showed me to make a string quilt block, with a few modifications that I made after playing with the concept.
But first, the legal stuff:
This post contains affiliate links, which means that if you click the links and choose to make a purchase, I may earn a commission. This commission comes at no additional cost to you but does help me earn enough to support the cost of this website. Please know that I only link to items which I personally use and feel that I can confidently endorse. Your support by clicking on these links is greatly appreciated.
And now back to the show. You will need to gather a few supplies.
Supplies you will need to make a string block:
- Tools & Notions: A marking pencil, scissors or a paper cutter, Add a Quarter Ruler, and your basic rotary cutting supplies (mat, cutter, rulers, etc.), 8.5″ Square Up Ruler, and a few long quilting pins. For a complete list of tools and notions that I prefer, see my Product Recommendation page.
- Copy paper or you can use Foundation Paper, which is a bit easier to remove from the block when you finish without damaging your seams. Below is a link to a product I have used with success:
- An assortment of quilting scraps cut at least 1.5″ and up to 2.5″ wide. These can be sub cut into various lengths, but for each block you make you will need one that is at least 12.5″ long. The remaining strips can vary in length but should be at least 3.5″ long to work for this technique.
- Approximately 1 to 1 1/2 yards of a solid fabric cut into 2.5″ strips. I typically use white, but gray and black work well, too. If all your scraps have a common color, you may want to choose that color. Anything goes. You actually don’t even have to use a solid if you don’t want to, but it’s a good idea to use a consistent fabric in this spot to pull the quilt together. (I’ll explain later) Sub-cut these into 2.5″ x 12.5″ strips.
How to Make a String Quilt Block:
These instructions will make an 8″ finished quilt block:
- Take a piece of 8.5″ x 11″ paper and cut it so that it is a perfect 8.5″ x 8.5″ square.
- Draw a dashed line that goes perfectly through the diagonal of the square on one side of the paper. On one side of this diagonal line, mark a solid line 1/4″ above your dashed line.
- On the same side where you just made a solid line, make four parallel dashed lines at 1″ intervals starting from the first dashed diagonal line that you drew.(not the solid line)
- On the other side of the diagonal, measure 2″ from the center dashed diagonal line and make another dashed line, then make two additional lines at 1″ intervals starting from the line you just made. Your marked foundation paper should like the illustration below.
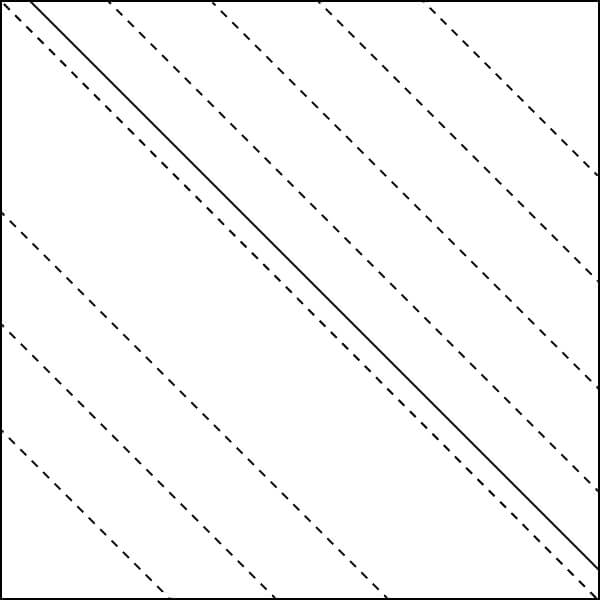
Foundation Markings for String Quilt 
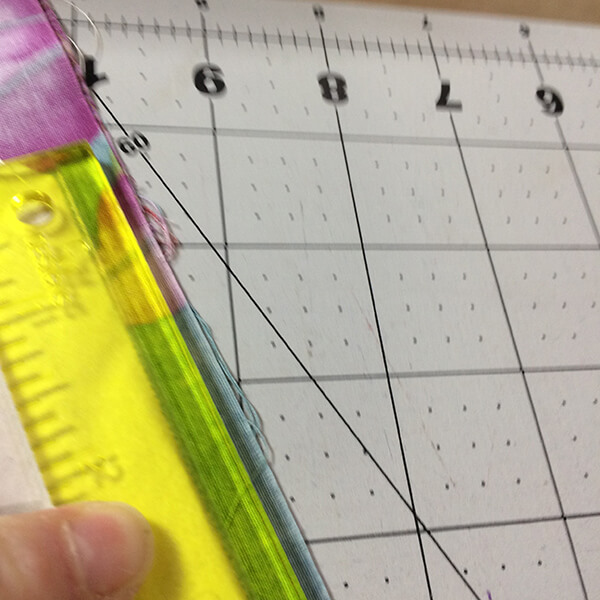
- Next, take a 2.5″ strip and a long scrap strip. Align the strips, right sides together, on the solid line you drew 1/4″ from the diagonal on the UNMARKED side of your foundation paper. Make sure the 2.5″ piece is right next to the paper, and the narrower piece is on top. Pin in place. It helps to hold them up to a light source.
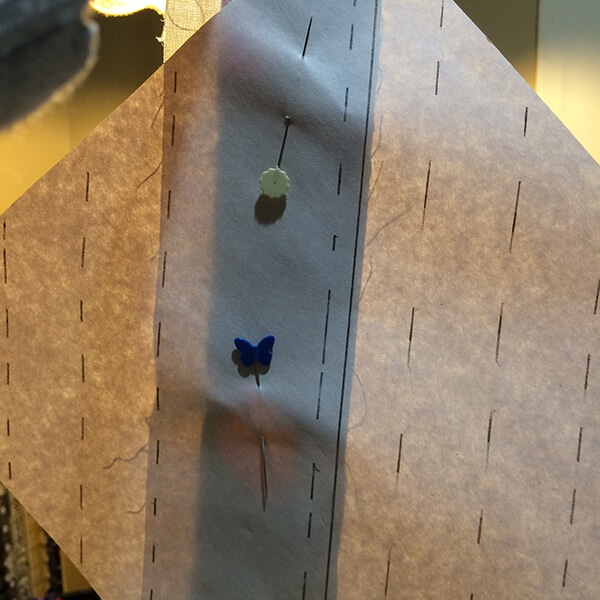 Here you can see that the pieces need to be moved over just a bit to the left so they will line up with the mark.
 - Turn your paper over so that the drawn lines are facing up. Take to your machine and, using a 1.5mm stitch length, sew along the dashed diagonal line on the foundation paper. The tighter stitches will help your seams to not fall apart when you remove the paper. (Note: you may want to practice a few times before you shorten your stitch, as they are very difficult to rip out if you make a mistake when the stitches are this tight.)
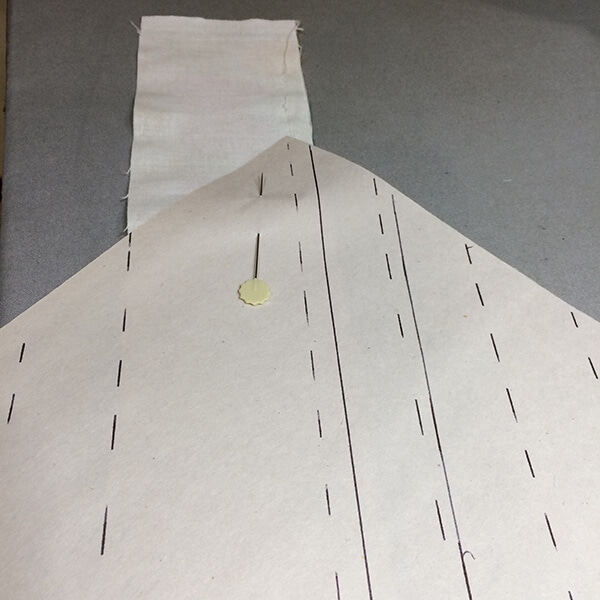
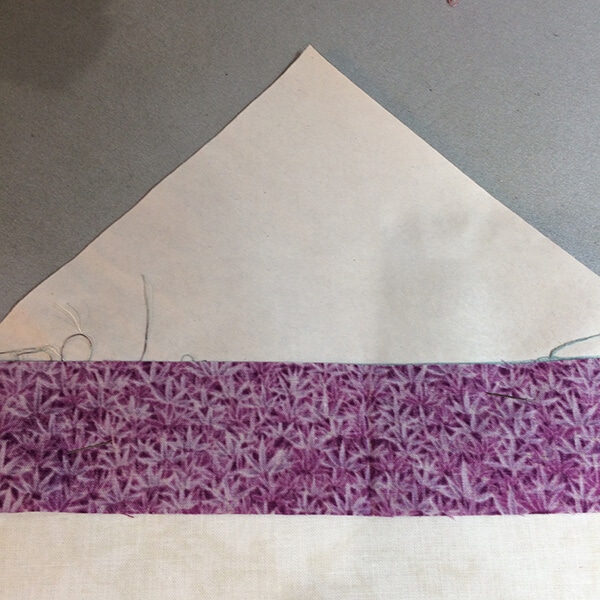
Pinned and ready to sew. Note that the wider strip is between the narrow strip and the foundation paper. - Fold the foundation paper back along the seam you just sewed. If necessary, line the lip of your “add-a-quarter” ruler along the seam, then trim away any seam allowance that extends above the ruler, so you have a nice trim 1/4″ seam. (Two things to point out here: First, you will not need to do this with the first two strips, and Two, make sure you do NOT cut your paper foundation. Always make sure it is folded back and away from where you will be cutting.)
If necessary, trim the seams down to 1/4″ - Open the fabrics that you just sewed and press flat, being careful to not stretch the fabrics.
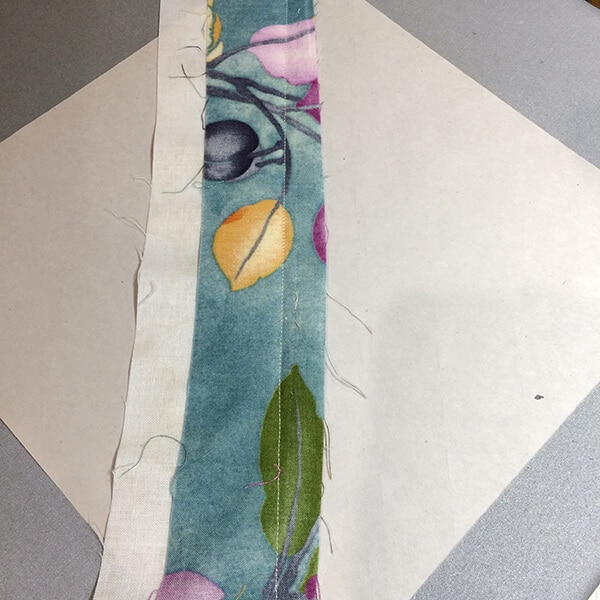
Seams pressed open - Take another scrap strip and align it, right sides together, with either edge of the strings you sewed onto the foundation. Pin, turn over, and again sew on the dashed line.
- Repeat steps 6 thru 9 until you get to the last line on each side. Notice that the strips on the outside corners of the block will need to be wider, whereas the inner scrap strips that you used could all be 1.5″
- When the entire paper is covered with fabric, trim and square up the block to 8.5″ (Unfinished). Carefully remove papers.
Some things to watch out for:
- Make sure that your two first two fabrics are lined up as perfectly as possible to the line. If they are off it will throw the other strips off. In the photo below you can see where the fabric was “bowed” across the top of the line.
Note how the fabric is bowed out over the line in the middle of the block. This one is a do over. - When you attach your final two corner stips, make certain that they are wide enough to completely cover the corner of the foundation piece.
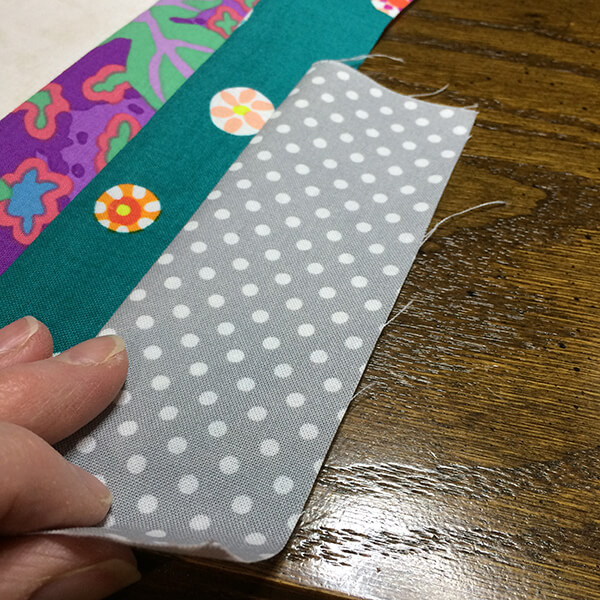
Make sure the corner piece extends all the way over the paper.
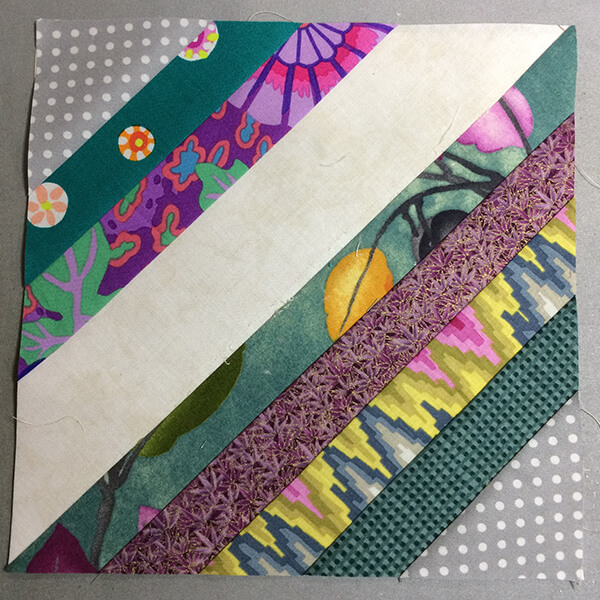
Here is my finished String Quilt Block:
Design Considerations for String Quilt Blocks:
One of the things I love about string quilts is the total randomness of the blocks and the colors, but you can get some interesting effects with just a little planning. What I like about this particular String Quilt Method is that it brings a little cohesiveness to the design. Earlier, I said that I would explain the need to use the same fabric for all of your 2.5″ strips that go along the diagonal. In the examples that follow, you will see the effect brought out by those wider strips when the blocks are put together.
Below are a couple of examples to show you the variety of effects that can be achieved.
First, here is a block with random colors except white is always used for the 2.5″ center strip.

One cool thing to do is to use more darkly saturated colors one side of the block and light/low-volume strips on the other side. Below, I used that scheme, except I plopped a dark gray at the corner of my light side.

Grouped together, here is how that looks:

So, play around with the concept and see what kind of beauty you can create. As a bonus for all of you who stuck with me to the end of this postl, I have a free gift for you. Click here to view the String Quilt Block entry in the Quilt Block Library, where you can download a String Quilt Coloring Sheet that you can use to plan your next String Quilt Project!

