

How to Paper-piece a Quilt Block {aka Foundation-piecing}
Estimated reading time: 8 minutes
Some of the most stunning quilt designs I have seen are achieved with paper-piecing (also known as foundation piecing.) I have a whole Pinterest Board section dedicated to paper-pieced quilts. If you’d like to see some really intricate, jaw-dropping quilts, check it out. In today’s post, I’m going to explain how to paper-piece a quilt block. It’s the perfect technique to achieve incredible accuracy in your quilts. Even if you never plan to make an intricate Feathered Star quilt, knowing how to do a little paper-piecing is a good skill to have in your toolbox.
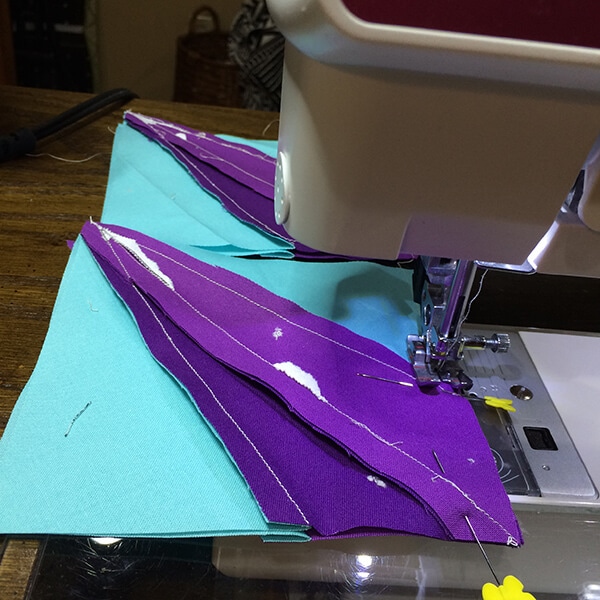
So, first let’s define paper-piecing. I like to call it “Sewing on the line.” In a nutshell, it’s where the fabrics are stitched down on a piece of paper where the design has been drawn or printed. You line the fabrics up on the back of the template, and (like I said) you sew on the line! And because you stitch exactly on the line of the design the technique tends to be incredibly precise even for those with little patchwork experience. Having said that, there is still room for error if you haven’t yet gotten the knack of sewing a very straight seam. You will also need to be careful to sew EXACTLY on and EXACTLY up to the lines in the design.
The pros and cons of paper-piecing
Convinced this is for you? If you want precision piecing, then you need to learn how to paper-piece a quilt block. It’s definitely the way to go. But I should warn you that there are a few downsides. The first is that paper piecing is going to waste some fabric. Due to the very nature of the technique, pieces will need to be cut much larger than you might think, and then the excess is trimmed away. Also, paper piecing is a bit slower, especially when you are starting out. Once you get your head around it, it will go faster and you will find ways to chain piece sections so that you can speed up the process. But you won’t ever be able to get around the fact that after each seam, you will need to fold the paper, trim the seam, then press it open. Yet even if all of it is a bit time consuming, the results don’t lie: it’s precise!
Another tricky part of paper-piecing is that it’s easy to get things turned around because your fabrics are on the underside of your templates, and actually, the templates are reverse (mirror) images of the finished unit. I actually forgot about this when I made the test block for this pattern. So, you have to get your head around this when it comes to where you place your fabrics. You’ll see what I mean when you get to the end of this post.
Let’s learn how to paper-piece!
Let’s get started with a very simple block. For this tutorial, we are going to learn how to paper-piece the Job’s Trouble Quilt Block. Hop over to that page in the library and grab the free template download and we will get started.
How to paper-piece a block:
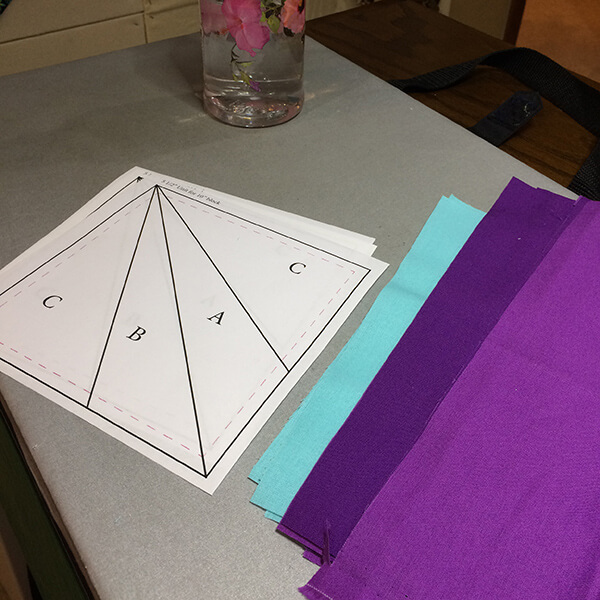
- With most paper-pieced blocks you will start off by creating your foundation papers. You will need access to either a copier or tracing paper. Print the template four times as directed in the download, then trim around the heavy black line. Do not trim on the red dashed line, which indicates your seam allowances.
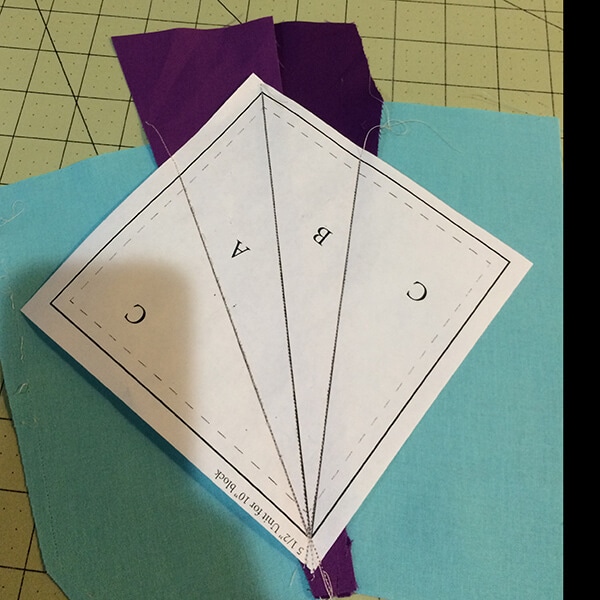
- Next, you will need to cut your fabrics. Most paper-pieced blocks will provide you with a cutting chart that indicates what sizes of fabrics you will need to cut. Do not be deceived by the size or shape of the piece in the template. Because the fabric is often sewn and then flipped at an angle, the fabric piece often needs to be much larger than you might expect. So, cut the fabrics as directed in the cutting chart in the download. I will sometimes even cut them a tad bigger. Here are my fabrics and templates ready to go:
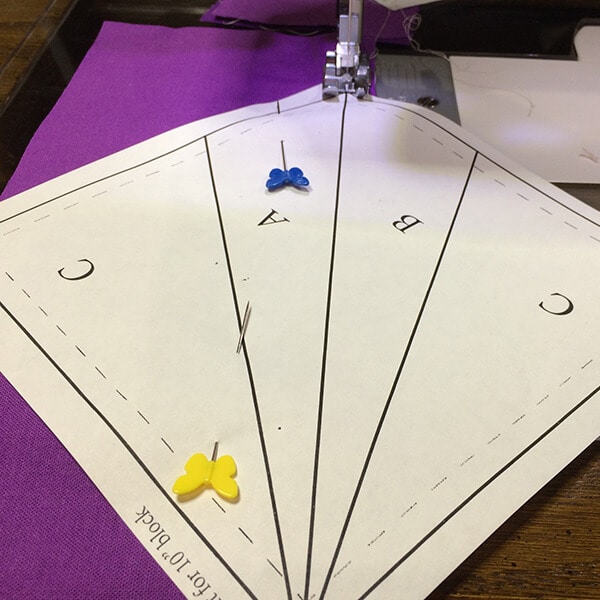
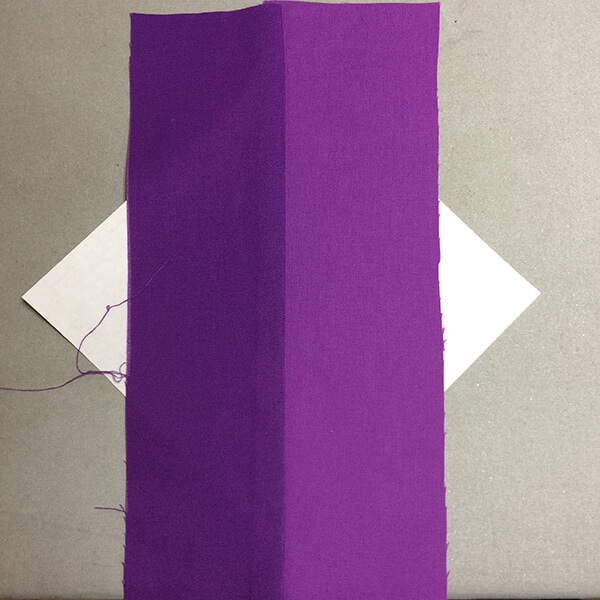
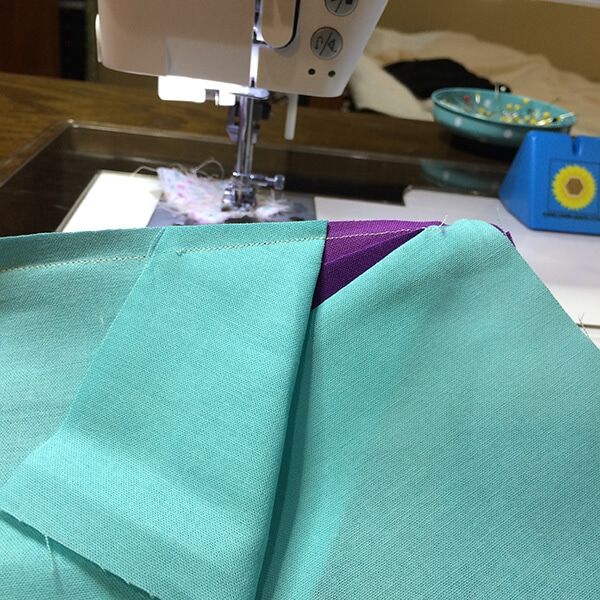
I should point out that pressing is pretty important with paper-piecing. If the pieces are not pressed open properly, when you sew the next piece over them you could end up with a problem. I should also point out that pinning is really important, too. Here I tried to get by with only one pin, and suffered the consequences of having to rip and redo:
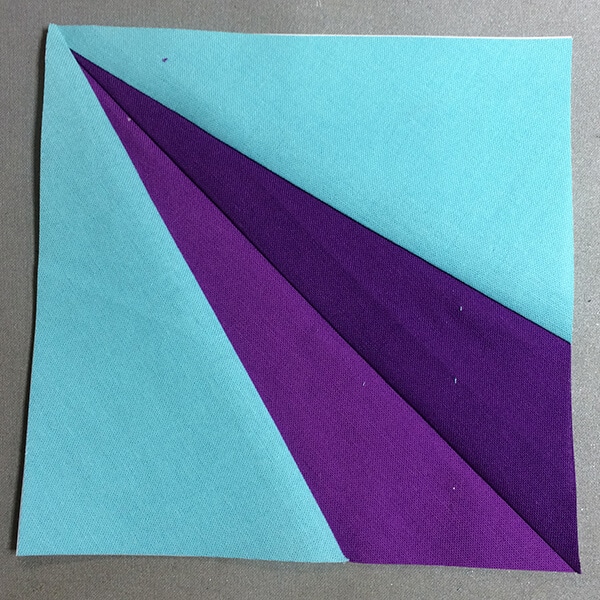
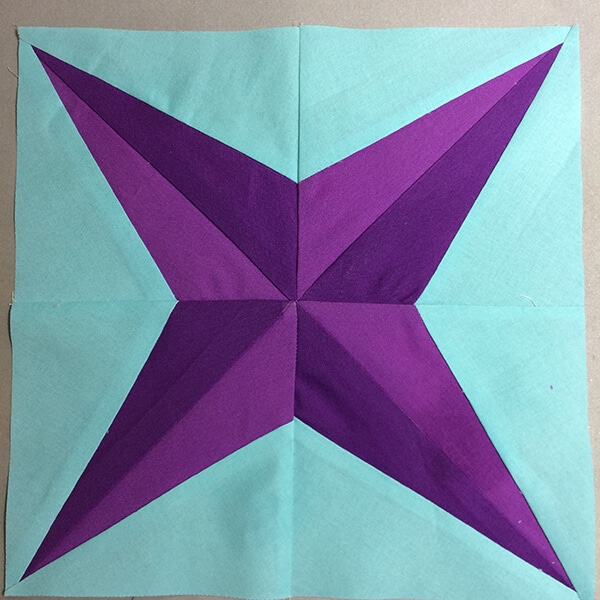
After I made my block I realized that I got the lights and darks. A little investigation resulted in me realizing that I had them marked wrong in the pattern. Fixed now, though.
You may notice that I took the papers out before sewing the templates together because I get tired of the bulk. You can remove your papers either at the end of step 7 or 8. I’m told that some people just leave their papers in the quilt, to be absorbed into the batting over time as the quilt is washed and used. But for me, I’d prefer to take them out.
One last tip about paper-piecing. Your sewing machine needle is working extra duty to go through the paper and all those layers of fabric, so it’s a good idea to change your needle after a lot of paper-piecing. (One block probably isn’t going to kill it, but needles are cheap and repairs to sewing machines from damaged needles can be expensive.)
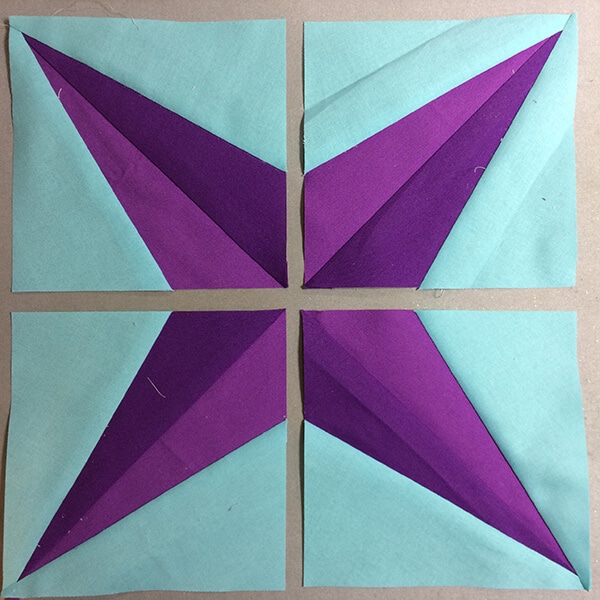
Well, I hope you enjoyed learning how to paper-piece a quilt block. If you enjoyed making this block, you might enjoy making some other paper-pieced blocks, such as the Hosanna Block. Even though I got the colors reversed, I’m happy with my block, and can’t wait to put it into my Heart Sampler!

