

Candy Stripe Units
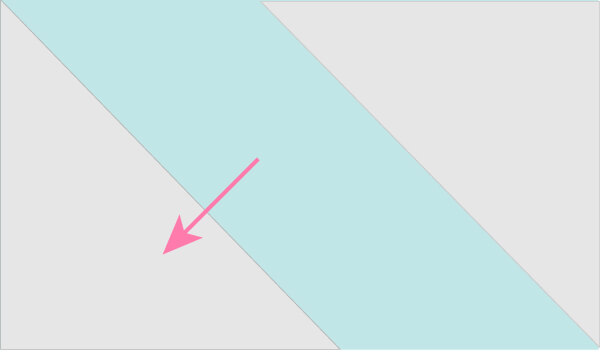
What I call a Candy Stripe Unit in quilt block construction is when you have a parallelogram flanked by two right triangles. The resulting unit is a rectangle. You often see parallelograms in blocks that required Y seams.
Below are a few quilt blocks that have parallelograms in their designs:


There are two ways to approach constructing these units. The first way is to divide the parallelograms into two Half Square Triangles. Many times this will be the best method, as the Candy Stripe Unit method doesn’t always lend itself to every design.

Pair of HSTs that when joined will make a parallelogram
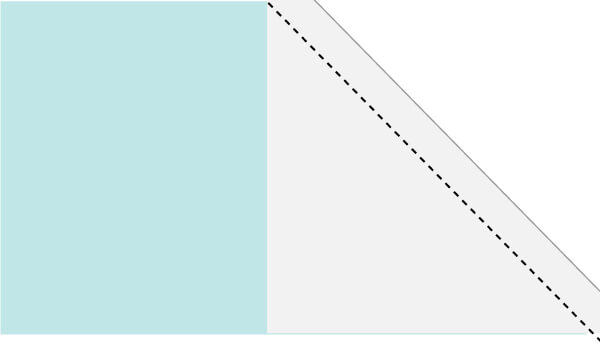
Another approach to making Candy Stripe Units is to make them using a Quick Corner method. This technique is similar to how Quick Corner Flying Geese are made, except that the 2nd corner is stitched down parallel to the first corner. The rotary cutting measurements for each piece are identical to how you would cut Flying Geese pieces when using the Quick Corner method. (You can use the cutting chart located on the Flying Geese Basic Units page.)
As shown in the chart, you will need to cut 1 base and 2 small square for each unit that you make. After you cut your pieces, draw a line down the diagonal of your two small squares. Then sew the pieces following the steps below:
Step 1: With right sides together, align the first small square to one side of the rectangular base. Stitch on the diagonal line.

Step 2: Trim
Step 3: Press stitched fabric open.

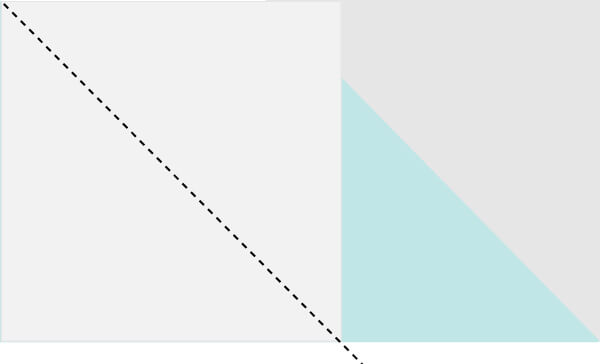
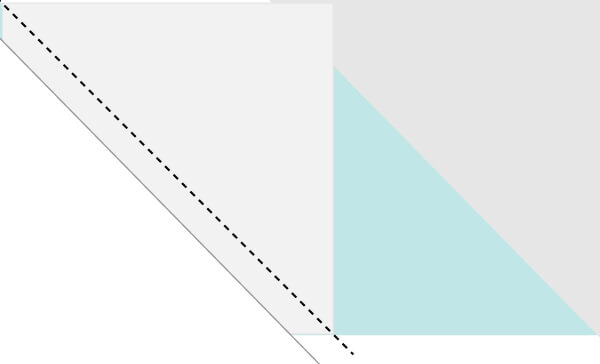
Step 4: With right sides together, align the second small square to the other side of the rectangular base, making sure that the drawn diagonal line is parallel to the stitched diagonal line of the other small square.
Step 5: Trim
Step 6: Press stitched fabric open.
-
Quilt Block Patterns
-
- 4 Patch Quilt Block Unit
- 9 Patch Quilt Block Unit
- Candy Stripe Units
- Corner Beam Quilt Block Unit
- Drunkard's Path Quilt Block
- Flying Geese Units
- Half Square Triangle Units
- Quarter Square Triangle Units
- Rail Fence Block Unit
- Snowball Quilt Block Unit
- Split Rectangle Quilt Block Units
- Square in a Square Unit
- V Quilt Block (Basic Unit)
- Y-Block Quilt Block Unit
-
- 4 Patch Quilt Block Unit
- Alaska Quilt Block
- Annie's Choice Quilt Block
- Anvil Quilt Block
- Arkansas Crossroads Quilt Block
- Around the World Quilt Block
- Art Square Quilt Block
- Attic Window Quilt Block (Version 2)
- Autumn Tints Quilt Block
- Battleground Quilt Block
- Big Dipper Quilt Block
- Blockade Quilt Block
- Bouquet Quilt Block
- Bowtie Quilt Block
- Bread Basket Quilt Block
- Brickwork Quilt Block
- Bright Hopes Quilt Block
- Broken Dishes Quilt Block
- Buzzard Roost Quilt Block
- Cactus Bud Quilt Block
- Checkerboard Quilt Block
- Clay's Choice Quilt Block
- Cotton Reels Quilt Block
- Diamond in a Square (4 Patch variation)
- Double Cross Quilt Block
- Double Windmill Quilt Block
- Double X Quilt Block - Version 2
- Dutchman's Puzzle Quilt Block
- Eight Hands Around Quilt Block
- Fancy Stripe Quilt Block
- Fanny's Favorite Quilt Block
- Flutterby Quilt Block
- Flying Dutchman Quilt Block
- Flying Kite Quilt Block (aka Spinning Wheel Quilt Block)
- Four H Quilt Block
- Four Little Baskets Quilt Block
- Four X’s Quilt Block
- Gentleman's Fancy Quilt Block
- Grandmother's Cross Quilt Block
- Hosanna Quilt Block
- Hourglass Quilt Block
- Hovering Hawks Quilt Block
- Idaho Quilt Block
- Indian Hatchet Quilt Block
- Jewel Quilt Block
- Johnny Round the Corner Quilt Block
- Kansas Dugout Quilt Block
- Laurel Wreath Quilt Block
- May Basket Quilt Block
- Mexican Cross Quilt Block
- Mothers Dream Quilt Block
- Mrs. Taft's Choice Quilt Block
- Nancy's Fancy Quilt Block
- Oh Susannah Quilt Block
- Old Maid's Puzzle Quilt Block
- Petal Dresden Plate Quilt Block
- Pinwheel Geese Quilt Block
- Pinwheel Quilt Block
- Puss in the Corner Quilt Block
- Rail Fence Quilt Block
- Right and Left Quilt Block
- Road to Oklahoma Quilt Block
- Scrappy Acorn Quilt Block
- Snail's Trail Quilt Block
- Streak of Lightning Quilt Block
- Swallow Quilt Block
- Tall Ship Quilt Block
- Tea Leaf Quilt Block
- Tipper Canoe and Tyler Too Quilt Block
- Tobacco Leaf Quilt Block
- Whirlwind Quilt Block
- Show all articles (56) Collapse Articles
-
- 54-40 or Fight Quilt Block
- 9 Patch Quilt Block Unit
- Air Castle Quilt Block
- Album Cross Quilt Block
- Antique Tile Quilt Block
- Apple Pie Quilt Block
- Attic Window Quilt Block
- Baby Basket Quilt Block
- Birds in the Air Quilt Block
- Broken Wheel Quilt Block
- Calico Puzzle Quilt Block
- California Quilt Block
- Card Trick Quilt Block
- Cats Cradle Quilt Block
- Chocolate Cake Quilt Block
- Churn Dash Quilt Block
- Clown's Choice Quilt Block
- Contrary Wife Quilt Block
- Corn and Beans Quilt Block
- Darting Bird Quilt Block
- Double Nine-Patch Quilt Block
- Dumbbell Quilt Block
- Eccentric Star Quilt Block
- Economy Quilt Block
- Fancy Contrary Wife Quilt Block
- Five Spot Quilt Block
- Friendship Star Quilt Block
- Grecian Square Quilt Block
- Greek Cross Quilt Block
- Honey Bee Quilt Block
- Idaho Beauty Quilt Block
- Indian Puzzle Quilt Block
- Jacob's Ladder Quilt Block
- Kansas Star Quilt Block
- London Steps Quilt Block
- Love in a Mist Quilt Block
- Maple Leaf Quilt Block
- Maple Star Quilt Block
- Missouri Star Quilt Block
- Ohio Star Quilt Block
- Pineapple Star Quilt Block
- Practical Orchard Quilt Block
- Road to California Quilt Block
- Rolling Stone Quilt Block
- Sawtooth Quilt Block
- Scotty Dog Quilt Block
- Shoofly Quilt Block
- Simple Flower Basket Quilt Block
- Spool Quilt Block
- Squash Blossom Quilt Block
- Star Variation Quilt Block
- Steps to the Altar Quilt Block
- Summer Winds Quilt Block
- Swing-in-the-Center Quilt Block
- Tulip Lady Fingers Quilt Block
- Tumble Dry Quilt Block
- Twin Star Quilt Block
- Union Square Quilt Block
- Weathervane Quilt Block
- Wonky Stars Quilt Block
- Wyoming Valley Quilt Block
- Show all articles (46) Collapse Articles
-
- Alaska Homestead Quilt Block
- Alaska Territory Quilt Block
- Album (5 Patch) Quilt Block
- Bird's Nest Quilt Block
- Cain and Abel Quilt Block
- Crazy Ann Quilt Block
- Cross and Crown Quilt Block
- Dakota Gold Quilt Block
- David and Goliath Quilt Block
- Domino Chicken Foot Quilt Block
- Double Irish Chain Quilt Block
- Double Wrench Quilt Block
- Double X Quilt Block (Version 1)
- Duck and Ducklings Quilt Block
- Eagle Quilt Block
- Farmer's Daughter Quilt Block
- Follow the Leader Quilt Block
- Fool's Square Quilt Block
- Four X Star Quilt Block
- Garden of Eden Quilt Block
- Georgia Quilt Block
- Goose in the Pond Quilt Block
- Grandmother's Choice Quilt Block
- Grandmother's Puzzle Quilt Block
- Grape Basket Quilt Block
- Grapevine Quilt Block
- Handy Andy Quilt Block
- Hartford Quilt Block
- Jack in the Box Quilt Block
- Joseph's Coat Quilt Block
- King David's Crown Quilt Block
- King's Crown Quilt Block
- Lady of the Lake Quilt Block
- Memory Quilt Block
- Minnesota Quilt Block
- Missouri Puzzle Quilt Block
- Oregon Quilt Block
- Single Wedding Ring Quilt Block
- Sister's Choice Quilt Block
- Star & Cross Quilt Block
- Tent of Armageddon Quilt Block
- Wedding Rings Quilt Block
- Wishing Ring Quilt Block
- X Plus Quilt Block
- Show all articles (29) Collapse Articles
-
- Basket Weave Quilt Block
- Cabin in the Cotton Quilt Block
- City Streets Quilt Block
- Courthouse Steps Quilt Block
- Curvy Log Cabin Quilt Block
- Heart Quilt Blocks
- Log Cabin Quilt Block
- London Stairs Quilt Block
- London Steps Quilt Block
- Pineapple Quilt Block
- Plus Sign Quilt Block
- Square Red Cross Quilt Block — a.k.a. The Plus Sign Quilt Block
- String Quilt Block
-
- Airplane Quilt Block
- Barn Quilt Block
- Bouquet Quilt Block
- Butterfly Quilt Block
- Cain and Abel Quilt Block
- Cat Quilt Block
- Church Quilt Block
- Eagle Quilt Block
- Easy Star Quilt Block (6" Finished)
- Flutterby Quilt Block
- Hosanna Quilt Block
- House Quilt Block
- Hovering Hawks Quilt Block
- Job's Troubles Quilt Block
- Maple Leaf Quilt Block
- Pumpkin Quilt Block (Assorted Variations)
- Rose of Sharon Block
- Scotty Dog Quilt Block
- Spool Quilt Block
- Swallow Quilt Block
- Swan Quilt Block
- Tall Ship Quilt Block
- Show all articles (7) Collapse Articles
- Air Castle Quilt Block
- Airplane Quilt Block
- Alaska Homestead Quilt Block
- Alaska Quilt Block
- Alaska Territory Quilt Block
- Album (5 Patch) Quilt Block
- Album Cross Quilt Block
- Annie's Choice Quilt Block
- Antique Tile Quilt Block
- Anvil Quilt Block
- Apple Pie Quilt Block
- Arkansas Crossroads Quilt Block
- Around the World Quilt Block
- Art Square Quilt Block
- Attic Window Quilt Block
- Attic Window Quilt Block (Version 2)
- Baby Basket Quilt Block
- Barn Quilt Block
- Basket Weave Quilt Block
- Bat Wing Quilt Block
- Battleground Quilt Block
- Bear's Paw Quilt Block
- Bird's Nest Quilt Block
- Birds in the Air Quilt Block
- Bouquet Quilt Block
- Bowtie Quilt Block
- Bread Basket Quilt Block
- Brickwork Quilt Block
- Broken Wheel Quilt Block
- Butterfly Quilt Block
- Buzzard Roost Quilt Block
- Cabin in the Cotton Quilt Block
- Cactus Bud Quilt Block
- Cain and Abel Quilt Block
- Calico Puzzle Quilt Block
- California Quilt Block
- Card Trick Quilt Block
- Cat Quilt Block
- Cats Cradle Quilt Block
- Checkerboard Quilt Block
- Chocolate Cake Quilt Block
- Church Quilt Block
- Churn Dash Quilt Block
- City Streets Quilt Block
- Clay's Choice Quilt Block
- Clown's Choice Quilt Block
- Contrary Wife Quilt Block
- Corn and Beans Quilt Block
- Corner Beam Quilt Block Unit
- Country Roads Quilt Block
- Courthouse Steps Quilt Block
- Crazy Ann Quilt Block
- Cross and Crown Quilt Block
- Curvy Log Cabin Quilt Block
- Dakota Gold Quilt Block
- Darting Bird Quilt Block
- David and Goliath Quilt Block
- Domino Chicken Foot Quilt Block
- Double Cross Quilt Block
- Double Irish Chain Quilt Block
- Double Nine-Patch Quilt Block
- Double Windmill Quilt Block
- Double Wrench Quilt Block
- Double X Quilt Block - Version 2
- Double X Quilt Block (Version 1)
- Dove in a Window Quilt Block
- Dresden Blade Quilt Block
- Duck and Ducklings Quilt Block
- Dumbbell Quilt Block
- Dutchman's Puzzle Quilt Block
- Eagle Quilt Block
- Easy Star Quilt Block (6" Finished)
- Eccentric Star Quilt Block
- Economy Quilt Block
- Eight Hands Around Quilt Block
- Fair Play Quilt Block
- Fancy Contrary Wife Quilt Block
- Fanny's Favorite Quilt Block
- Farmer's Daughter Quilt Block
- Five Spot Quilt Block
- Flutterby Quilt Block
- Flying Dutchman Quilt Block
- Flying Kite Quilt Block (aka Spinning Wheel Quilt Block)
- Follow the Leader Quilt Block
- Fool's Square Quilt Block
- Four Little Baskets Quilt Block
- Four Queens Quilt Block
- Four X Star Quilt Block
- Four X’s Quilt Block
- Friendship Star Quilt Block
- Garden of Eden Quilt Block
- Gentleman's Fancy Quilt Block
- Georgia Quilt Block
- Goose in the Pond Quilt Block
- Grandmother's Choice Quilt Block
- Grandmother's Cross Quilt Block
- Grandmother's Puzzle Quilt Block
- Grape Basket Quilt Block
- Grapevine Quilt Block
- Grecian Square Quilt Block
- Greek Cross Quilt Block
- Handy Andy Quilt Block
- Hartford Quilt Block
- Heart Quilt Blocks
- Hens and Chickens Quilt Block
- Honey Bee Quilt Block
- Hourglass Quilt Block
- House Quilt Block
- Hovering Hawks Quilt Block
- Idaho Beauty Quilt Block
- Idaho Quilt Block
- Indian Hatchet Quilt Block
- Indian Puzzle Quilt Block
- Jack in the Box Quilt Block
- Jacob's Ladder Quilt Block
- Johnny Round the Corner Quilt Block
- Joseph's Coat Quilt Block
- Kansas Dugout Quilt Block
- Kansas Star Quilt Block
- King David's Crown Quilt Block
- King's Crown Quilt Block
- Lady of the Lake Quilt Block
- Laurel Wreath Quilt Block
- Lincoln's Platform Quilt Block
- Log Cabin Quilt Block
- London Stairs Quilt Block
- London Steps Quilt Block
- Love in a Mist Quilt Block
- Lover's Tiff Quilt Block
- Maple Leaf Quilt Block
- Maple Star Quilt Block
- May Basket Quilt Block
- Memory Quilt Block
- Mexican Cross Quilt Block
- Minnesota Quilt Block
- Missouri Puzzle Quilt Block
- Missouri Star Quilt Block
- Mothers Dream Quilt Block
- Mrs. Taft's Choice Quilt Block
- Nancy's Fancy Quilt Block
- Navajo Quilt Block
- Oh Susannah Quilt Block
- Ohio Star Quilt Block
- Old Maid's Puzzle Quilt Block
- Orange Peel Quilt Block
- Oregon Quilt Block
- Petal Dresden Plate Quilt Block
- Pineapple Quilt Block
- Pineapple Star Quilt Block
- Pinwheel Geese Quilt Block
- Pinwheel Quilt Block
- Plus Sign Quilt Block
- Polka Dot Quilt Block
- Practical Orchard Quilt Block
- Prickly Pear Quilt Block
- Pullman Puzzle Quilt Block
- Pumpkin Quilt Block (Assorted Variations)
- Puss in the Corner Quilt Block
- Queen Victoria's Crown Quilt Block
- Rail Fence Block Unit
- Rail Fence Quilt Block
- Road to California Quilt Block
- Road to Oklahoma Quilt Block
- Robbing Peter to Pay Paul Quilt Block
- Rolling Stone Quilt Block
- Sawtooth Quilt Block
- Scotty Dog Quilt Block
- Shoofly Quilt Block
- Simple Flower Basket Quilt Block
- Single Wedding Ring Quilt Block
- Sister's Choice Quilt Block
- Snail's Trail Quilt Block
- Snowy Windows Quilt Block
- Split Rectangle Quilt Block Units
- Spool Quilt Block
- Square Red Cross Quilt Block — a.k.a. The Plus Sign Quilt Block
- Squash Blossom Quilt Block
- Star & Cross Quilt Block
- Star Variation Quilt Block
- Steps to the Altar Quilt Block
- Summer Winds Quilt Block
- Swallow Quilt Block
- Swan Quilt Block
- Swing-in-the-Center Quilt Block
- Tall Ship Quilt Block
- Tea Leaf Quilt Block
- Tent of Armageddon Quilt Block
- Tipper Canoe and Tyler Too Quilt Block
- Tobacco Leaf Quilt Block
- Tulip Lady Fingers Quilt Block
- Twin Star Quilt Block
- Union Square Quilt Block
- Walls of Jericho Quilt Block
- Weathervane Quilt Block
- Wedding Rings Quilt Block
- Whirlwind Quilt Block
- Wishing Ring Quilt Block
- Wonky Stars Quilt Block
- Wyoming Valley Quilt Block
- X Plus Quilt Block
- Y-Block Quilt Block Unit
- Show all articles (186) Collapse Articles
-

